
To Find Attachments in Outlook
- Open Outlook.
- Navigate to the folder where you want to search.
- Use the search bar at the top to enter the file name or extension.
- Press Enter or click the magnifying glass icon to search.
- Outlook displays matching results; double-click to open or right-click to save.
OR
- Open Outlook and go to the folder.
- Click “Filter Email” in the top navigation bar.
- Select “Has Attachments“.
- Outlook displays only emails with attachments; click to view or save.
OR
- Open Outlook.
- Click the arrow icon in the search bar.
- Choose “Attachments” and select “Yes“.
- Click “Search” to start the advanced search.
Hi. Welcome back, everyone. Today, we will teach you how to find attachments in Outlook. In today’s digital world, email attachments play a crucial role in sharing important files and information. With the sheer volume of emails we receive, finding specific attachments can sometimes be a challenge. Whether you are using the Outlook desktop app or the web version, knowing how to effectively locate attachments can save you valuable time and effort.
In this article, we will explore step-by-step methods for finding attachments in the Outlook desktop app and the web interface. By mastering these techniques, you’ll be able to quickly pinpoint attachments, access crucial documents, and enhance your productivity. Let’s dive in and discover how to efficiently find attachments in Outlook, regardless of the platform you’re using.
Why do we need to Find Attachments in Outlook?
Attachments are very important in email communication, and sometimes we might miss them. So, learning how to find attachments in Outlook is essential for efficient email management and easy access to important files. Attachments often contain critical documents, images, or other valuable information that we need to retrieve quickly.
By mastering the art of finding attachments in Outlook, you can save time searching through numerous emails and locating specific files with ease. This knowledge empowers you to stay organized, improve productivity, and effectively collaborate with others by having immediate access to the attachments you need.
Whether you’re a professional handling work-related documents or an individual managing personal files, learning how to find attachments in Outlook is a valuable skill that streamlines your workflow and enhances your overall email experience.
How to Find Attachments in Outlook?
Today, I have brought various methods for you to find attachments in Outlook, whether it’s Outlook desktop App or the Web version, we have got you covered. So, let’s see all the methods one by one and learn how to find attachments in Outlook.
Find Attachments in Outlook – Search by File Name or Extension
In this section, I will show you how to find attachments in Outlook by using the search function, the search function in Outlook is very powerful and we can search out for relevant keywords to find the desired attachments, the search bar is located at the top of the Outlook desktop app, and for a better search, you should open the folder first where you want to search for an attachment, so let’s see how we can do that.
Step 1
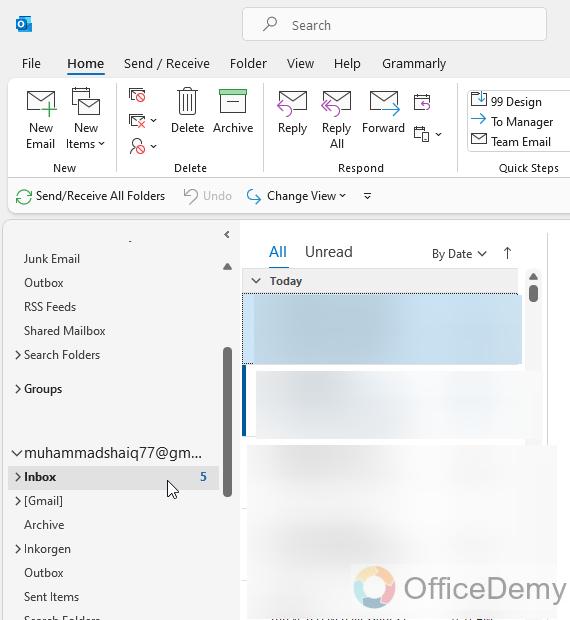
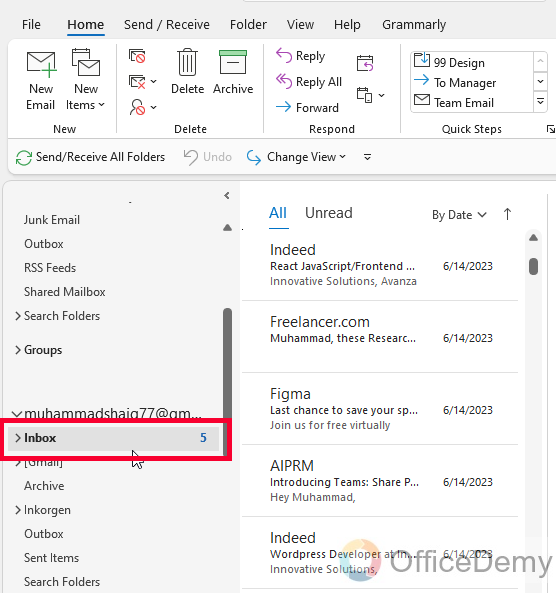
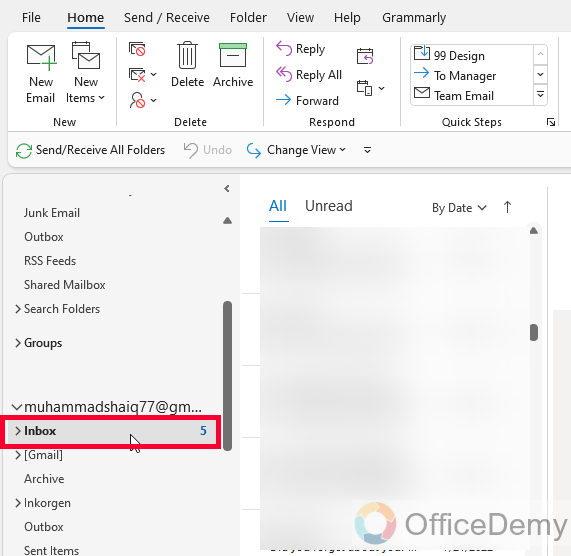
Open Outlook and go to the folder or mailbox where you want to search for attachments.
Step 2
In the search bar at the top, enter the file name or extension of the attachment you’re looking for.
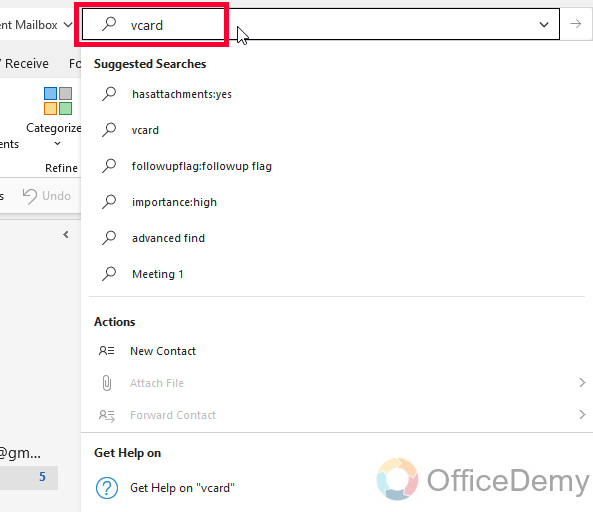
Step 3
Press Enter or click on the magnifying glass icon to start the search.

Step 4
Outlook will display the search results that match your file name or extension criteria.
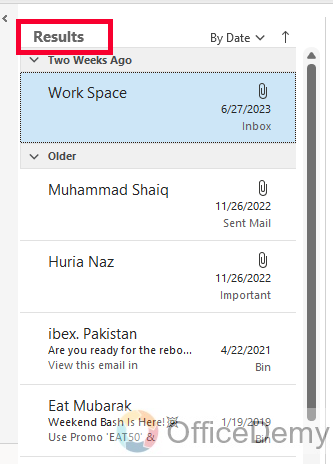
Step 5
Look through the search results to find the desired attachments.
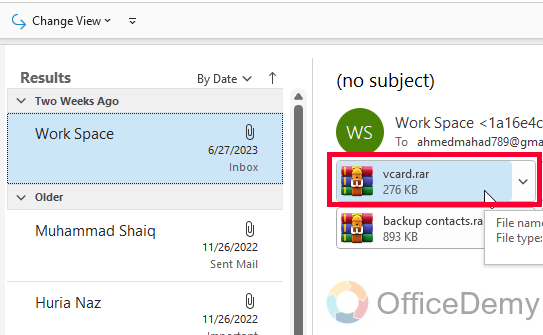
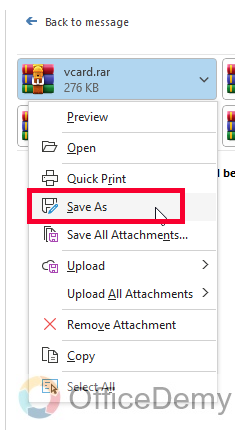
Step 6
Double-click on an attachment to open and view it.
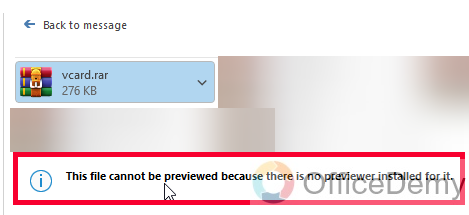
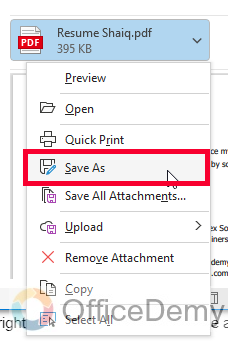
Step 7
If the file can’t be opened, then right-click on it, and click on the “Save as” button to download it.
This is how to find attachments in Outlook desktop app using the Search function.
Find Attachments in Outlook – Filter by Attachment Type
This is another handy method to find all the attachments in Outlook. In this method, I will show you how to find attachments in Outlook desktop app by using the filter function, and we will perform a filter by the attachment type. This method does not target a specific attachment, but it gives you a list of all the emails in your folder that contain some attachments. So, let’s get started with this method.
Step 1
Open Outlook and go to the folder or mailbox where you want to filter attachments.
Step 2
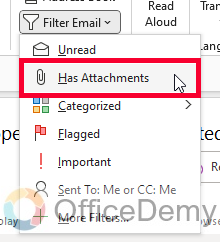
In the top navigation bar, click on the “Filter Email” dropdown button
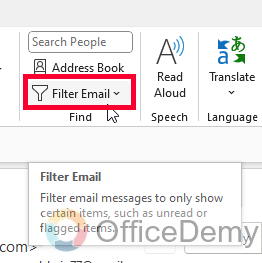
Sep 3
From the dropdown menu, select the “Has Attachments” option to filter emails with attachments.
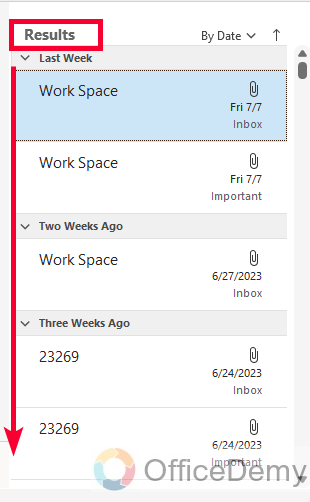
Step 4
Outlook will filter the emails and display only those with attachments in the selected folder or mailbox.
Step 5
Click on an email to view its attachments.
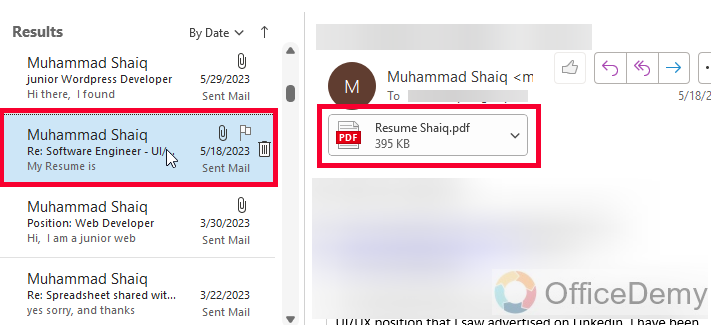
Step 6
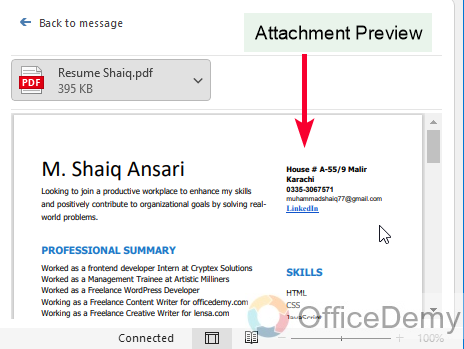
Double-click on an attachment to open and view it
Step 7
If you want to download the attachment, right-click on it and click the “Save as” button.
So, this was another common way to find attachments in Outlook desktop app.
Find Attachments in Outlook – Advanced Search by Attachment
In this method, we will learn how to find attachments in Outlook using the advanced search feature for attachments. This is a very targeted search, and this way we can find a specific attachment from a cluttered mailbox. So, let’s get started with this method.
Step 1
Open Outlook and go to the folder or mailbox where you want to perform the advanced search.
Step 2
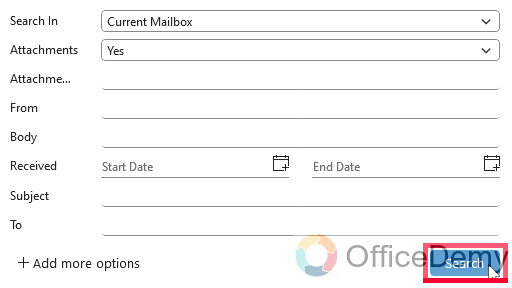
In the search bar at the top, click on the small arrow icon to the right.
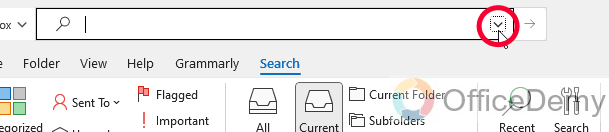
Step 3
A drop-down menu will appear. Click on the “Attachments” option.
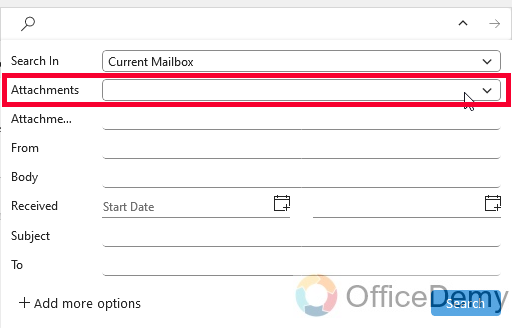
Step 4
Select Yes from the dropdown.

Step 5
Click on the “Search” button to start the advanced search.
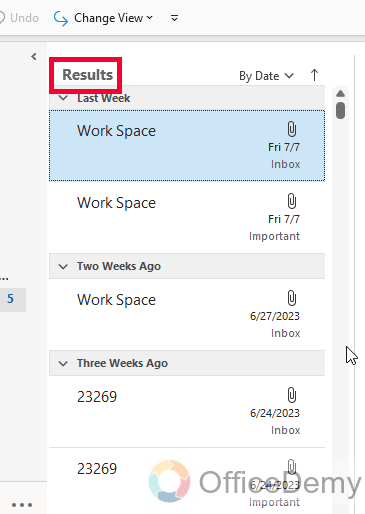
Step 6
Outlook will display the search results that match your specified attachment criteria.
Look through the search results to find the desired attachments.
That’s all about how to find attachments in Outlook desktop app using three useful methods.
Find Attachments in Outlook Web – Using Filter
In this method, I will show you how to find attachments in Outlook Web using the Filter method. The filter in Outlook Web works pretty much identically to the Outlook desktop app, so let’s see how we can use it to find attachments in Outlook Web.
Step 1
Open the Outlook web from any browser and log in to your account.
From the main window, select your preferred folder to find attachments.
Step 2
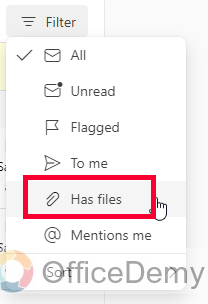
On the top of your folder, you can see a Filter dropdown button, click on it.
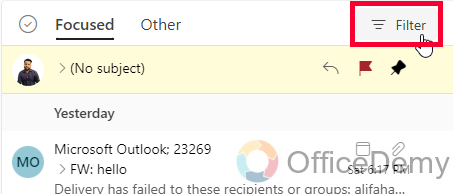
Step 3
Select the option “Has files” from the list, it means the same as “Has attachments”
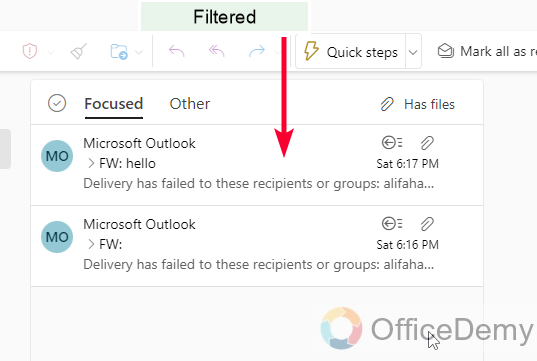
Step 4
As you click on it, a filter will be applied to your folder, and you will get the only emails that have attachments.
Find Attachments in Outlook Web – Using Advanced Search
In this section, I will show you another way to find attachments in Outlook Web using the advanced search feature. This is also a similar method to the Outlook app’s method. Let’s see how it works.
Step 1
Go to the top search bar and click on the small icon at the right bottom of it.
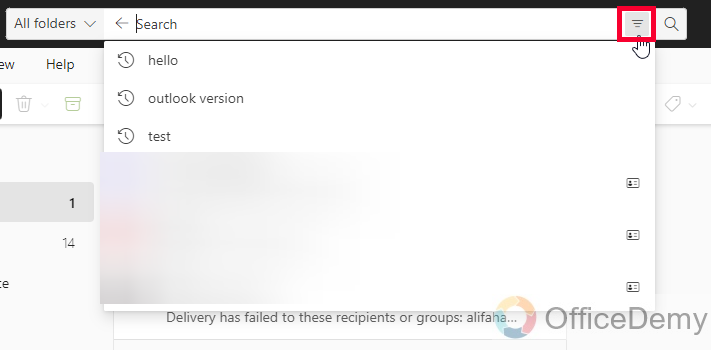
Step 2
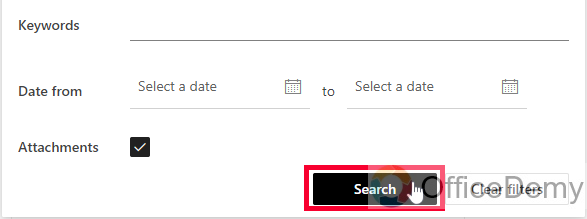
You will see various options, check on the bottom checkbox “Attachments”
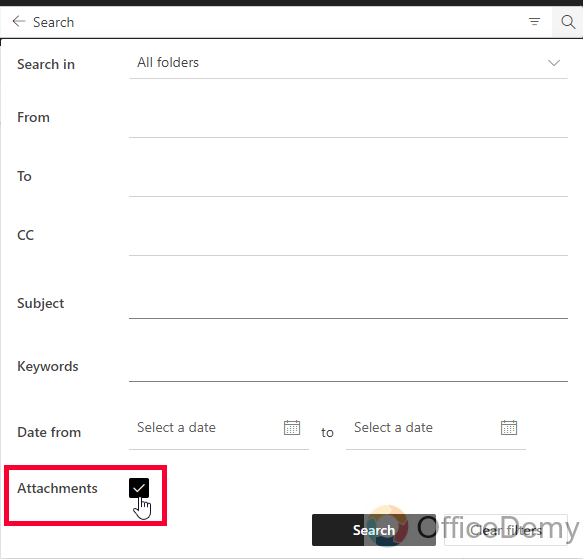
Note: You can use all other attributes too if you want a more customized search.
Step 3
Click on the “Search” button, and your search query will be started, and your emails will be filtered.
Frequently Asked Questions
How can I quickly find an attachment in Outlook Web?
To quickly find an attachment in Outlook Web, use the search bar at the top and enter the file name or extension. Outlook Web will display search results matching your criteria, allowing you to locate the desired attachment more efficiently.
Can I filter emails to show only those with attachments in Outlook Web?
Yes, in Outlook Web and App, you can use the filter option to display only emails that have attachments. Simply click on the “Filter” button in the top navigation bar and select the “Has Attachments” option. This will filter and show only emails with attachments in the selected folder or mailbox.
Conclusion
That’s all about how to find attachments in Outlook Web. I tried to cover all the possible methods to find attachments in the Outlook desktop app and web versions. I hope you find this guide useful and helpful. Thanks a lot for reading this article. Keep learning Microsoft 365 and Google Workspace with Office Demy.


