
To Group Images in Google Docs
- Go to “Insert” > Select “Drawing“.
- Click the image icon in the drawing window
- After uploading the images, select them all.
- Click “Actions” in the top-left corner.
- Choose “Group” > Click “Save and Close” to finish.
Hi. Today, we are going to learn how to group images in Google Docs. We are now being able to use Google Docs as a complete image editing and template creation tool. As time is passing, an update is coming day by day in Google applications which increases the counting of features built-in in all applications. This is the reason why it’s important to be aware of what Google Docs can offer, as it helps you finish your work more conveniently. So, if you are dealing with the images in Google Docs one by one individually then you are wasting your time. Read the following article on how to group images in Google Docs and save your time and make your work more efficient.
Images are a good tool to use in a document. It helps to represent a better picture of your document by virtual means. There can be two ways in which you want to add images, whether you want to add images individually or sometimes in the form of a group of images. But if you like to go with the first option which is adding individual images then you must know you have to edit all of them one by one. It will take time to edit its size, position, style, etc. However, if you add images as a group, it will allow you to move, resize and apply other modifications in one go to best fit into your document.
Therefore, we have come up with this article that will help you to learn how to group images in Google Docs. Unfortunately, Google Docs does not provide an official method to group images as Microsoft Word does. But don’t worry, we will show you some magic tricks that will do your work smoothly using Google Docs. In this guide, we will take you through each step to make its procedure clear and easy to understand for you. So, carry on reading this article till the end and follow the steps properly to learn how to group images in Google Docs.
Importance of doing Group Images in Google Docs
Images are an effective way to strengthen your document and are used to make the document more interesting and easier to understand for the audience. Adding images as a group will take less space and it becomes easy to control. Note that if you need you can still make edits to the individual images, add, or delete images, and rearrange them. When you are done you can drag that group to any spot, rather than moving images one by one. It is useful when you have to use multiple images simultaneously, such as to describe a process or to show the difference between two images, etc.
It is painful to say that this function would be somehow impossible to access with your mobile phones so make sure you are using Google Docs on your personal computers to combine images in a group.
So, if you are ready to learn the way to keep images together, we are here to teach you how to group images in Google Docs. This article deals with a step-by-step procedure of grouping images that will help you to achieve your milestones. Let’s quickly move toward the next section where you can look at these steps.
How to Group Images in Google Docs?
Google Docs is an online web-based program that enables you to edit and format your documents right in the web browser and work with other people. You can also edit your images in Google Docs. If we talk about group images, it is not possible to directly group images in Google Docs, but you can group images with the help of the drawing tool of Google Docs. The drawing tool provides more functionality for the images through which you can group them together in one piece, but this method is only possible when you are using desktop Google Docs. In mobile apps, grouped images are almost impossible. Let’s see how we can group images in Google Docs. The following steps will lead you to how to group images in Google Docs.
Step 1
Take a new file in Google Docs first.
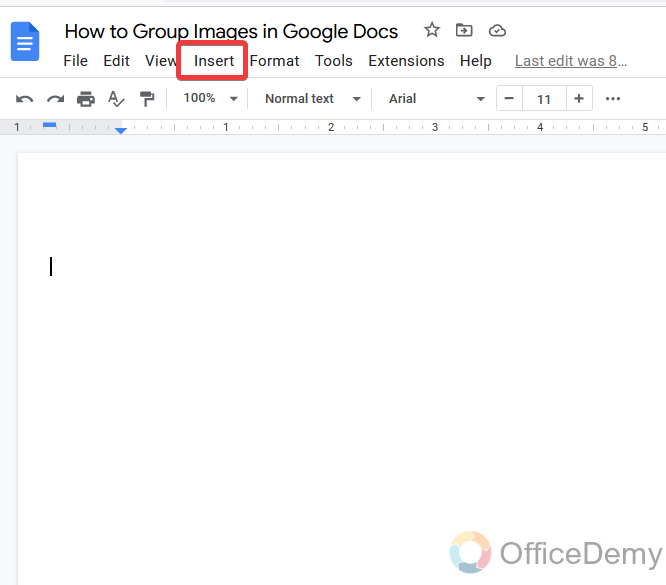
Step 2
Then go into the “Insert” tab of the menu bar of Google Docs.
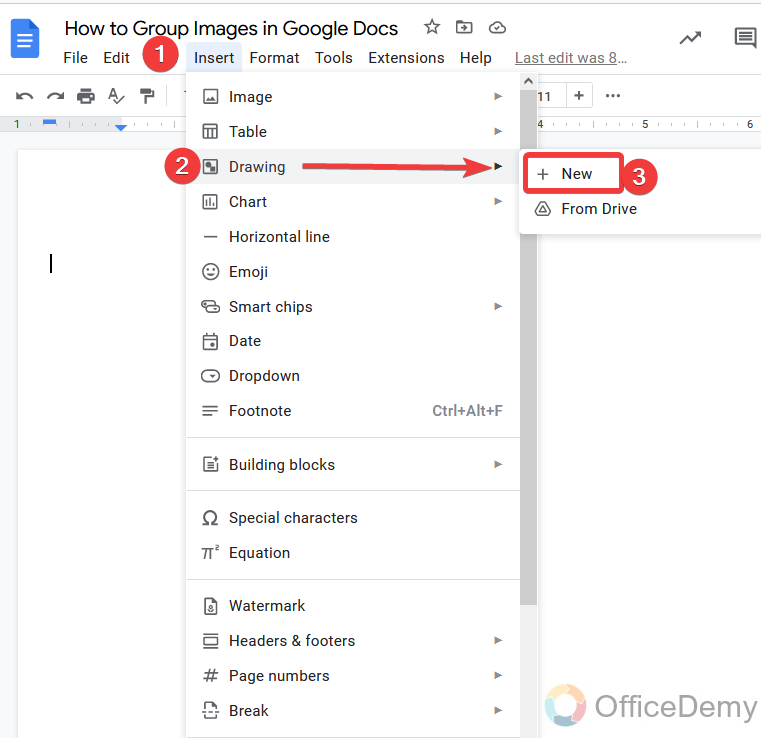
Step 3
Here a drop-down menu will open as click on the “Insert” tab. You will find here the “Drawing” option, click on it to expand more and take a new file.
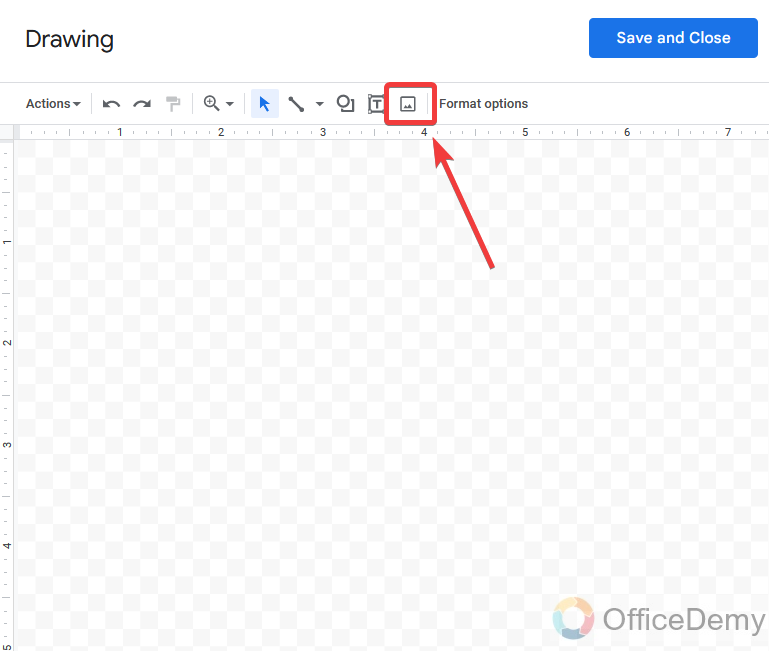
Step 4
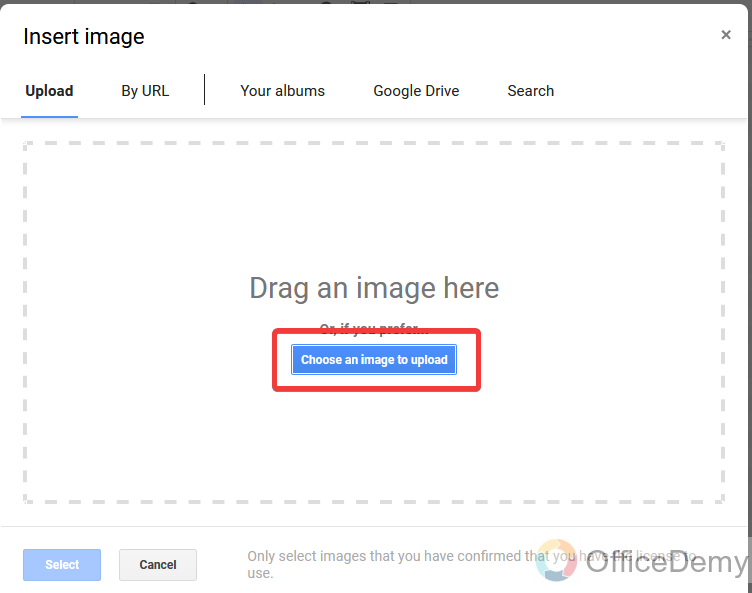
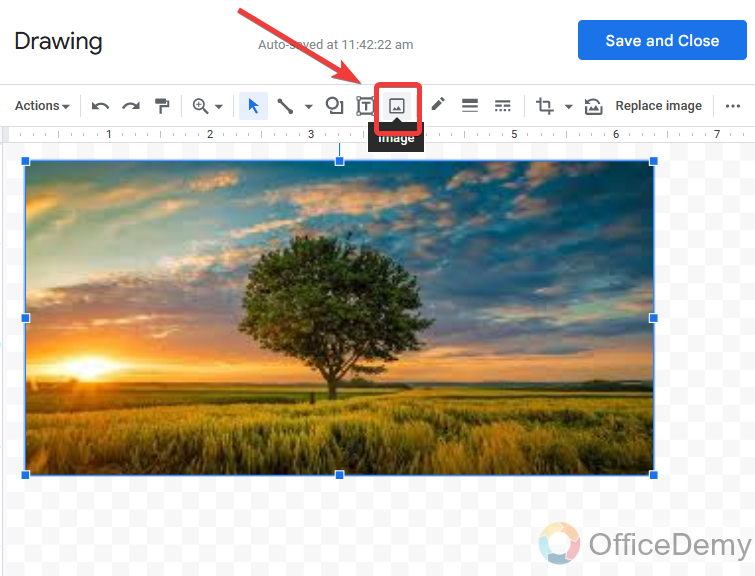
As you click on a new button, a new separate pop-up window will appear. Upload an image here by clicking on the image icon as shown in the following picture.
Step 5
When you click on this image icon it will promptly ask you to upload an image to browse it from your computer.
Step 6
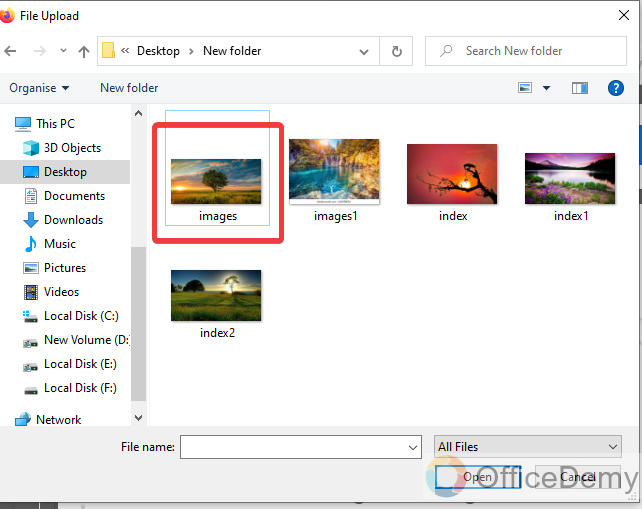
When you click on the “Upload button” it will again prompt you to your computer to select an image to upload. So, browse your image and select it.
Step 7
Once you have selected the image which you want to upload. Then just click on the “Ok” button.

Step 8
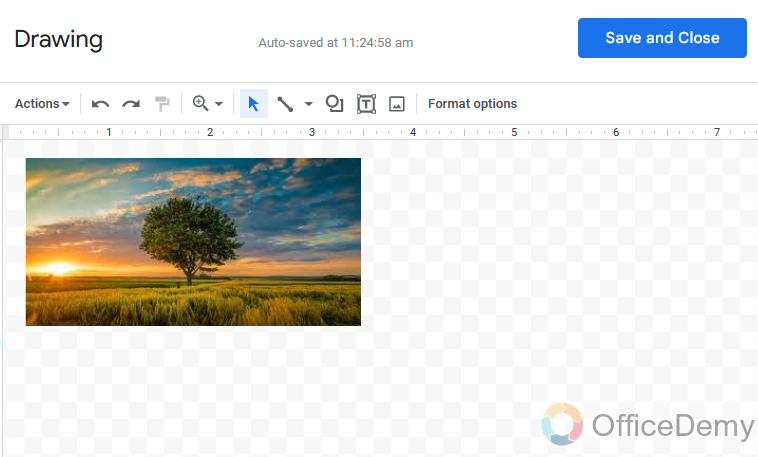
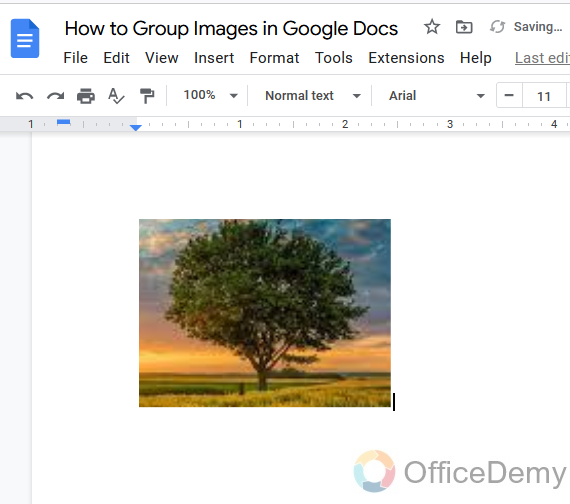
As you can see in the following picture, an image has been inserted.
Step 9
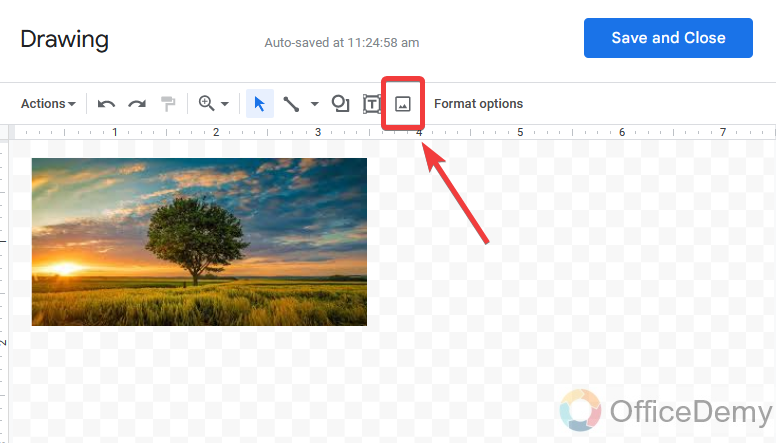
As we need to group images, we will need more images. Let’s upload more images with the same icon as shown below.
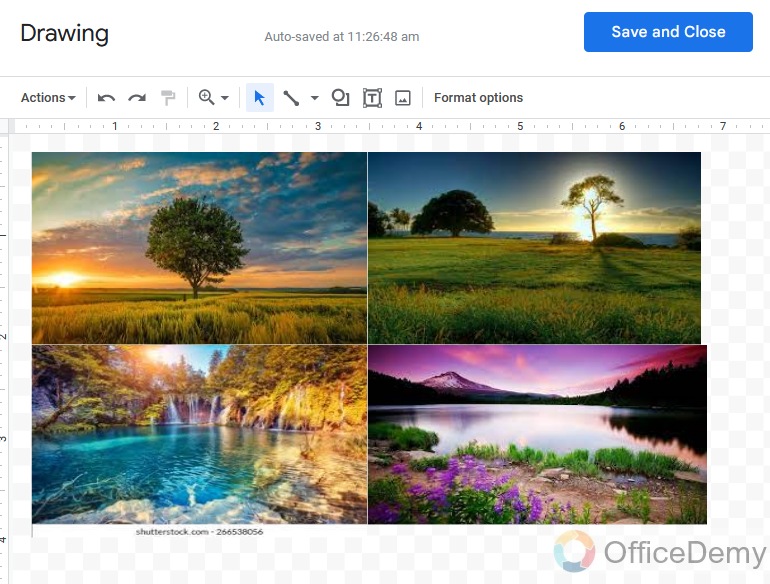
Step 10
Now here we have about four pictures which I have set in a square pattern.
Step 11
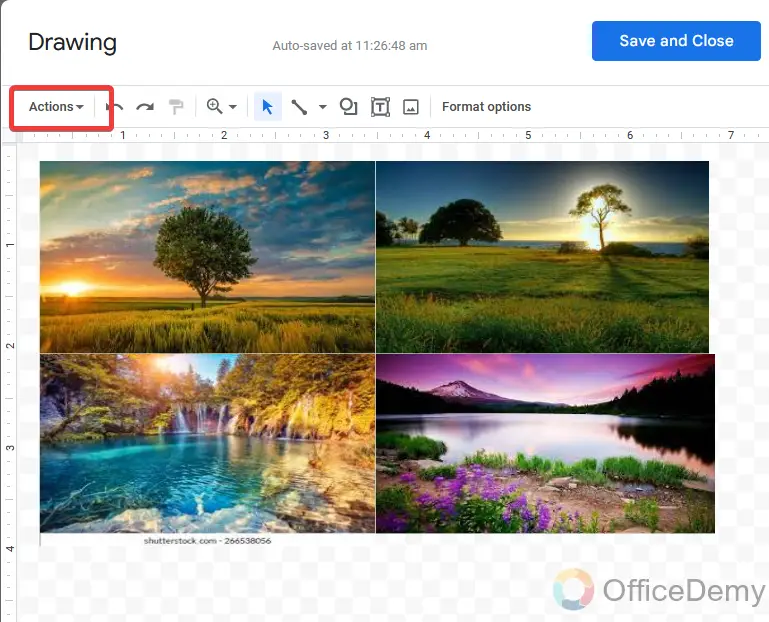
To make a group of images, first select all the images together.

Step 12
Then click on the option at the left top corner of the drawing window namely “Actions“.
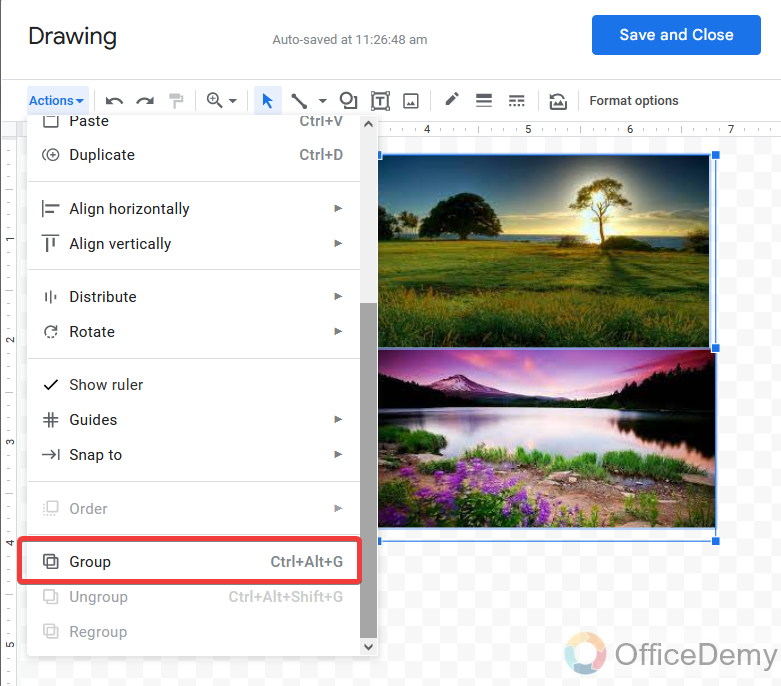
Step 13
It will further drag down where you will find the “Group” option. Click on it to group images.
Step 14
You are almost done your images are grouped now just click on the “Save and Close” button.

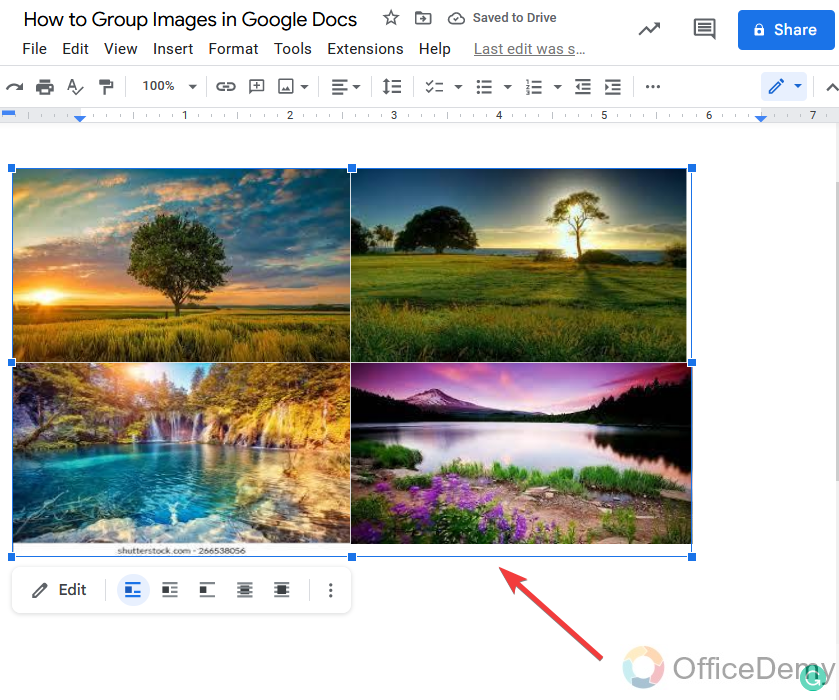
Step 15
As you can see from the result below in the following picture, all images are grouped in one piece which can be moved simultaneously, rotated, and flip, etc.
Frequently Asked Questions
What is the advantage of group images in Google Docs?
A: While working with the document dealing with multiple images can lack your workflow while moving, flipping, or editing with them. We grouped images so that they can be rotated, flipped, moved, or could be resized simultaneously. Grouping lets one rotate, flip, move, or resize all shapes or objects at the same time as though they were a single shape or object. Instead of displaying a collection of different pictures rather than just a single image is a great way to capture all the feelings or special events surrounding an important time in your life.
Is It Possible to Add Captions to Grouped Images in Google Docs?
Yes, it is definitely possible to add captions to grouped images in Google Docs. By using the Insert option, you can easily incorporate images into your document. Once inserted, right-click on the image and select the Add caption function. This allows you to enhance your document’s visual appeal while providing contextual information. Try adding captions to google doc images to make them more informative and engaging.
Is it possible to make a collage using the grouping feature in Google Docs?
Yes, it is possible to make visually appealing collages using the grouping feature in Google Docs. By organizing and arranging images, shapes, and text boxes, creating collages in google docs becomes seamless. This feature allows users to easily manipulate elements within the document, enabling the creation of customized collages with just a few clicks.
How to crop images in Google Docs?
A: Many people directly upload pictures in Google Docs and then will stick while cropping images in Google Docs. You cannot crop images in Google Docs directly. You will need to use the drawing tool of Google Docs. If you want to crop any image, First open the drawing tool, upload an image then crop it with the crop tool. Let me show you with the help of the following examples.
Step 1
First, we will go into the “Insert” tab of the menu bar where we find the “Drawing” option and take a new drawing.

Step 2
A pop-up window will open, insert the image which you want to crop from the following option.
Step 3
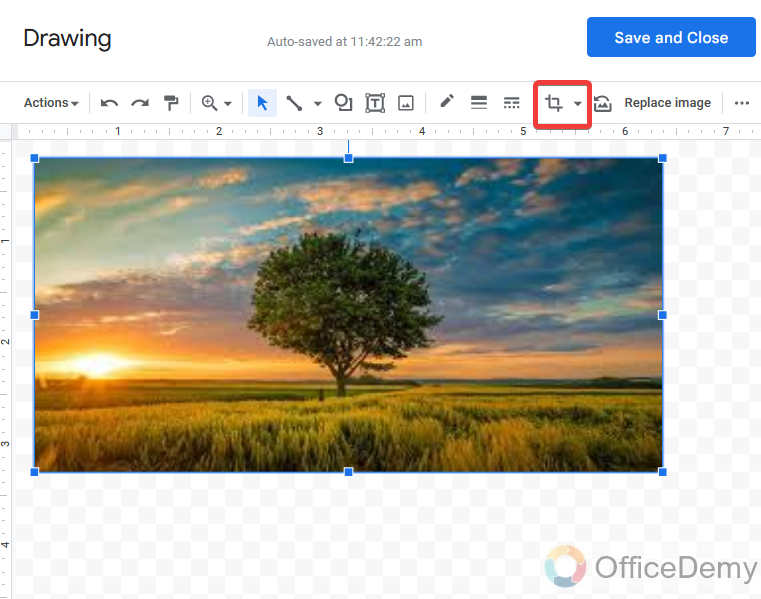
In the toolbar of the drawing window, a crop tool is present as highlighted below in the picture. Click on it.
Step 4
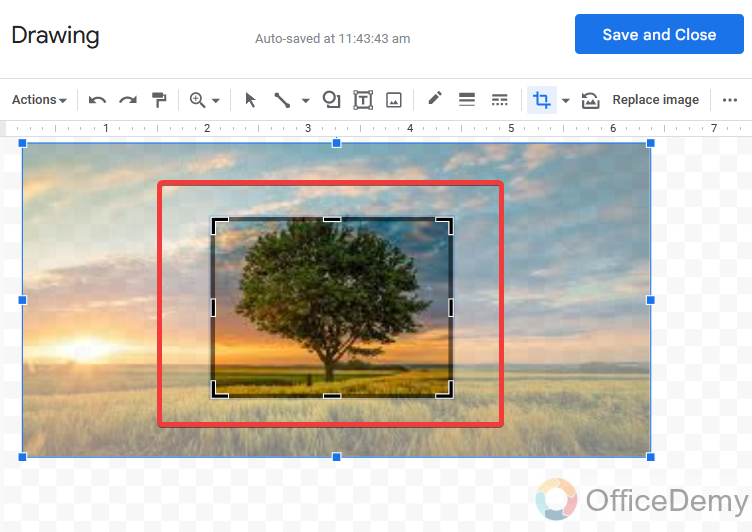
Another selection along the edges of the image will appear, crop your image by dragging it as you need.
Step 5
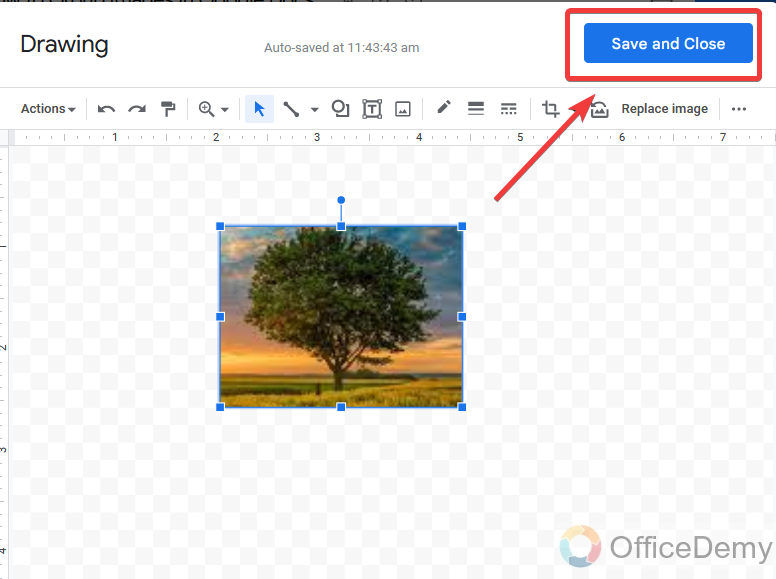
You are done now; the image has been cropped just press the save and continue button to insert it into your document.
Step 6
In this way, you can crop images in Google Docs.
How to layer images in Google Docs?
A: You can also use the Wrap Text option in Google Docs to layer images. You might have seen that after inserting the images in Google Docs, you cannot move them. This is because the Wrap Text option is not enabled by default. Select the image and click on the three vertical dots. Now, click “All image options”. This will open the image options on the right pane. Here, you must expand the “Text Wrapping” section and select the “Wrap Text” option. Now, move the images by using either your keyboard arrow keys or your mouse and place them one over the other. This is all about layering the images in Google Docs.
What is the difference between collage and group images?
A: A collage is a picture that is made of different pieces of pictures to describe a story, convey a message, or any other idea. Collage is the method of making pictures by sticking pieces of colored paper and cloth onto paper. While Grouping pictures lets you rotate, flip, resize, or arrange them together, as though they were a single picture. Although both are almost the same in terms. The purpose of both is almost the same.
Conclusion
So that’s from how to group images in Google Docs. When you use images in your document, you might want to keep them together. This allows you to move them as a group and resize that group to fit your document better. Above article on how to group images in Google Docs can be a way for you. Hope it will help you in grouping images in Google Docs. To learn more related solutions and guides keep visiting Office Demy. Thanks for reading.


