
To Make a Cover Page in Google Docs
- Access Page Setup.
- Adjust page margins, orientation, and background color.
- Create a Page Border.
- Add a Title.
- Insert an Image.
- Include the Author’s Name.
- Add Additional Information.
Hi, today we will learn how to make a cover page in Google Docs. Sometimes the cover page is a requirement of a research document or any educational paper to make it more informative and valuable. It is the first and initial page of a document. It contains information about the theme of a document and its author. It gives a professional look to a document. Google Docs provides you with a platform where you can customize a cover page for your document. There are two types of formats or standards to write a cover page i.e., APA format and MLA format. APA (American Psychological Association) is the most common and widely used format whereas MLA (Modern Language Association) is specifically used at the request of a supervisor or instructor.
In this article, you are going to learn how to make a cover page in Google Docs. It is fairly simple to make a cover page in Google Docs. You just need to be a little careful while making a cover page to avoid mistakes because it is representing you and your work. There are numerous templates available that you can use to format your cover page and if you want you can start from scratch. Keep on reading this article till the end and it will guide you on how to make a cover page in Google Docs.
Importance of making a Cover Page in Google Docs
We should learn how to make a cover page because a document containing a cover page is of much importance. The cover page is really important while writing research papers, resumes, and other educational or business documents. It is an official way to represent any document. It also represents one’s dedication and hard work toward his/her work. It is a great way to make your document stand out among others and helps you to attract readers more readily.
The cover page is the first page of the article, booklet, brochure, or any book, it represents the origin of the file and attracts the reader most as a book is known by its cover as well. Everybody buys a book by its cover. Similarly, in other criteria, a cover page plays an administrative role. I hope it is clear to you how a cover page can make your document more significant and impactful to the readers. Let’s learn how to make a cover page in Google Docs and go the extra mile to add value to our document. We have a step-by-step procedure in the next section which will help you to make a cover page in Google Docs. Now take a look at these steps to achieve your milestone.
How to Make a Cover Page in Google
Making a cover page in Google Docs is not quite difficult. The drawing tool of Google Docs allows users to create and edit flowcharts, organizational charts, website wireframes, mind maps, concept maps, and other types of diagrams online while collaborating with other users in real-time. Similarly, you can also make a beautiful cover page for your manuscript in a simple way by following the below steps. In this section I will tell you how you can utilize the text shapes table to make a beautiful drawing then you can make anything in Google Docs so let’s start.
Step 1
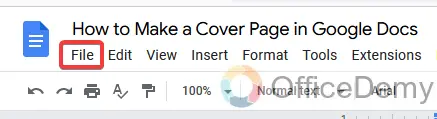
Go into the “File” tab in the menu bar.
Step 2
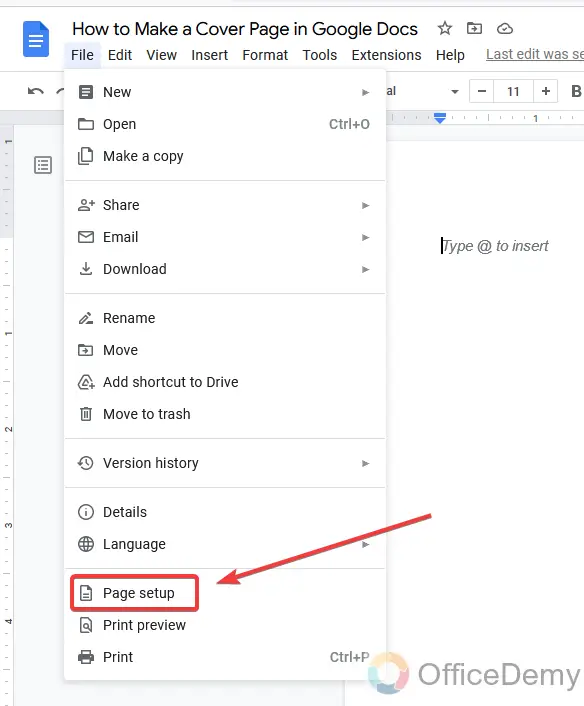
You will find the “Page setup” option in the drop-down menu. Click it to open it.
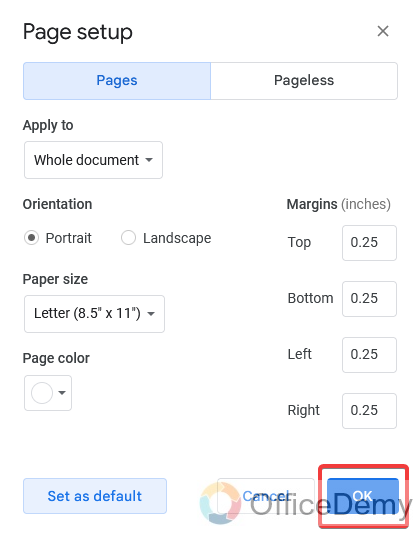
Step 3
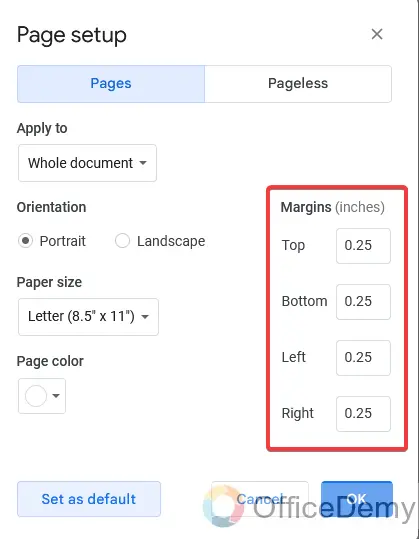
When you click on the page setup option a pop-up window will appear in front of you. Where you will find the page margins, set the margins with a narrow size as I set the below with 0.25 inches with equal sides.
Step 4
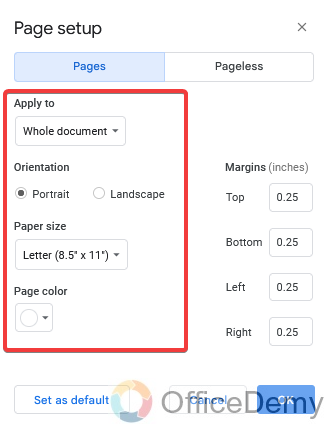
In this page setup window, you will see some more page setup options like page orientation where you change the orientation from landscape to portrait and portrait to landscape, you can also select the paper size and set the page background color if need background page color instead of the default white color.
Step 5
Once you set up the page options, then just click on the “OK” button to apply.
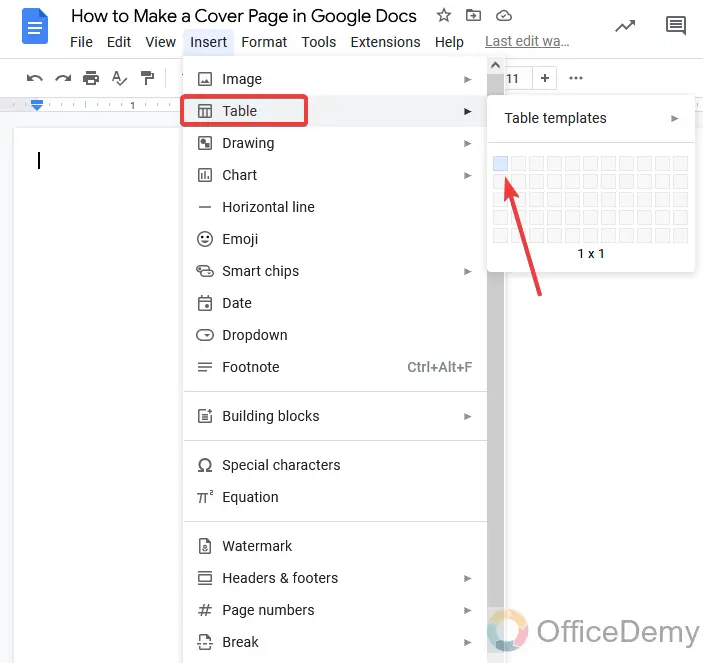
Step 6
Now here, we are inserting a page border with the help of a 1×1 table. To insert a table, go into the Insert tab then the table from the drop-down menu, and select the 1×1 table as shown in the figure.
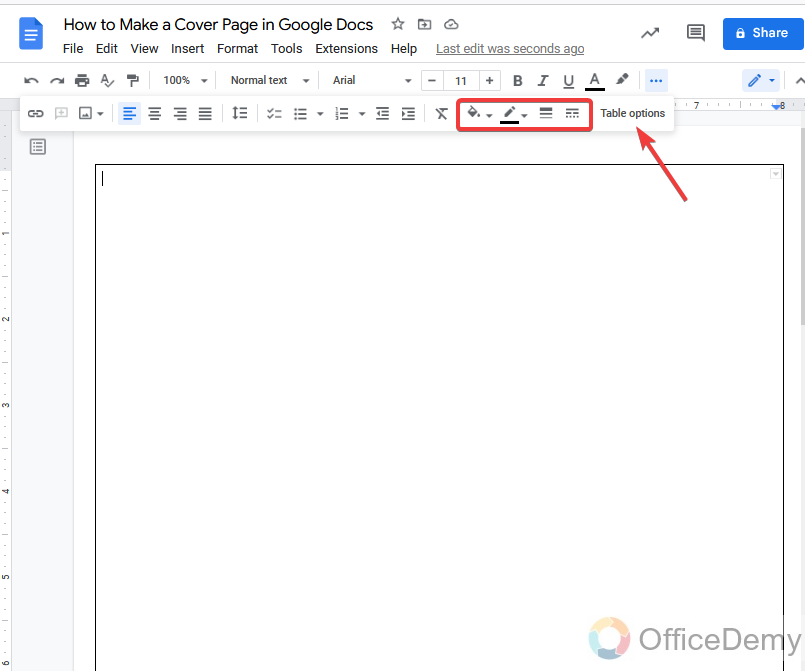
Step 7
Once the table inserts then drag it to expand all over the page to make a page border. Here are some more table options by which you can format your page border design and color as well.
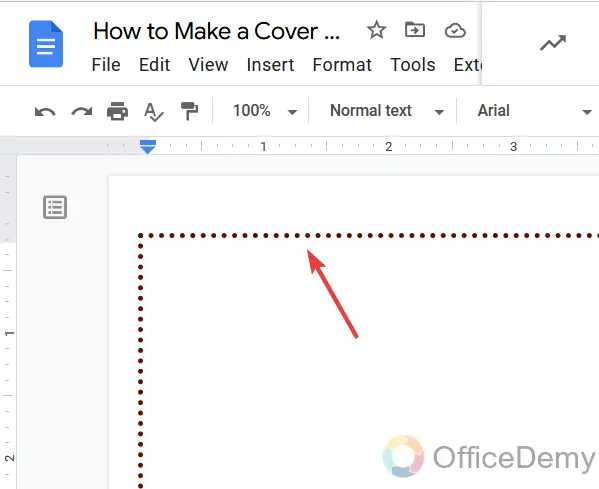
Step 8
As you can see below, I have designed my page border beautifully.
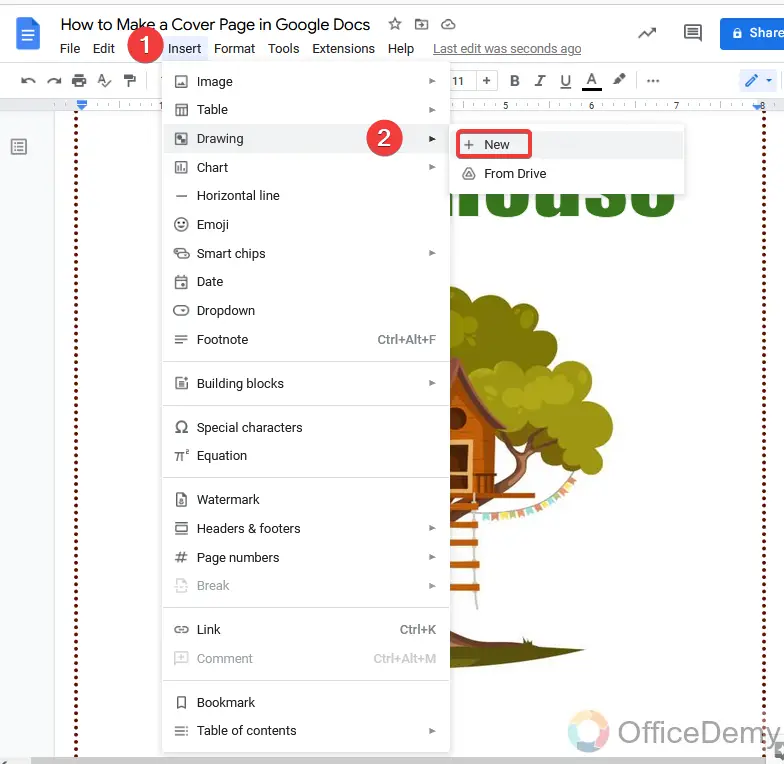
Step 9
Now we are going to write the title of the cover page, here we will use word art to Insert the title. Go into the “Insert” tab and then “Drawing” from the drop-down menu and take a new drawing.
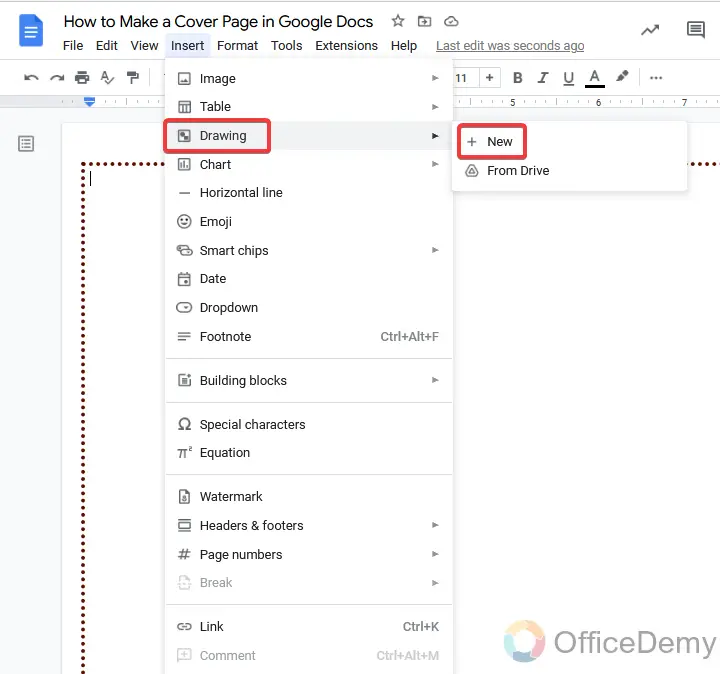
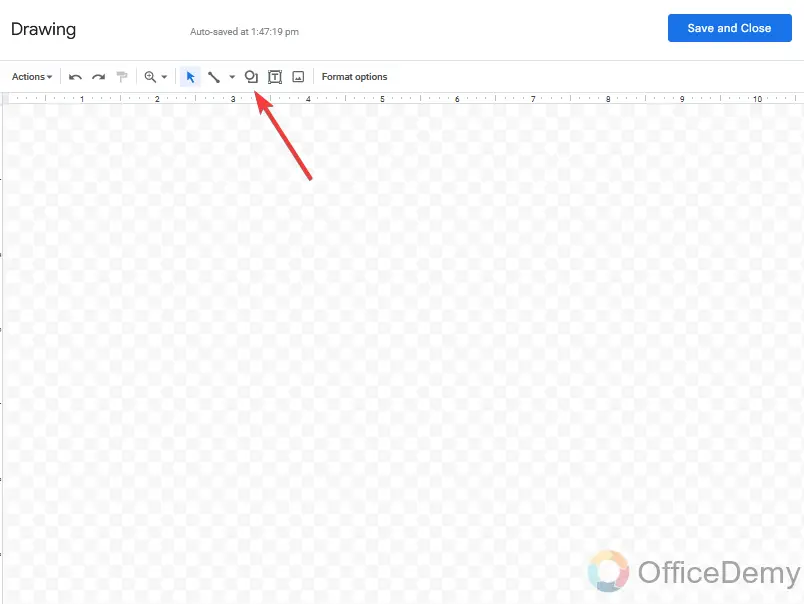
Step 10
The drawing window will open where you will find the “Action” button which includes a word art option in it. Click on it to insert word art.
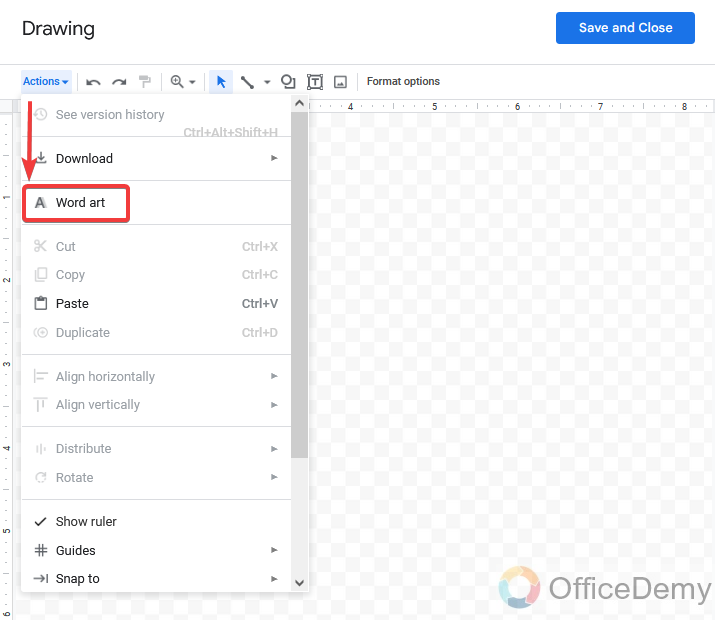
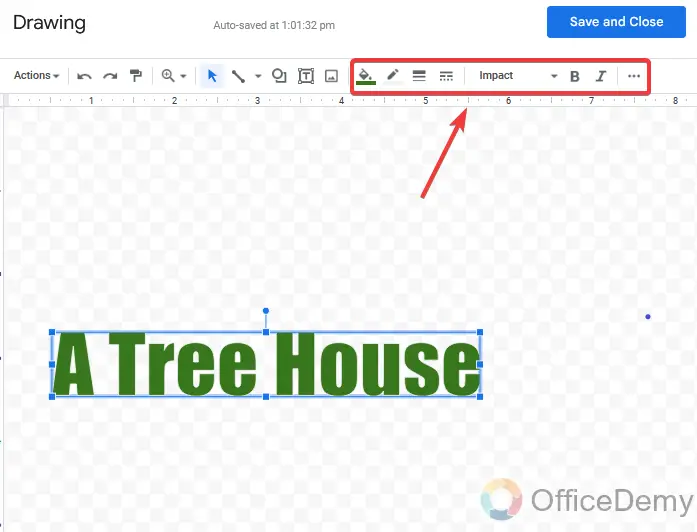
Step 11
While writing the word art, you can also format your word art by the following option. You can the color of text and outline, font style, etc.
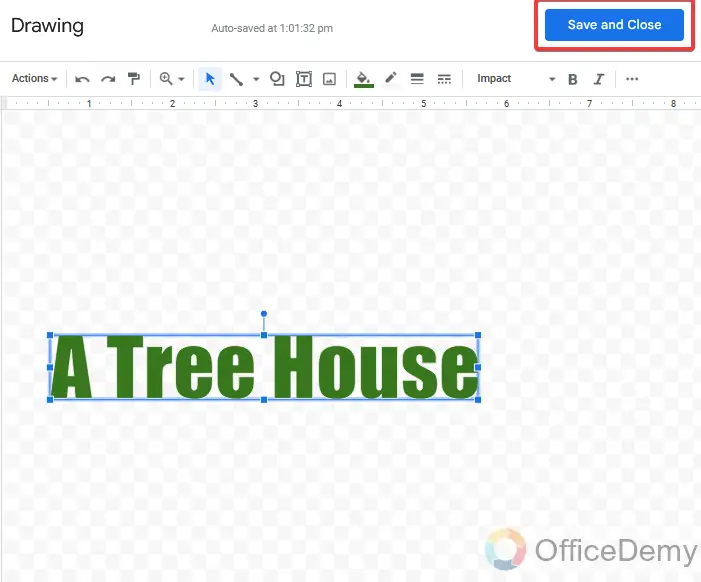
Step 12
Once your word art is completed, click on save and change at the right top of the window.
Step 13
After adding a title, I am now inserting an image here to make our tile page or cover page more attractive. To add images, go to the “Insert” tab and then “Image” and select the “upload from computer” option from the expanded menu.

Step 14
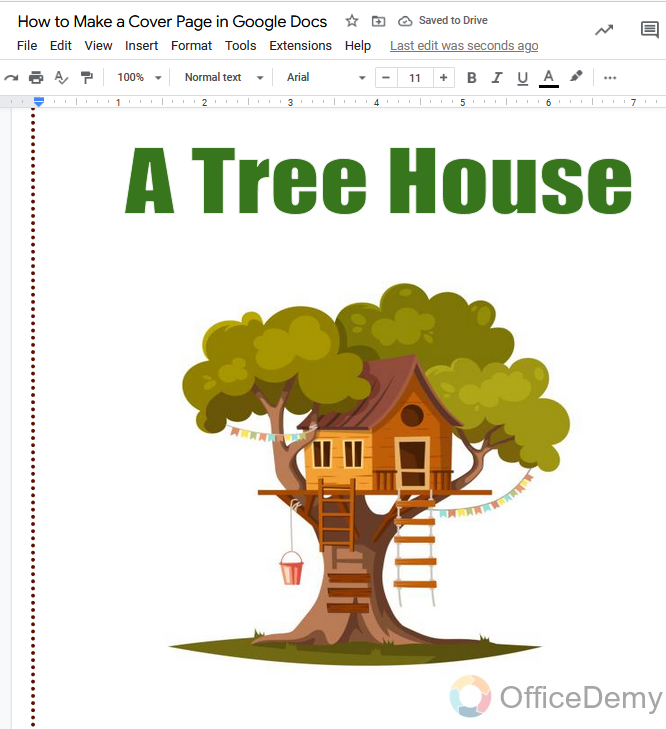
Here you may see the result, Image has been inserted which is giving a fruitful look to a cover page.
Step 15
Now here, I am going to insert a shape with the author’s name to make my cover page more presentative. Again, we will go into the drawing tool window by following the below track.
Step 16
Here you will find the shape icon as shown in the figure, open it and select the shape and draw it.
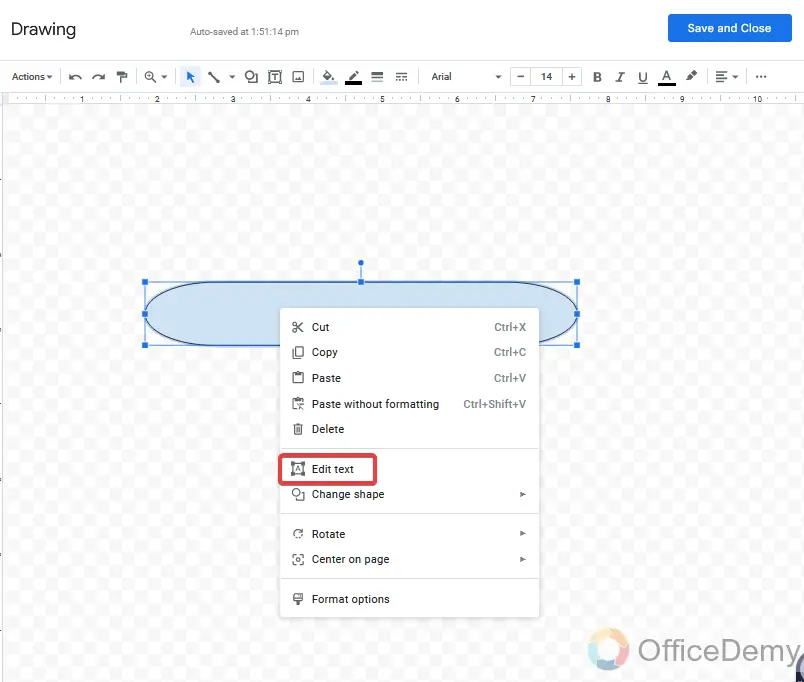
Step 17
As I have made a shape and then right-click on the shape, you will see the “Edit text” option to write in the shape.
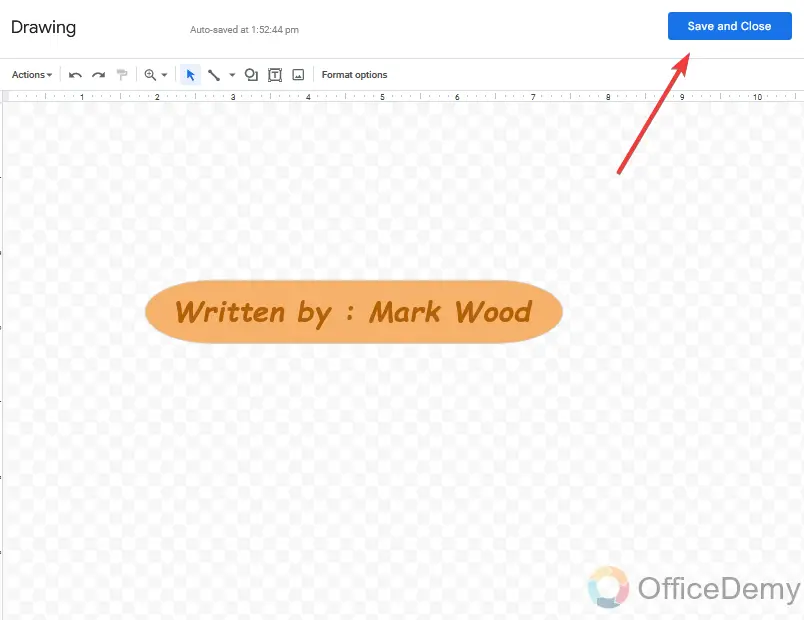
Step 18
Here I have added an author name in the shape and then formatted it with some color text and shape both, now I am pressing the save and changes buttons to do.
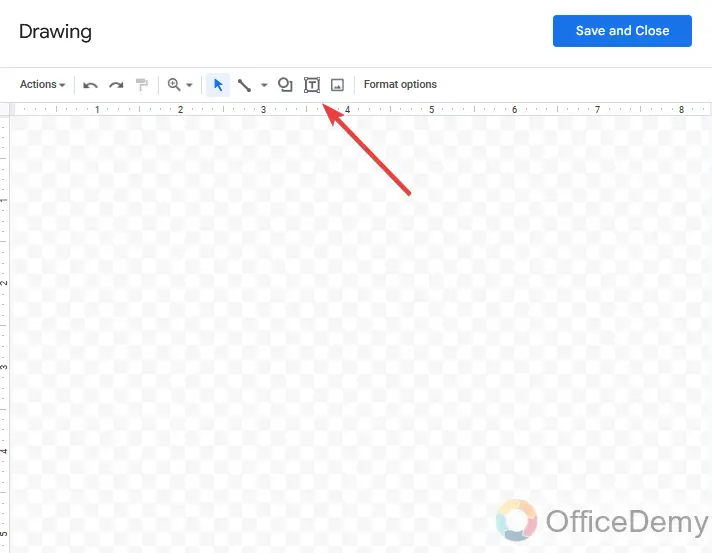
Step 19
One more thing adds here a text box to write some additional information. The text box is also found in the drawing tool as shown below.
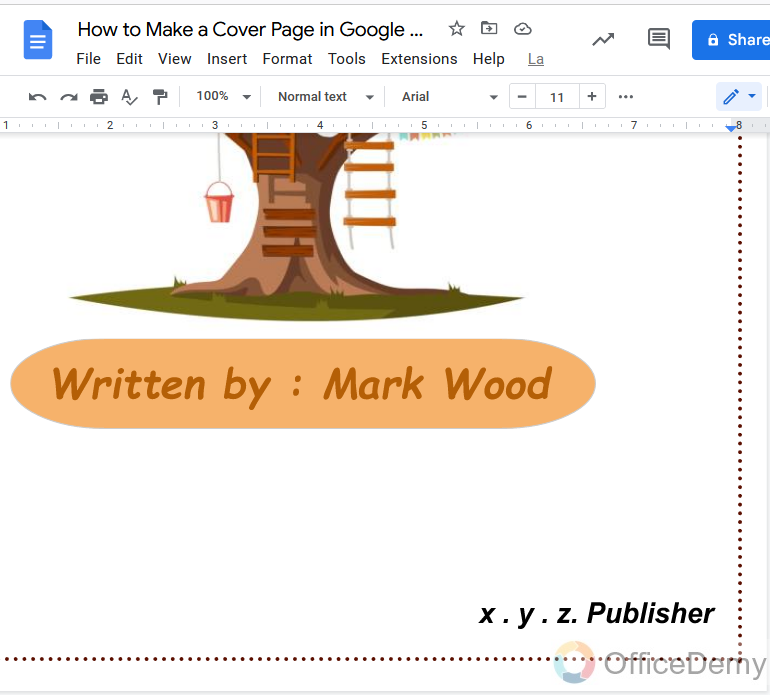
Step 20
You can also add any information and can write any quote with the help of the text box as I have mentioned the publisher.
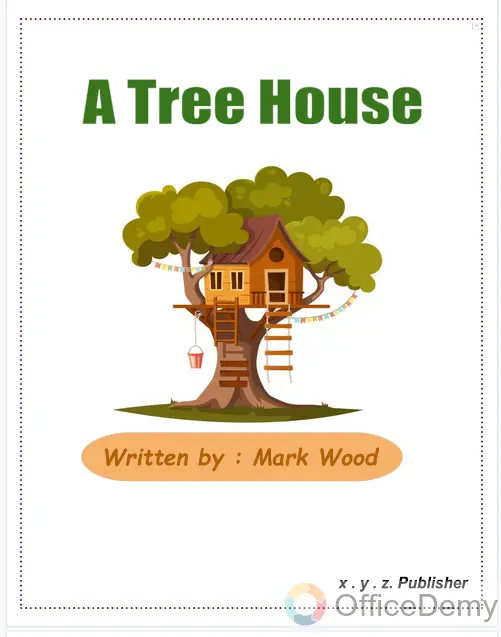
Step 21
The result in front of you is beautiful and simple. This is a simple way I have made a cover page with the help of border, word art, text, and shapes.
Similarly, you can also make a beautiful and attractive cover page by using these things in Google Docs.
Frequently Asked Questions
What is the Best Way to Insert Shapes into a Google Docs Cover Page?
The best way for inserting shapes in google docs cover page is to navigate to the Insert menu and choose Drawing. Utilize the Shape tool to pick from various shapes. Adjust the size and position accordingly. Once satisfied, click Save and Close to add the shape to your cover page.
Q: Why do we need to make a cover page in Google Docs?
A: The cover page provides the reader with the necessary information to judge if the paper is relevant to them before they even click into the study to read the abstract. A good title may provide the reader with useful information about the study before even clicking into it and reading more so they can save time. Most of the users are using Google Docs for writing books and booklets, brochures, etc. The cover page of your manuscript is usually the first introduction readers have to your published work. Therefore, you must select a title that grabs attention, accurately describes the contents of your manuscript and makes people want to read it further. In short, a cover page plays an important role in the publicity of a manuscript, this is why we need to make a beautiful cover page in Google Docs.
Q: Can we make a cover page by Google Docs template gallery?
A: Although, everything you need to get anything done in Google Docs you can do. As Google Docs is providing enough tools to make a cover page, booklet, brochure, pamphlet, cards, etc. But If you are not able to make a cover page with available tools or you do have not the skills to make it then you can use the Google Docs template gallery as well, there are a pre-made sample of different categories you can select according to your document and can make a cover page by just simply changing the entire material. Let me show you,
Step 1
Open Google Docs and go into the template gallery of Google Docs instead of taking a blank file.
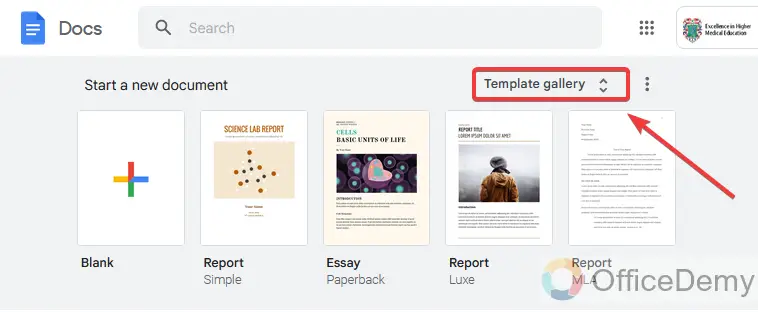
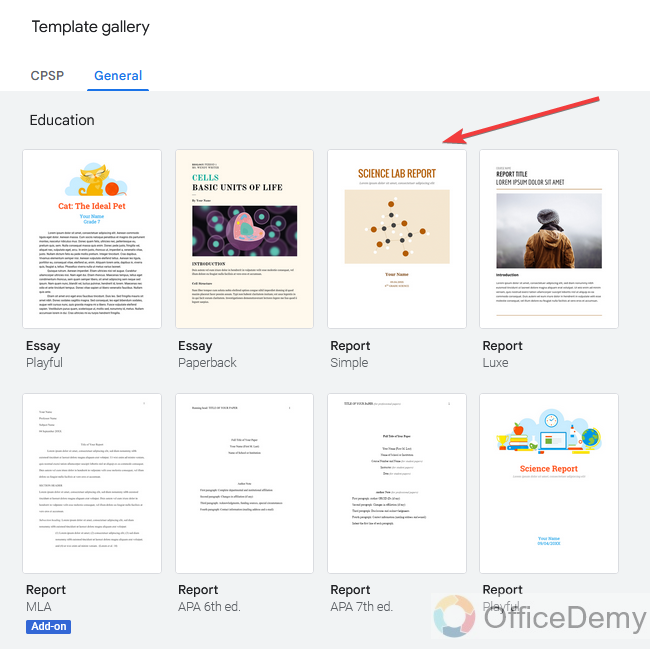
Step 2
Here you can see so many designs and templates related to different categories, you can select any of them you like which relate to your document. Open it with just one click on it.
Step 3
The readymade theme will be open now you just need to change the entire sample material. Here I am changing the text.
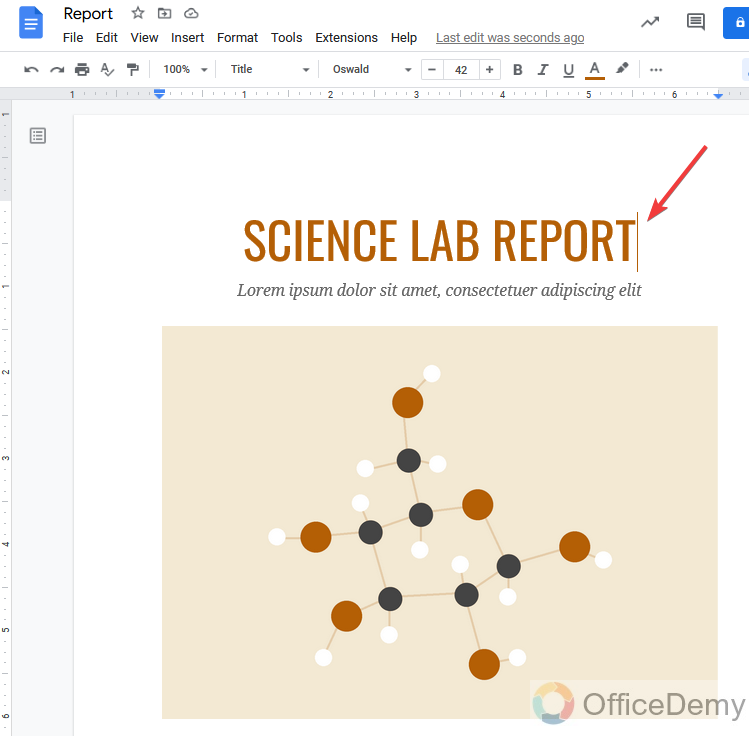
Step 4
You can also replace the sample image by right click on it, you will find the replace image option where you can place your image.

In this, you can use the template gallery of Google Docs for making a cover page in Google Docs.
Q: Can we insert a premade cover page in Google Docs?
A: Yes, you can Insert premade cover page in Google Docs, you can open your document through Google drive and insert it in Google Docs.
Conclusion
Nothing is difficult if you have some essential awareness of creativity and knowledge of using tools even in Google Docs. As you have seen in the above article on how to make a cover page in Google Docs, we simply made a cover page by just using text images and shapes.
Hope you got the logic of this tutorial so that you can also make a beautiful cover page for your manuscript.


