
To Highlight in Microsoft Word
- Select text.
- Go to the “Home” tab.
- Click “Text Highlight Color” and choose a color.
- The Text is highlighted.
OR
- Right-click the selected text.
- Open the Mini Toolbar.
- Click “Text Highlight Color” and pick a color.
- Text gets highlighted.
OR
- Pick a highlight color.
- Click the highlighter tool.
- Cursor becomes a highlighter.
- Select text, and it’s highlighted.
Learn more Methods in the Article below!
Hi. In this article, we will learn how to highlight in Microsoft Word. Microsoft Word is one of the most widely used word-processing software programs in the world. It is an essential tool for students, professionals, and anyone who needs to create and edit documents. One of the many features that make Word so useful is its ability to highlight text. Highlighting can be used to draw attention to important information, to mark passages for further review, or to simply add visual interest to a document.
In this article, we will explore how to highlight in Microsoft Word and provide tips and tricks for getting the most out of this powerful feature. Whether you are a seasoned Word user or just getting started, this guide will help you make the most of your highlighting capabilities.
Importance of using Highlight in Microsoft Word
Well in today’s world, being able to communicate effectively is more important than ever. Microsoft Word has become the go-to tool for creating and editing documents in both personal and professional settings. Knowing how to highlight text in Word is an essential skill that can make your documents stand out and convey your message more clearly.
Highlighting text in Word allows you to emphasize important information, organize your thoughts, and improve readability. With the ability to customize your highlights with different colors and styles, you can create visually appealing documents that are easy to navigate. Whether you’re a student working on a research paper or a professional preparing a presentation, learning how to highlight in Microsoft Word is a valuable skill that will help you communicate your ideas more effectively.
Six Methods to Highlight in Microsoft Word
There are many ways for highlighting in Microsoft Word. We have had the classical highlighter in Word for a very long time, and now in new versions, we also have drawing tools, so in this guide, I will show you some good methods to learn how to highlight in Microsoft Word.
How to Highlight in Microsoft Word – Using Ribbon
In this section, we will learn how to highlight in Microsoft Word using the ribbon. This is the easiest and the most common method every beginner uses. This is a traditional method and can be
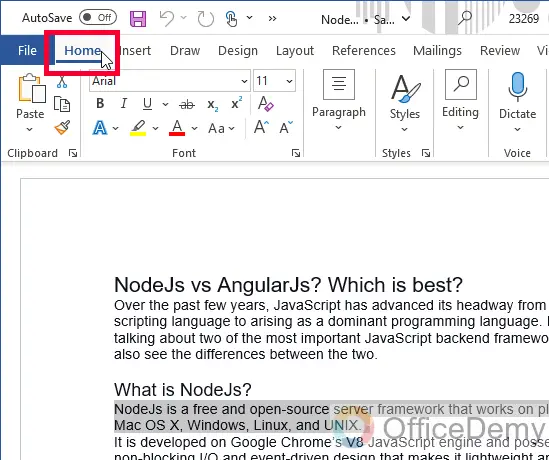
Step 1
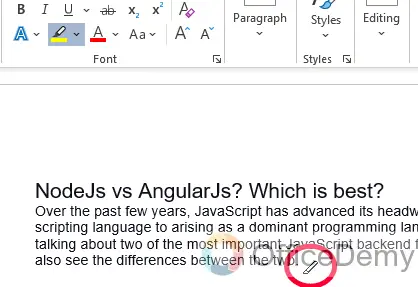
Select the text you want to highlight.

Step 2
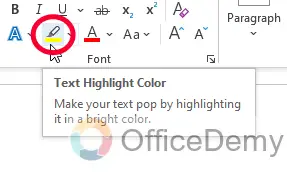
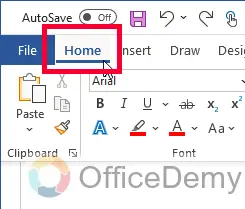
Go to the “Home” tab in the ribbon.
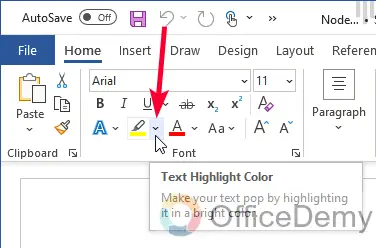
Step 3
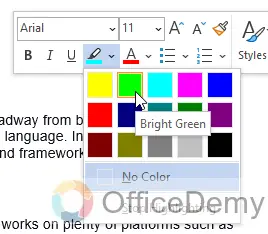
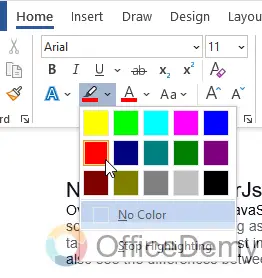
Click on the “Text Highlight Color” dropdown in the “Font” group.
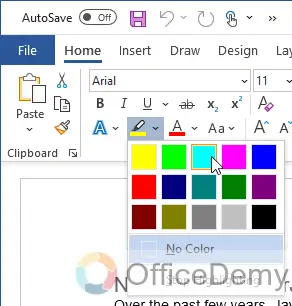
Step 4
Select the color you want to use for highlighting.
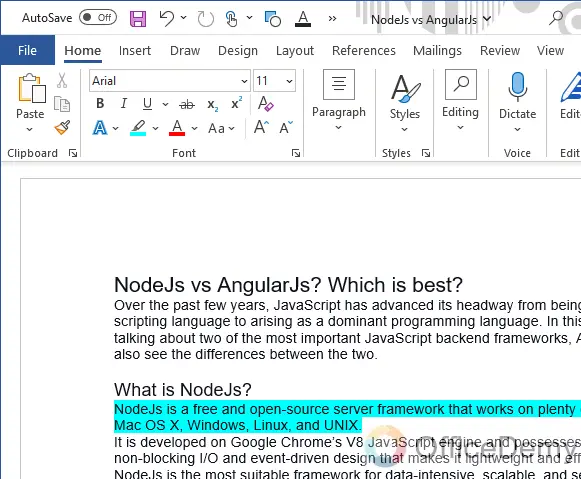
Step 5
Your selected text is highlighted.
How to Highlight in Microsoft Word – Using Mini Toolbar
In this section, we will learn how to highlight in Microsoft Word using the Mini Toolbar. This is another handy feature from Word and is not available in other similar programs like Google Docs, this provides easiness to avoid going to ribbon for the smaller tasks and do them on your cursor position with a little mouse movement. Let’s see how it works.
Step 1
Select the text you want to highlight.

Step 2
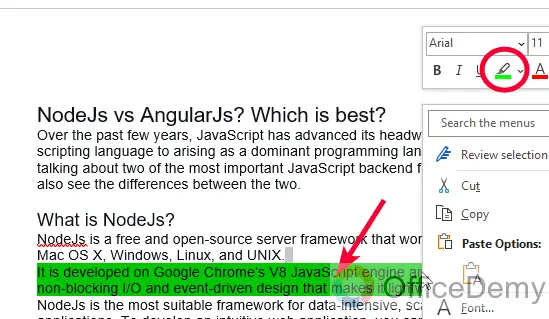
Right-click on the selected text to open the Mini Toolbar.

Step 3
Click on the “Text Highlight Color” button.

Step 4
Select the color you want to use for highlighting.
Step 5
Your text has been highlighted.
How to Highlight in Microsoft Word – using Mouse Cursor
In this section, we will learn how to highlight in Microsoft Word using another handy method which is by converting your cursor into a highlighter for multiple highlights. This method is specifically very useful when you are skimming through a document, and you need to highlight multiple parts of the document after reading them, this method will make your cursor a highlighter, and all you need is to select the text and it will be highlighted automatically as per the pre-set color.
Step 1
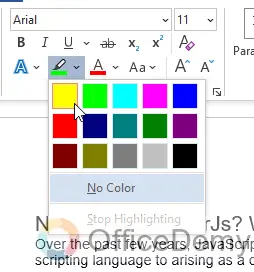
Before selecting the text, click on the “Text highlight color” dropdown and pick a color.
Step 2
Now click on the tool itself, it is positioned before the dropdown.
Step 3
Now you can see your cursor is changed to a highlighter and it’s no longer an arrow sign
Step 4
Now, go through your document, and keep selecting the text you want to highlight
You can see only by selection; your text is highlighted automatically.
This is how this method works. This is extremely useful for making multiple highlights.
How to Highlight in Microsoft Word – using Keyboard Shortcut
In this section, we will learn how to highlight in Microsoft Word using the keyboard shortcut. This method is going to be the best of all.
Step 1
Set your color from the “Text highlight color” dropdown menu.
Step 2
Now do not do anything just select the text you want to highlight

Step 3
Now press Ctrl + Alt + H from your keyboard to highlight the selected text with the color you have just set for the highlighter tool.

This is how you can use a handy keyboard shortcut for highlighting in Microsoft Word.
How to Highlight in Microsoft Word – Using Draw Tools
In this section, we will learn how to highlight in Microsoft Word using the brand new Draw menu in Microsoft Word. This is something very advanced, and we have a variety of pen, markers, pointers, and highlighters, and remember that all these are free highlighter and works on the page surface, not on the text only, so there is no need to select text before highlighting.
Step 1
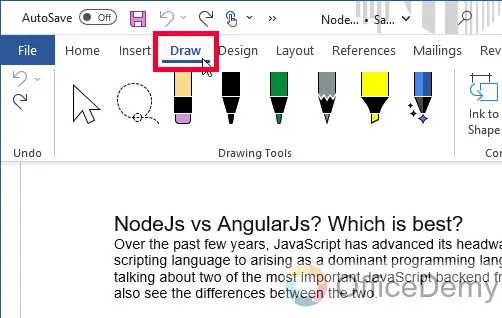
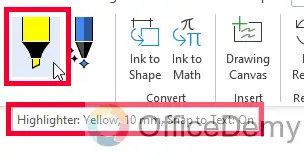
Go to the Draw menu
Step 2
Select the highlighter from so many available markers (hover on the pen, and it will show the name)
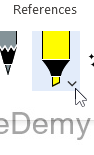
Step 3
After selecting it, you will get a dropdown icon, click on it
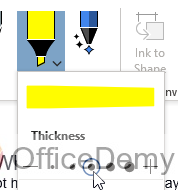
Step 4
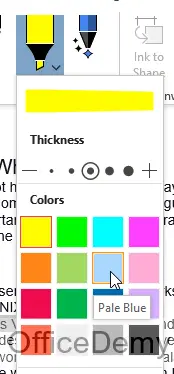
Firstly, you can adjust the thickness of your highlighter
Step 5
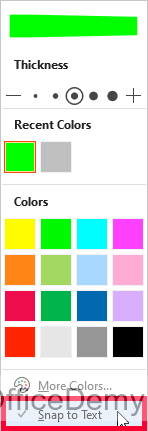
Below you can pick any color for highlighting your document.
Step 6
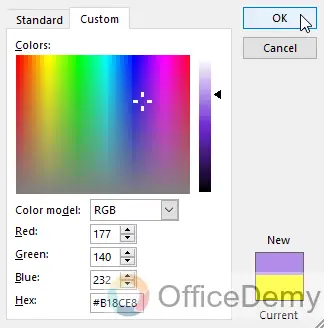
You have a “More color” button from where you can select custom colors.
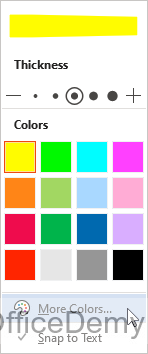
Step 7
Lastly, you have a button “Snap to text”, click on it and it will have a checkmark. It helps you to snap your highlighter works only over the text and not only the blank area.
Step 8
Now freely highlight your text with mouse clicks and drags. You don’t even need to make any selection.
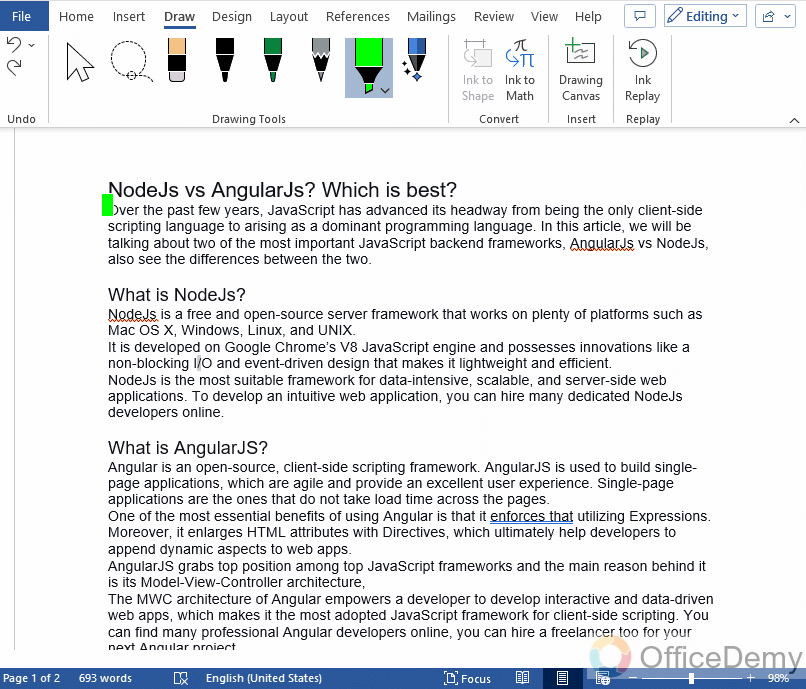
This option will also enable you to add a highlight effect on a part of the text and it will snap automatically to complete your highlight selection.
So, this is how you can highlight in Microsoft Word using the Draw tool.
How to Highlight in Microsoft Word – Using Find and Replace
In this section, we will learn how to highlight in Microsoft Word using find and replace. The Find and Replace inside Microsoft Word is very advanced and gives you a lot of options not only to find and replace your words/sentences, but also to highlight, format, or style them on the spot without making any additional effort. So, let’s see how it works.
Step 1
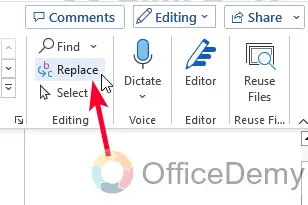
Click on the “Home” tab in the ribbon.
Step 2
Click on the “Replace” button in the “Editing” group.
Step 3
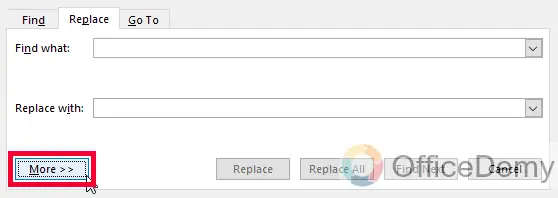
Click on the “More >>” button to expand the dialog box.
Step 4
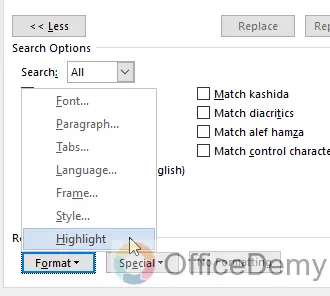
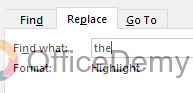
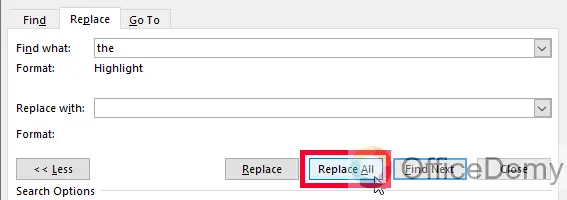
Click on the “Format” button and select “Highlight” from the drop-down menu.
Step 5
Enter the text you want to highlight in the “Find what” field.
Step 6
Click on the “Replace All” button to highlight all instances of the text.
So, these were some cool and stunning methods to highlight in Microsoft Word, there can be some more methods using add-ins. But I don’t recommend using add-ins when you have so many easy methods that can do your job easily.
Frequently Asked Questions
Are the methods for highlighting text in Google Docs similar to those in Microsoft Word?
When it comes to removing highlights in google docs, the methods are indeed similar to those in Microsoft Word. Both platforms offer easy ways to remove highlighting from selected text, ensuring a seamless editing experience for users. With just a few clicks, unwanted highlights can be effortlessly eradicated, allowing for clean and professional-looking documents.
Conclusion
That’s all from today’s guide on how to highlight in Microsoft Word. I hope you find this guide helpful; you understand all the above methods and now you have so many options to consider when you need to highlight in Microsoft Word next time. Thanks for reading. Keep learning with Office Demy.


