
To Insert Multiple Rows in Google Sheets
- Right-click on the row header where you want to insert rows.
- Choose “Insert X rows above” or “Insert X rows below” based on your selection.
OR
- Select the desired number of rows.
- Go to “Insert” in the menu.
- Choose “Rows” and then select “Above” or “Below“.
OR
- Click on the sheet’s origin point to select the entire sheet.
- Right-click the origin and select “Insert X rows above” or “Insert X rows below“.
Hi. In this article, we will learn how to insert multiple rows in Google Sheets. We all work with sheets and we have seen many times we need to insert rows and columns in between data. But this becomes a little hectic when we need to insert so many rows or columns.
So, in Sheets, when you are working with a large file having 1000 rows, and now you need to insert 1000 more, how will you insert? You will insert them one by one? Of course not, then will you insert them 100 100? No, so what’s the most optimum way to insert a large number of rows in one or two clicks? Well, today are going to learn that.
Importance of Inserting Multiple Rows in Google Sheets
When you are working with a large company data set, or you are working on a very long project, it has so much data in rows, and it is kept on increasing every day. In such cases, our default Google Sheet is not enough, we have to insert rows and sometimes columns as well. In normal cases, we easily insert a single row or column where we want, but when we need to insert multiple rows or columns, then it may be confusing for many beginners. I will teach you 2 ways to insert multiple rows in Google Sheets in 1-2 clicks. This way you can insert countless rows to your sheet file very quickly.
In Google Sheets, there is no limit to adding rows, you can insert as many as you want, but the point of this article is to teach you how to insert multiple rows in Google Sheets. So, these are some reasons you should learn how to insert multiple rows in Google Sheets.
How to Insert Multiple Rows in Google Sheets?
There are many ways we can learn to insert rows in Google Sheets, some methods are used to insert single rows, and some are used to insert multiple. We will start with the basic methods and will proceed to advanced methods as our normal practice. Let’s get started.
How to Insert Multiple Rows in Google Sheets – By Right Clicking
In this section, we will learn how to insert multiple rows in Google Sheets, and we will see a method that is done by right-clicking and adding a row above or below.
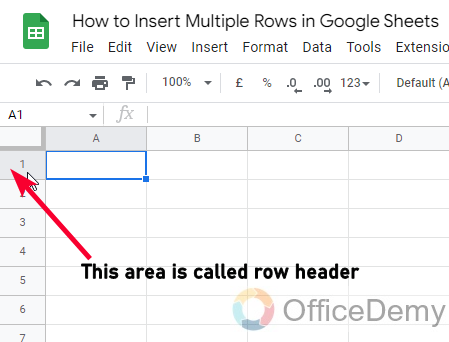
Step 1
Right-click on the row header where you want to insert a row.
Step 2
You will see two options here, insert 1 row above, and Insert 1 row below.
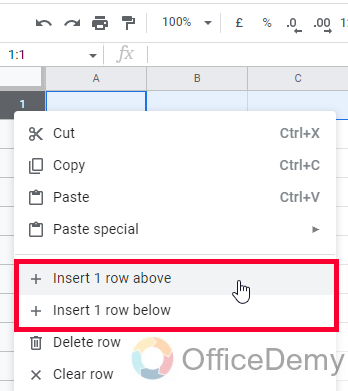
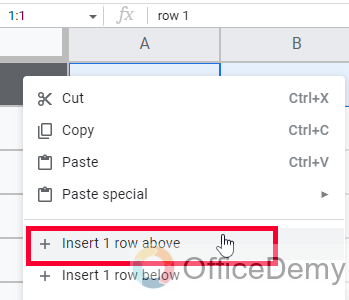
Step 3
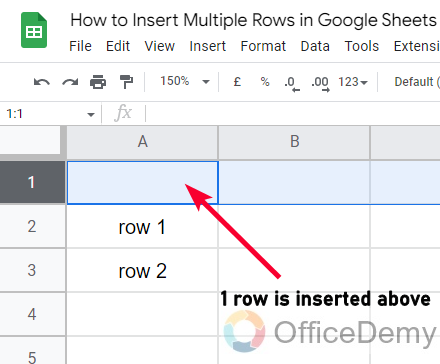
Click on any of these to insert a row, and your row will be added.
But this will insert only a single row above or below the selected row. But we need to insert multiple rows.
Step 4
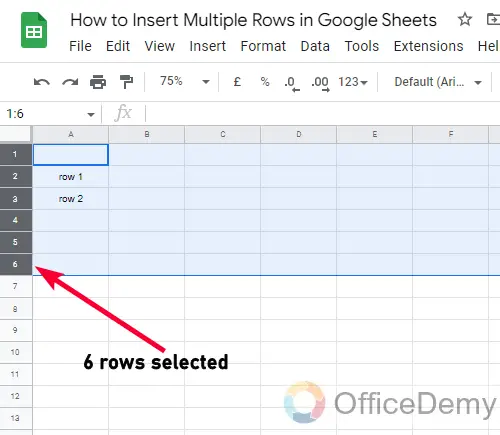
Keep a number in your mind and select those rows (from row headers), i.e., you want to insert 14 rows then select the 8 existing rows where you want to insert new 8 rows (above or below)
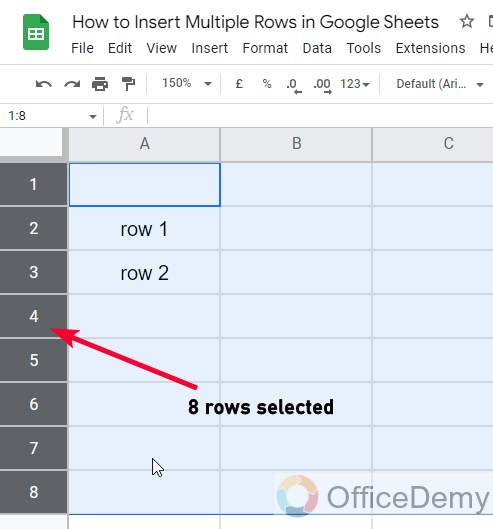
Step 5
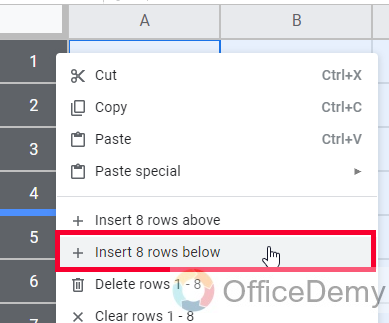
Right-click, and now you will see the same row options as, “Insert 8 rows above, and Insert 8 rows below”
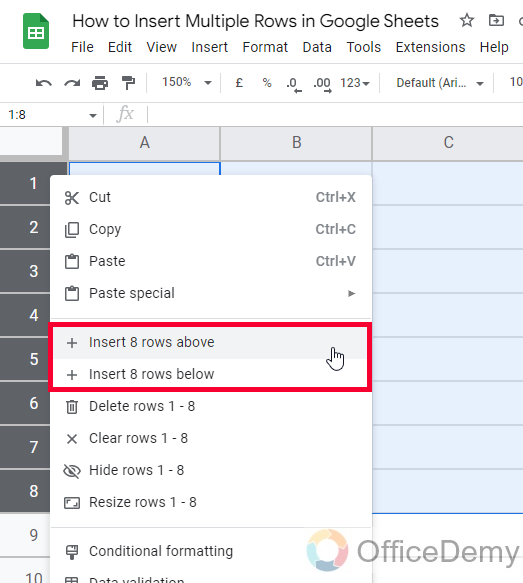
Step 6
Click on it and you will 8 new rows will be inserted into your sheet.
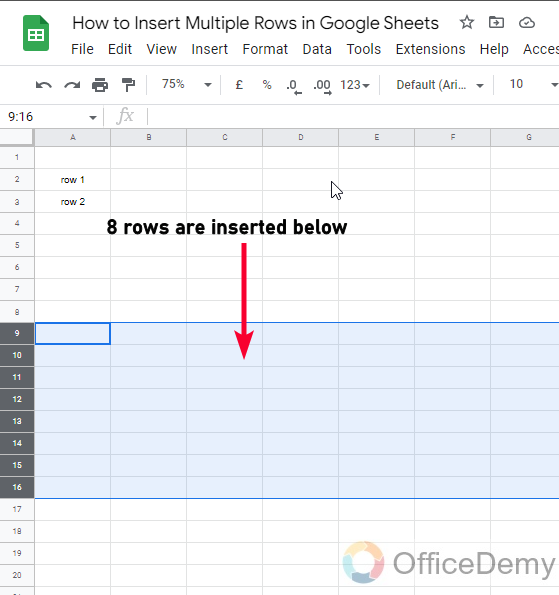
This is how to insert multiple rows in Google Sheets.
How to Insert Multiple Rows in Google Sheets – By Insert Menu
In this section, we will learn how to insert multiple rows in Google Sheets using the Insert menu. This method also works the same as the previous one, which means that it also allows you to insert several rows depending on the selection. If you select 5 rows and got insert menu > rows, then it will allow you to insert 5 rows. So, let’s see how it’s done.
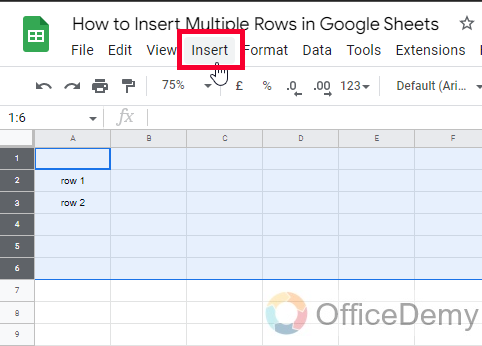
Step 1
Select as many rows as many you want to insert
Step 2
Go to Insert menu
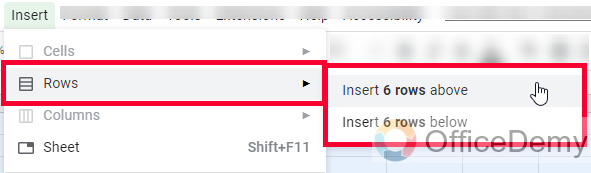
Step 3
Go to Rows, and then select the position from above or below to add the same number of rows as you selected.
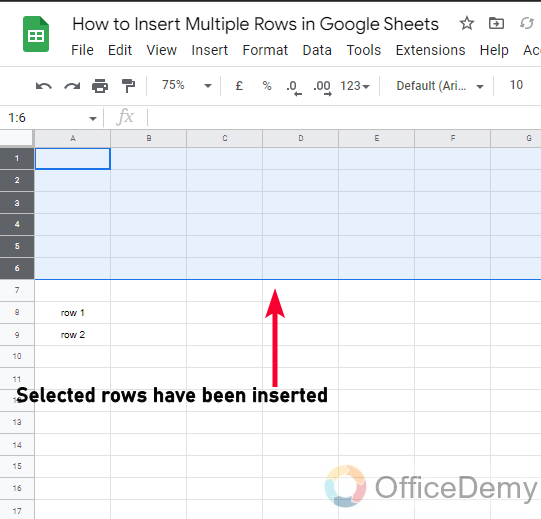
Step 4
Selected rows have been inserted.
This is how these two methods work to add multiple rows in Google Sheets.
How to Insert Multiple Rows in Google Sheets – Add 1000 Rows
In this section, we will learn how to insert multiple rows in Google Sheets, and now we will see a method to add a thousand rows together without selection, without right-clicking method, and also without using the insert menu. This method is used you have a lot of data to add to your current sheet and it’s already filled. The default number of rows in a sheet file is 1000. Let’s see how we can add 1000 rows together.
Step 1
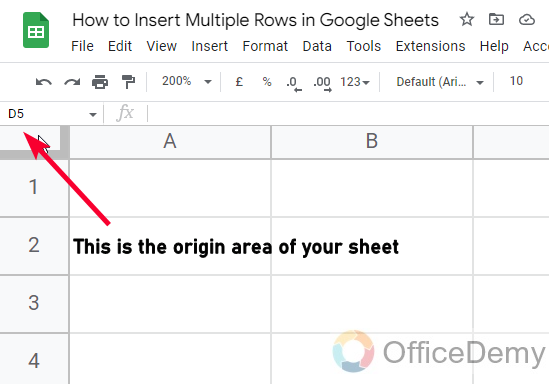
Click on the sheet’s origin point on the top of the rows, and the left-most side of the column header.
Step 2
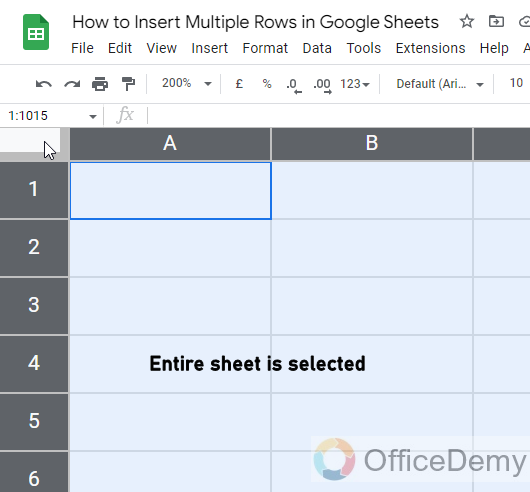
You can see the entire sheet file is selected
Step 3
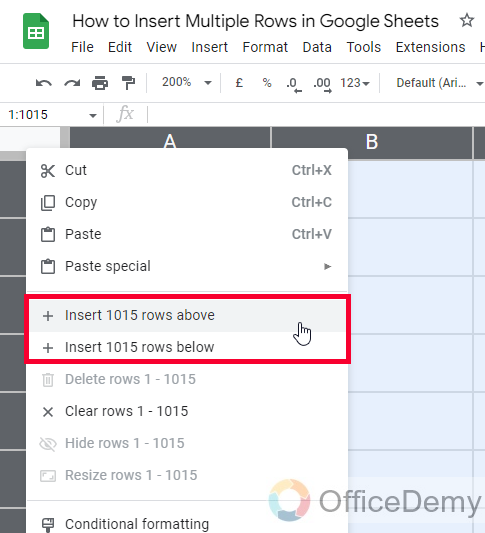
Right-click on the origin, and you will see two-row options in the context menu
“Insert 1000 rows above”, and “Insert 1000 rows below”
Click on any one and you will get 1000 rows inserted on your sheet.
Step 4
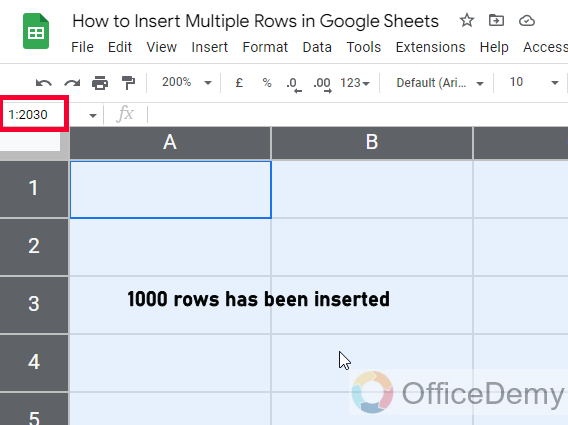
1000 rows have been inserted
How to Insert Multiple Rows in Google Sheets – Bulk Rows at the Bottom
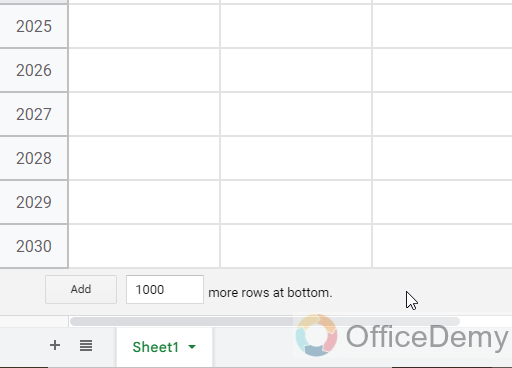
In this section, we will learn how to insert multiple rows in Google Sheets, and we will see how to add bulk rows at the bottom of the sheet. Sometimes, we don’t want to add 1000 rows, we may need 500 rows, for this we will have to select 500 rows which is not a good way to go with. Well, this method is the solution to add bulk rows by number, you can write any number of rows and they will be added to the bottom of the page.
Step 1
Scroll down to the bottom of the sheets
Here you can see an input box in which a number (1000) is written by default, and you can also (add) a button on the left side of it.
Step 2
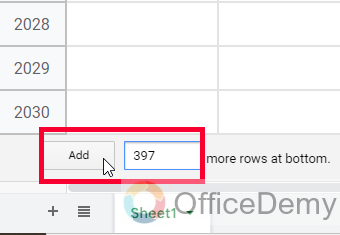
You can remove 1000, and can add any random number i.e., 397, and then click on add button and it will add 397 rows to the bottom of your sheets.
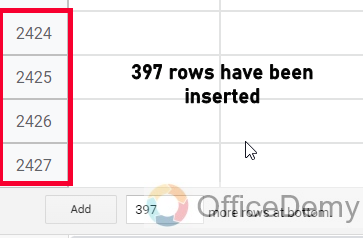
So this is how to insert multiple rows in Google Sheets using the page’s bottom section. This method allows you to add a random number of rows without any selection.
How to Insert Multiple Rows in Google Sheets – Google Sheets App
In this section, we will learn how to insert multiple rows in Google Sheets using Google Sheets mobile app. This method will work the same for Android and IOS devices. For this, you must have a Google Sheets mobile app, the browser method will be emphasized in the next section. See the below steps to insert multiple rows in Google Sheets using an Android or Apple Mobile device.
Step 1
Select a cell and then drag it to complete your selection
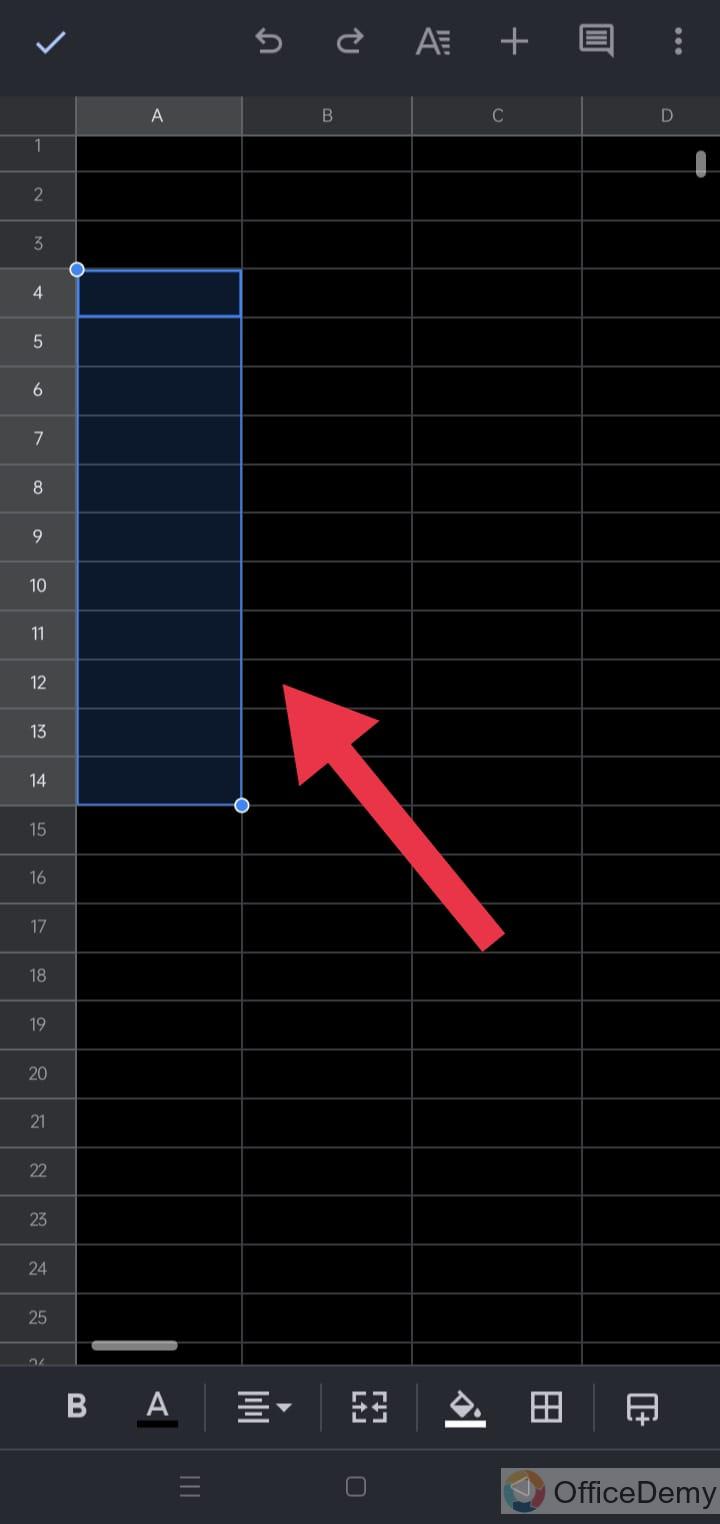
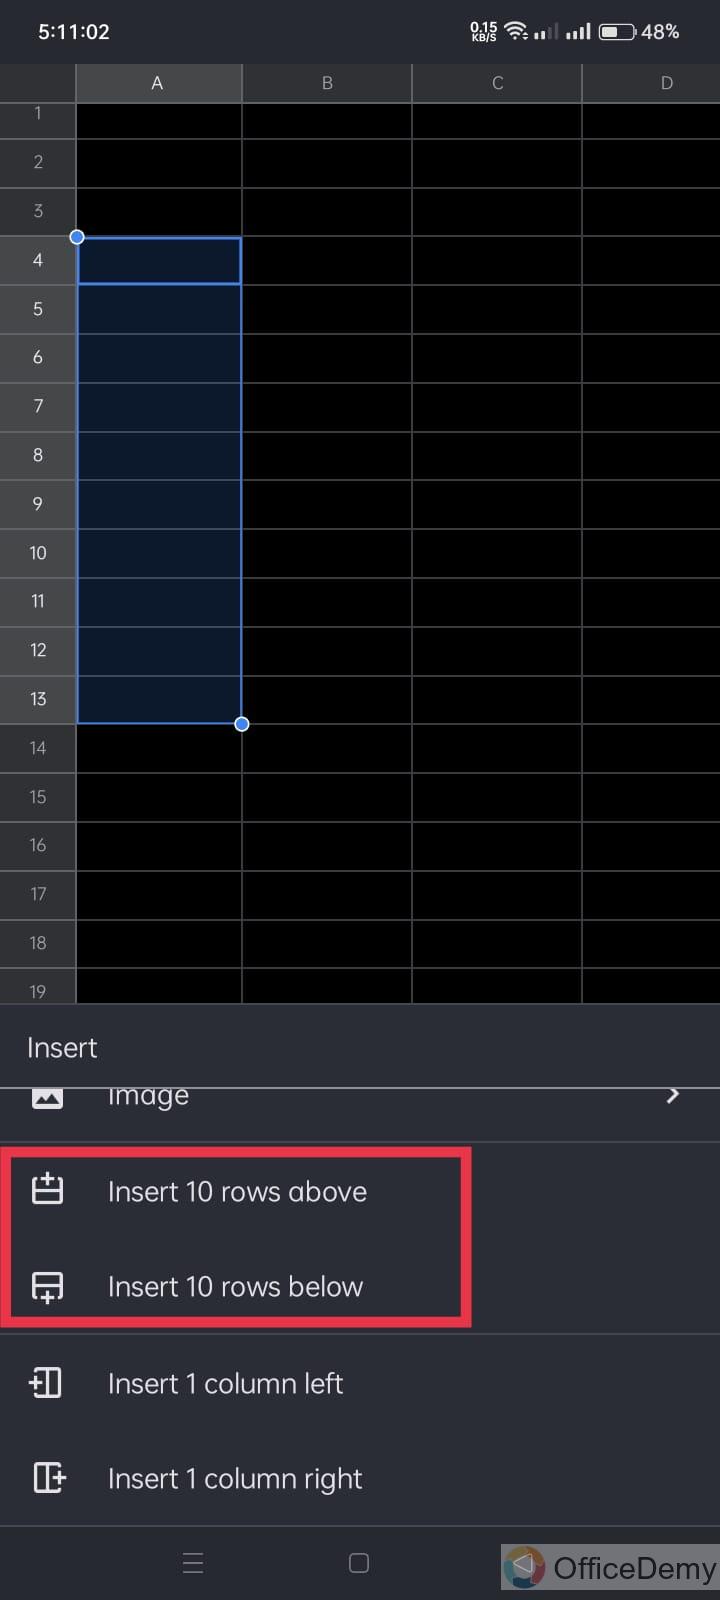
Note: You need to select as many rows as you want to add, I am selecting 10 rows to add 10 more below or above.
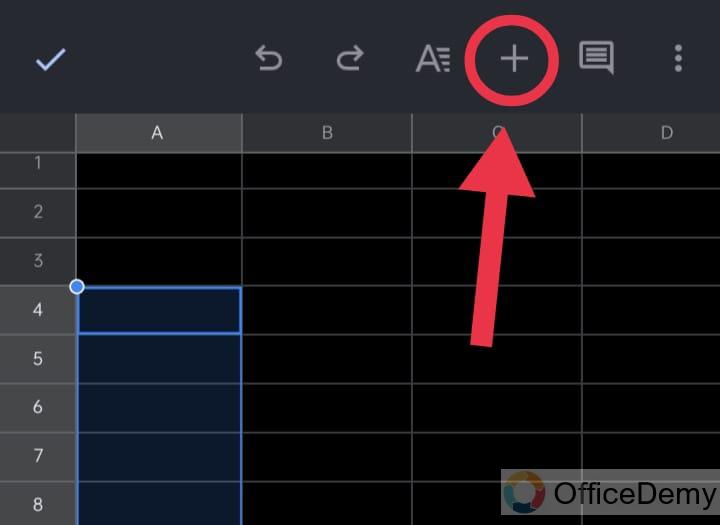
Step 2
Click on the Plus icon on the top of the sheet
Step 3
Now you have many options, see two options “Insert 10 rows above”, and “Insert 12 rows below”
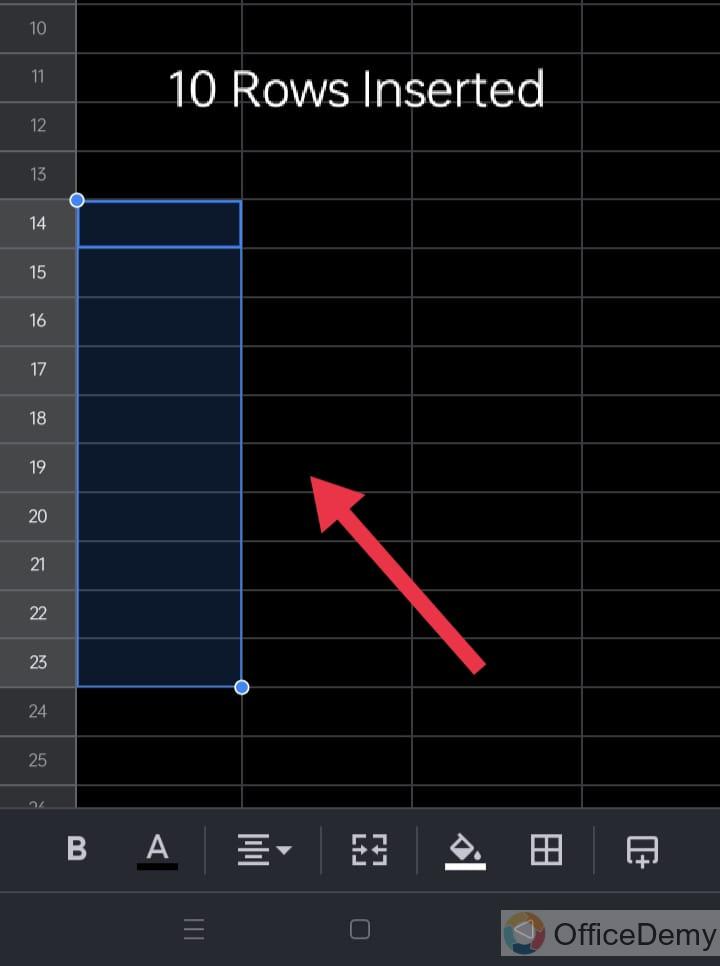
Step 4
Click on any of these to insert 10 rows.
This is the only method you can use on your mobile device using the Google Sheets App.
Note: You cannot select rows from the header, so you will select from cells directly
How to Insert Multiple Rows in Google Sheets – In Mobile Device from Browser
In this section, we will learn how to insert multiple rows in Google Sheets on a mobile device using any web browser. Sometimes, we don’t have the Google Sheets app, so we use Sheets from the browser. In this case, we may need to insert multiple rows, so this is the method to go with. See the below steps to learn this quick method.
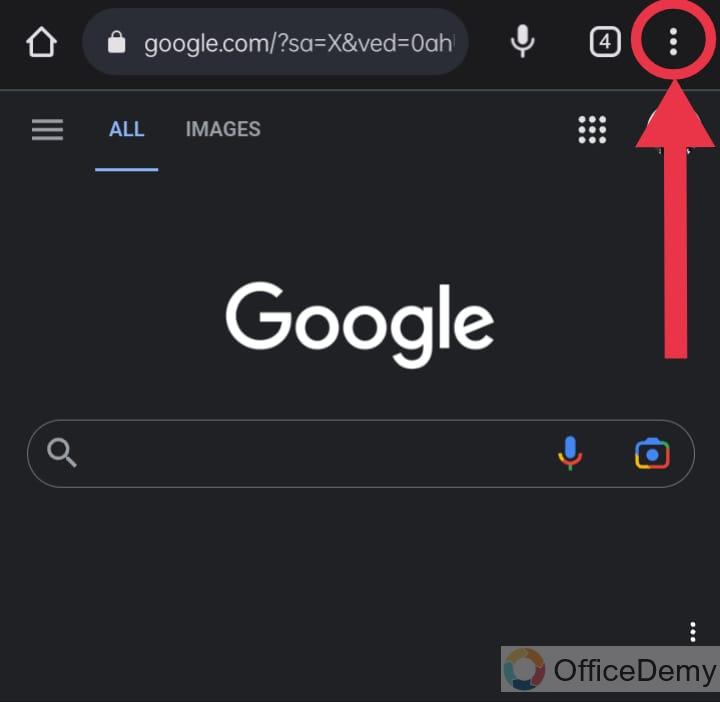
Step 1
Open your browser

Step 2
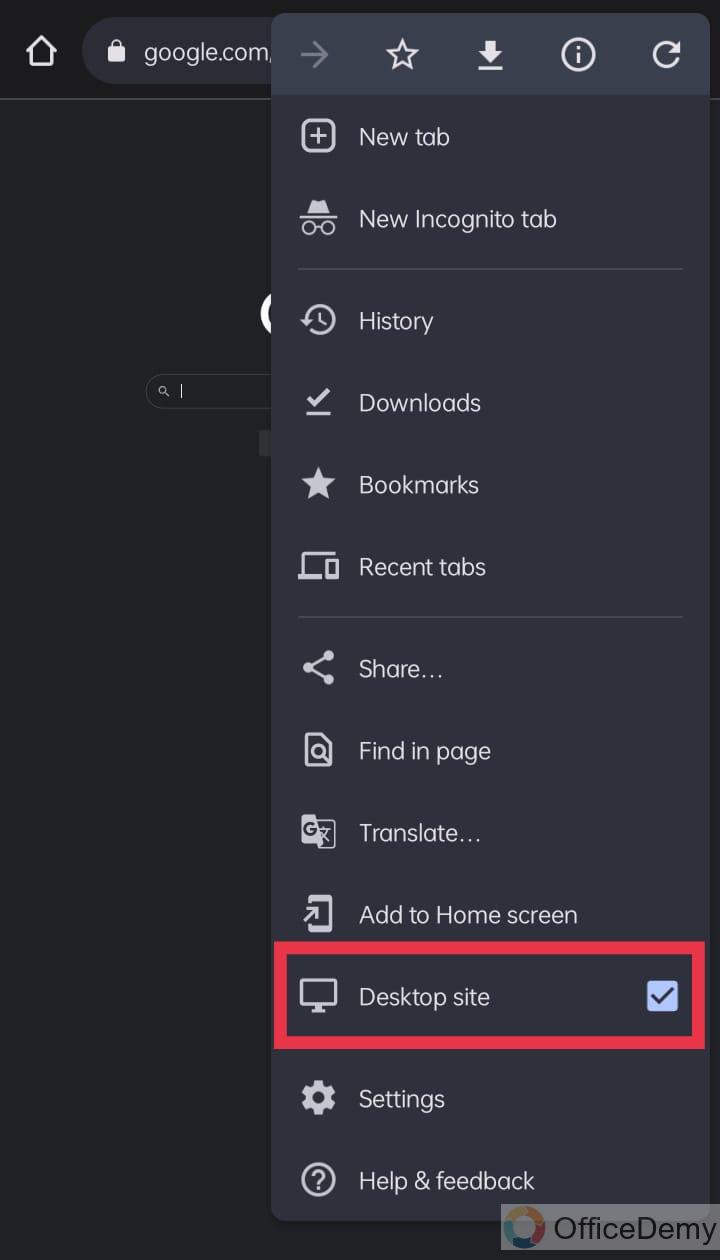
Go to the Three dots in the top right corner, and click on it
Step 3
Check on the “Desktop Site” checkbox to enable the desktop version of Sheets.
Step 4
You have your Google Sheets file opened on the desktop version on your mobile
Now you can repeat all the methods we did above for laptop PC.
This is how to insert multiple rows in Google Sheets using a mobile device and a desktop version of Google Sheets.
How to Insert Multiple Rows in Google Sheets – Keyboard Shortcut
This is a quick workaround and not a method to insert multiple rows in Google Sheets. You can use the Ctrl + D. This shortcut is used in windows to repeat the last action performed. So, the idea is that first, you will manually insert a row, and then use this keyboard shortcut to repeat this operation again and again. In this way, you can insert some rows like 10 12.
Frequently Asked Questions
How to insert multiple rows in Google Sheets?
There are four easy methods to add multiple rows in Google Sheets. The first method is selecting the same number of rows, right-clicking, and adding the same number of rows above or below. The second method is also similar to this one. We select the number of rows, then go to Insert menu > Rows and select an option to add the same number of rows above or below. The third method is to select the entire sheet from the origin and then add 1000 (the default row number in a sheet) above or below, and the last method is to add a bulk number of rows on the bottom.
Conclusion
That’s all from how to insert Multiple rows in Google Sheets. I hope you find all the methods useful. Keep in mind that these methods are exclusively used to insert multiple rows in Google Sheets. We have some similar and different methods to insert single rows and columns. I will see you soon with another helpful guide. Keep learning with Office Demy.


