
To Link Outlook to Gmail
- Go to your “Gmail Account” > “Settings“.
- Select “forwarding POP/IMAP” > “Enable IMAP” > “Save Changes”.
OR
- Open Outlook.
- Go to “File” > “Add Account“.
- Add your Gmail account here > Select “IMAP“.
Today we will learn how to link Outlook to Gmail. There are only two extremely popular web-based email services, the first is Google’s Gmail and the second is Microsoft’s Outlook. Both services are commonly used among the people.
But there may be a client who needs to use both services at the same time then we will recommend you the following solution, how to link Outlook to Gmail. With the help of this tutorial, you will be able to access your Gmail from an Outlook application.
Importance of Linking Outlook to Gmail
Let’s suppose you are owning a business and using Microsoft products like Outlook, but you may also want to use Gmail at the same time. If it is so, then you may need to learn how to link Outlook to Gmail.
With the help of this tutorial, you will not need to endure the inconvenience of checking email in two places, but you can take the services of both exchanges on the same platform at the same time.
How to Link Outlook to Gmail?
The procedure of linking Outlook to Gmail is as typical as it seems to the user. You can fruitfully sync your Gmail to your Outlook in the following steps.
Step 1
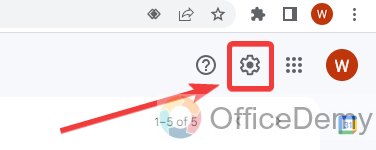
The procedure for linking Outlook to Gmail starts with the Gmail account first. You will have to log in to your Gmail account and access your Gmail account settings. After login, look at the right corner of the window you will see a gear icon through which you can access the Gmail account settings.
Step 2
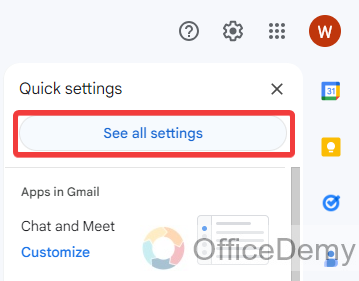
Clicking on the gear icon will give you a drop-down panel with less basic settings for Gmail. Click on “See all settings” to open your Gmail account’s settings.
Step 3
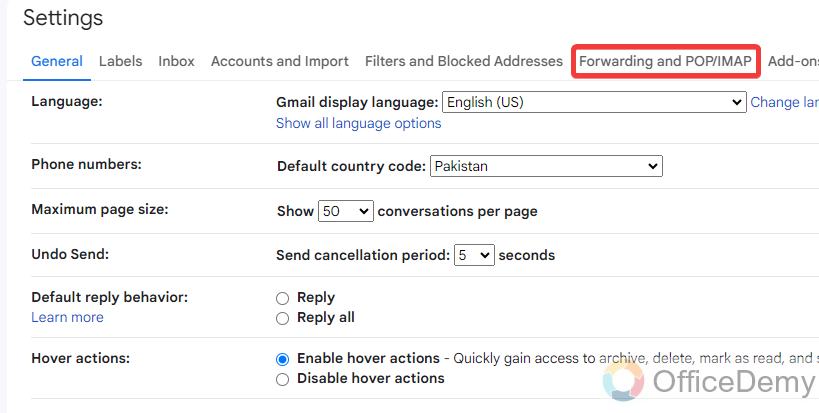
When you open Gmail account settings the following window will appear in front of you where you will find a “Forwarding and POP/IMAP” tab as highlighted in the following picture.
Step 4
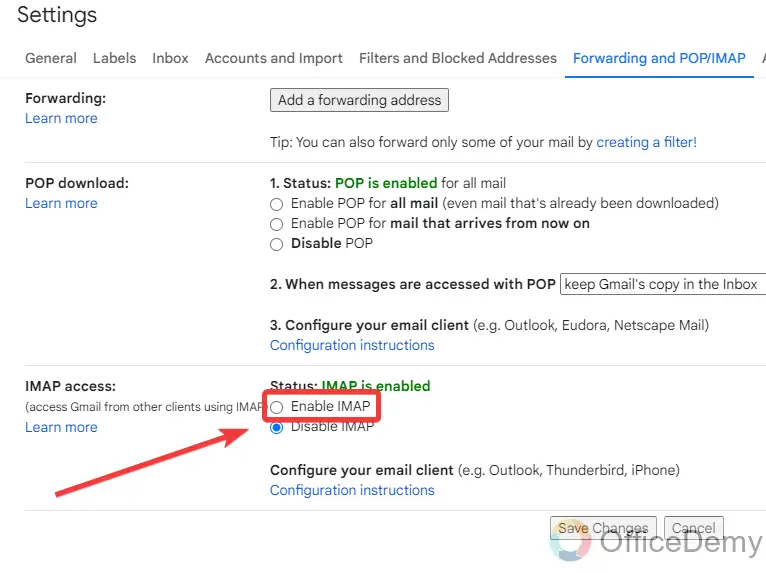
On this “Forwarding and POP/IMAP” tab, you will find “IMAP access” with a little scrolling down. Click on “Enable IMAP” to enable IMAP services to link to the Outlook exchange.
Step 5
Once you have enabled IMAP in your Gmail account settings then click on the “Save changes” button at the bottom of the window to save these changes.

Step 6
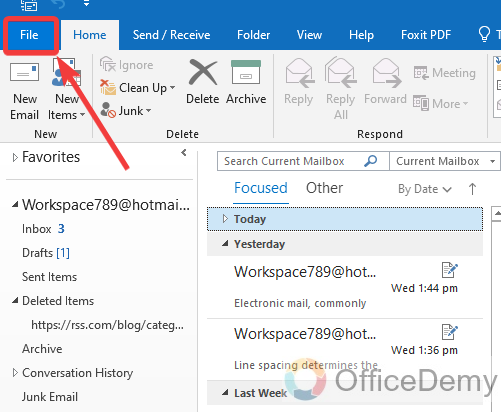
Now it’s time to launch Outlook, after opening Microsoft Outlook go into the “File” tab of the menu bar located at the left top corner of the window.
Step 7
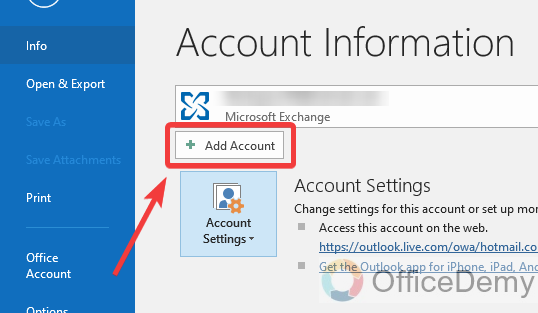
When you click on the “File” tab, the following window will appear where you will see an “Add Account” button just straight to your eyes as highlighted in the following screenshot.
Step 8
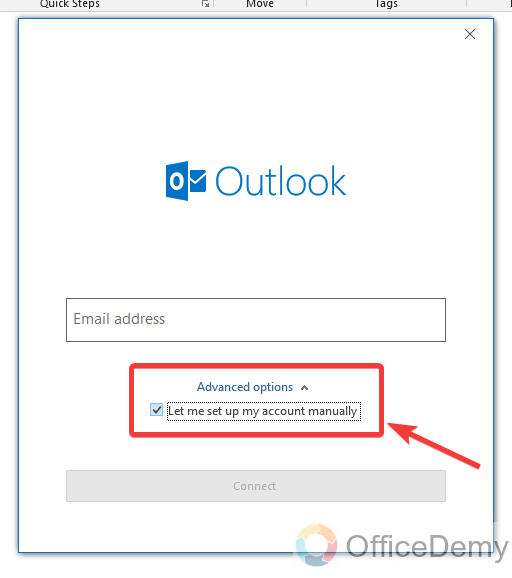
When you click on the “Add Account” button, a small new pop-up will open to process your new account as can be seen below. As we are not entering an Outlook exchange account but a Gmail account, here we will mark the following option “Let me set up my account manually” before entering the username or email.
Step 9
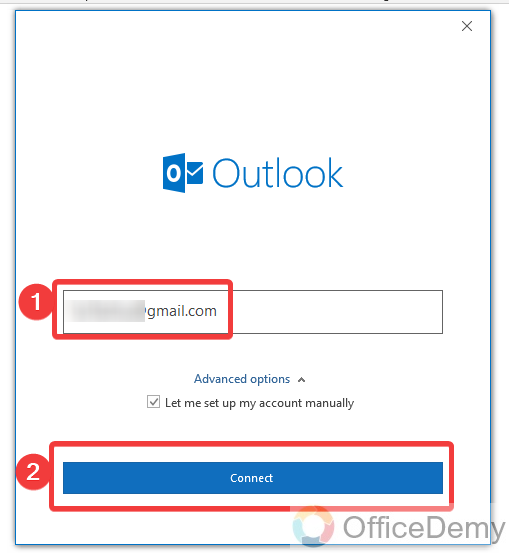
Now you can enter your Gmail account in the email dialogue box and then click on the “Connect” button to link your Outlook to Gmail.
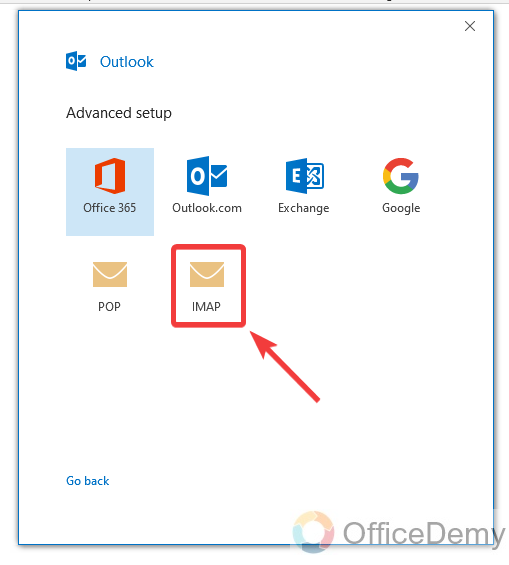
Step 10
The pop-up will be directed towards the “Advanced Setup“, where select the “IMAP” option to continue as an IMAP account.
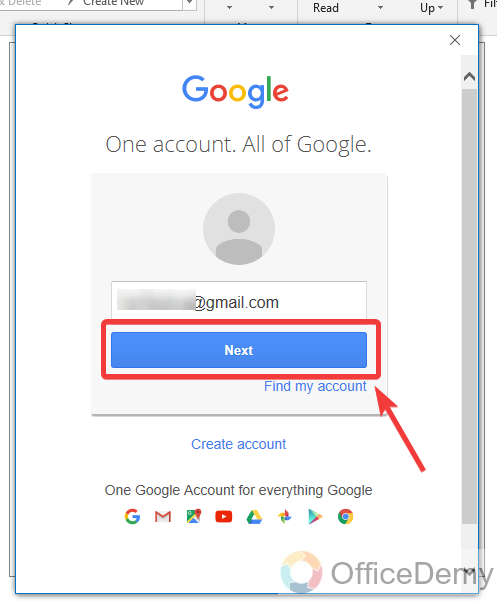
Step 11
When you click “IMAP“, it will ask you to enter the Gmail account. Write the username of your Gmail account in the email dialogue box and then simply click on the “Next” button to move ahead.
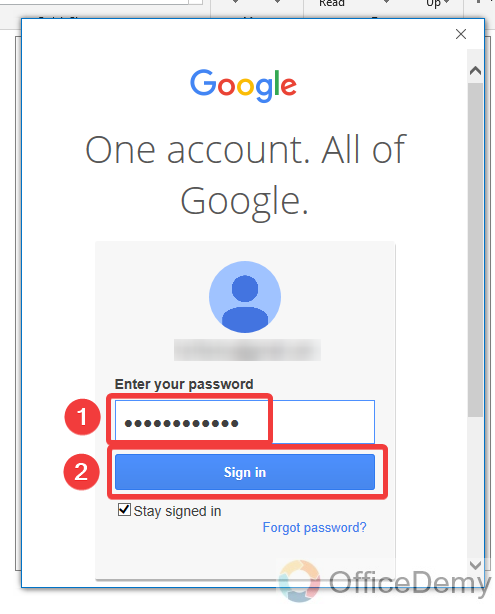
Step 12
When you process your Gmail account, it will ask you to write the password of your Gmail account. Write the password of your Gmail account and sign in to your Gmail account in the following window.
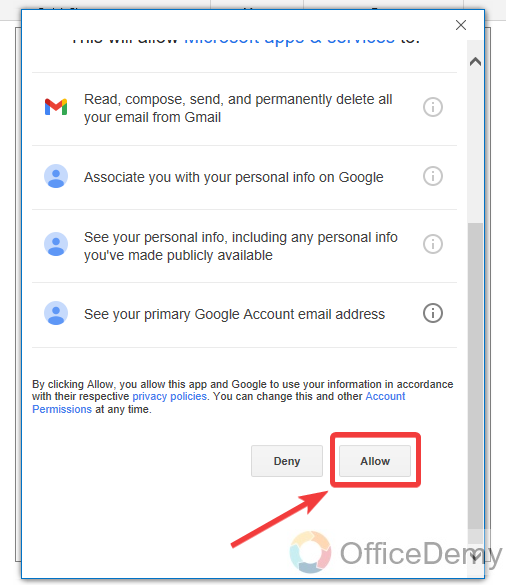
Step 13
Before logging up to your Gmail account, it will also ask you to grant permission from your account, click on the “Allow” button to grant permission to this action.
Step 14
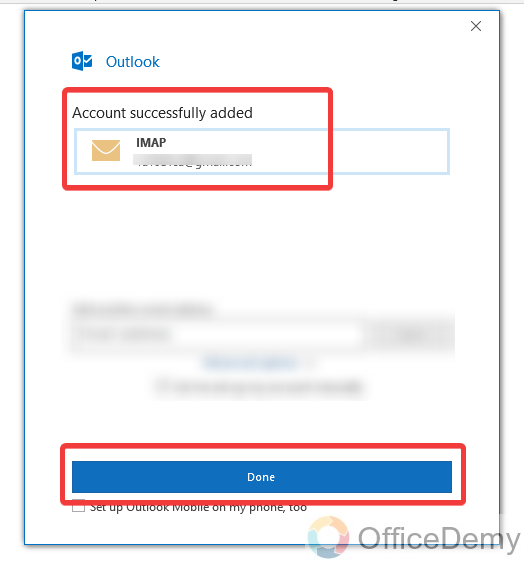
You are almost done, as you can see the message alert in the following window that says “Account successfully added“. That means your Outlook has been linked to your Gmail.
Step 15
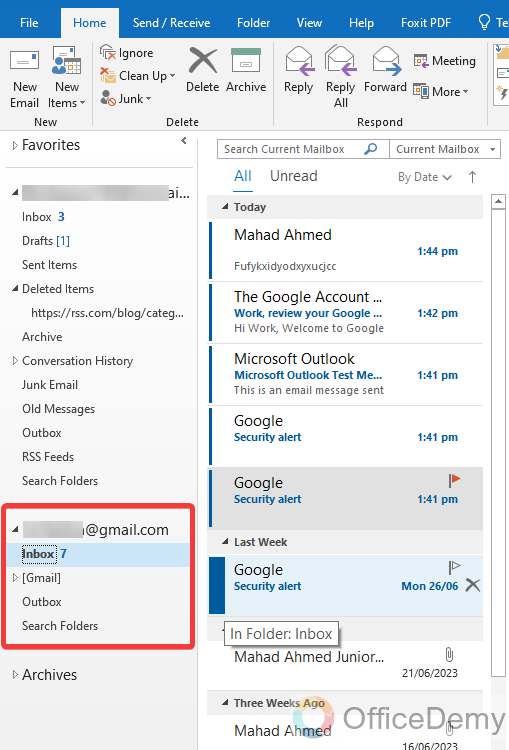
You can see the result as well in the following screenshot, Gmail account with its all folders has been linked to your Outlook. You can also see your Gmail account emails in the following picture.
Frequently Asked Questions
Q: How to import Gmail contacts to Outlook contacts?
A: When you link your Outlook to your Gmail, you may get all your Gmail account emails into your Outlook but most probably possible that you will not get your Gmail account contacts into Outlook contacts. To share information, media, attachments, and sending emails if you need your Gmail account contacts into Outlook then you can import them, you won’t need to find your contact separately. These are the steps through which you can import your Gmail contacts to Outlook contacts.
Step 1
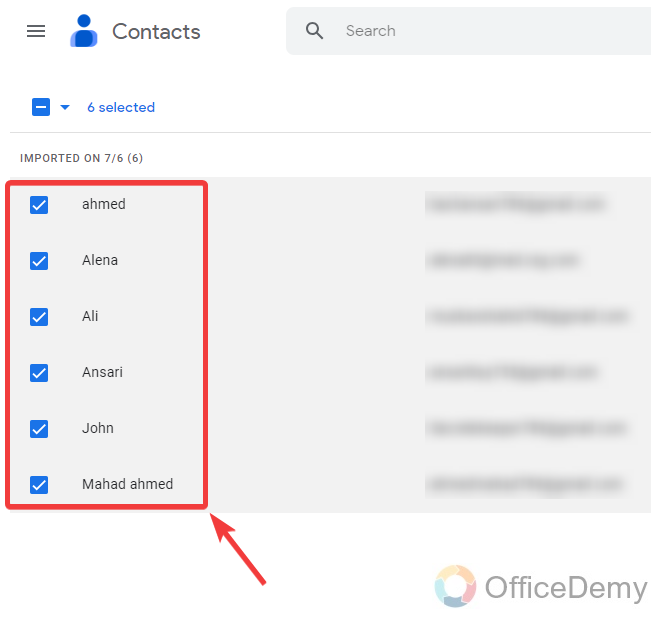
First, go into your Gmail account and access your Google contacts. To export these Google contacts to your Outlook, select all these contacts as I have selected below.
Step 2
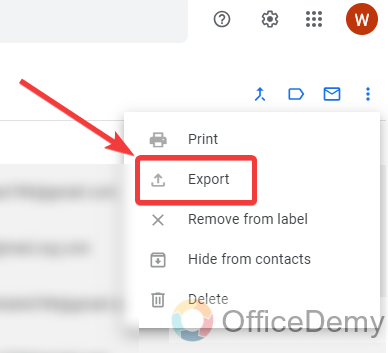
Once you have selected all the contacts that you want to export then press the right click of the mouse on it and a drop-down menu will open. Click on the “Export” button on this drop-down menu.
Step 3
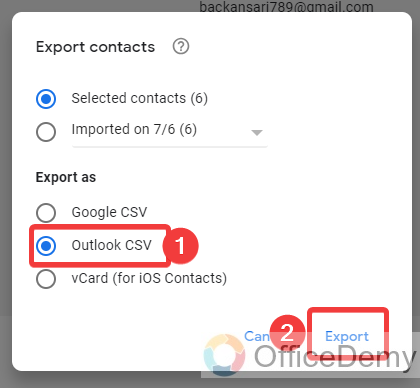
As you click on the “Export” button another pop-up will appear where it will ask you in which format to export your Gmail contacts. As we have to add these contacts to Outlook, here we will export our file in the “Outlook CSV” file type and then click on the “Export” button.
Step 4
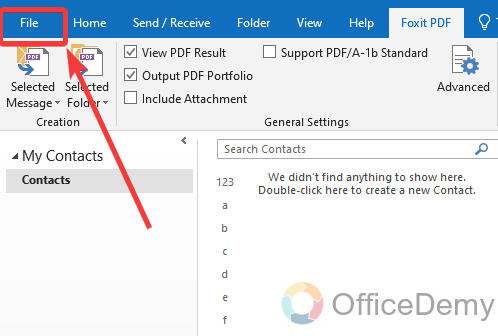
Once you have got your exported file then come back to Outlook and go into the “File” tab of the menu bar of Microsoft Outlook.
Step 5
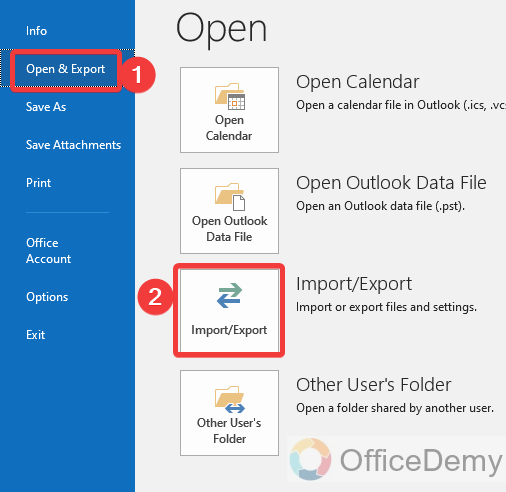
When you click on the “File” tab, the following window will open where you will see an “Open & Export” button in the blue panel. Click on this “Open & Export” button and then click on the “Import/Export” button as directed below.
Step 6
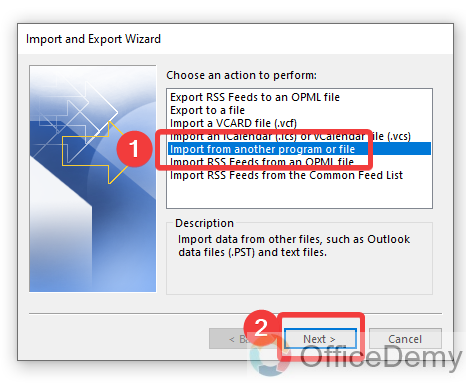
A small new window will open when you click on the “Import/Export” button. To import Gmail contacts, click on “Import from another program and file” and then click on the “Next” button to proceed.
Step 7
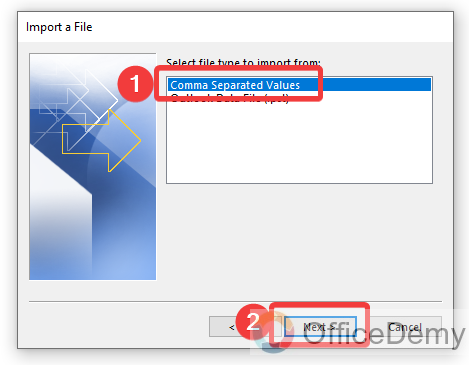
In the next step, it will ask you which type of file you want to import. As we are going to import an Outlook CSV file, here we will select “Comma separated Values” and then press the “Next” button.
Step 8
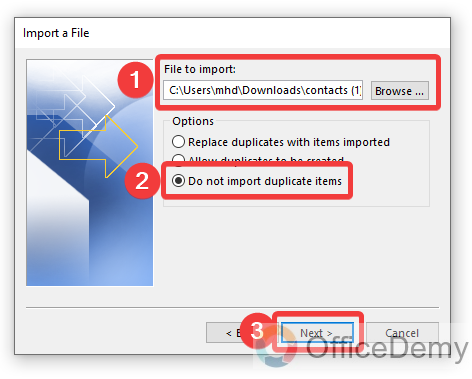
In the next step, Outlook will require the CSV file to import, browse your downloaded Google contact file, and then click on the “Next” button. Before clicking on the Next button, don’t forget to select the options as described below.
Step 9
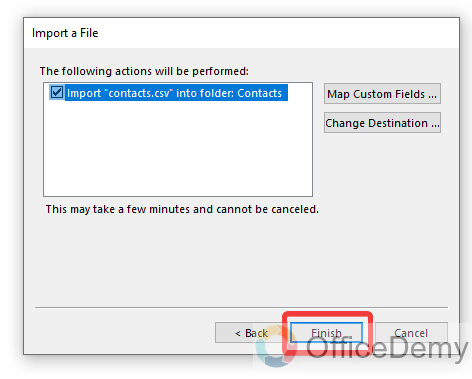
You are just one click to go, click on the “Finish” button to finalize the procedure. You will see that your contacts will be imported.
Step 10
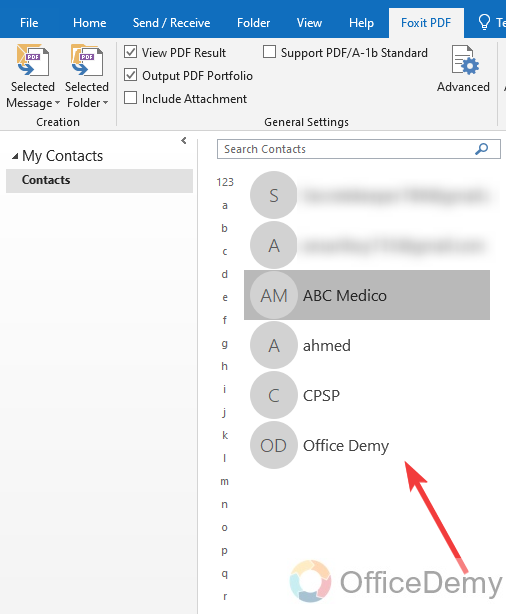
As you can see from the result in the following picture, all the Gmail contacts have been imported to Outlook.
Q: How to remove Gmail from Outlook?
A: Let’s suppose you have subscribed your Outlook to a Gmail account and due to some reason you want to remove it from your Outlook then there is nothing to worry not even a long process. Although you can remove your Gmail from Outlook within a few clicks which are described below.
Step 1
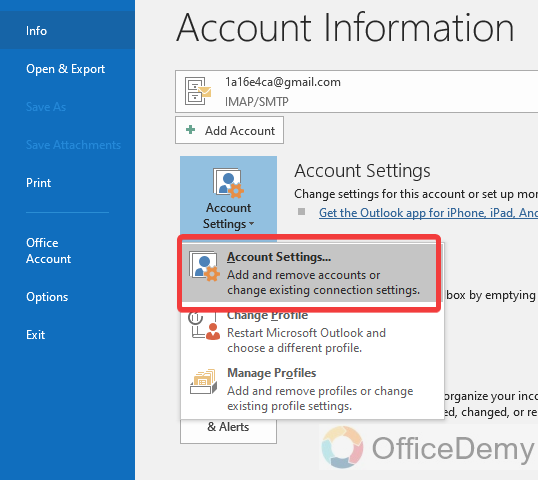
Go into the “File” tab of the menu bar in your Outlook and click on “Account settings“.
Step 2
When you click on “Account settings” a new dialogue box will open where you will be able to see all account details. Here you will also find your Gmail account. Select your Gmail account and then click on the “Remove” button as highlighted below.
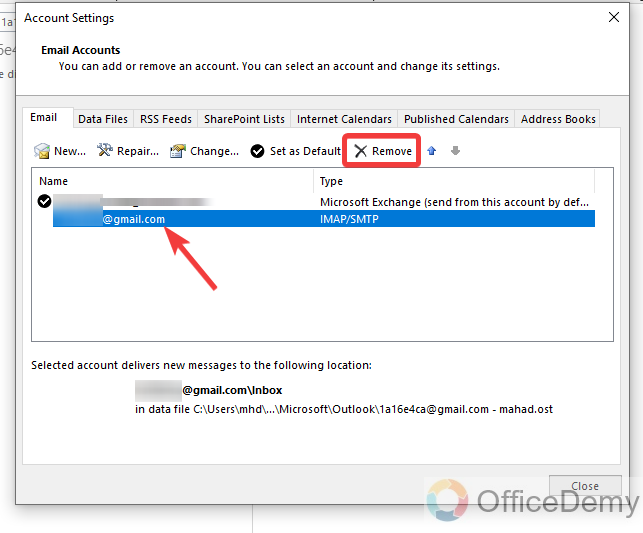
Your Gmail account will be removed from your Outlook.
Conclusion
Today we learned how to link Outlook to Gmail. Now you know how to link Outlook to Gmail with the help of the above article and can also import your Google contacts to Outlook contacts. Hope it shall be found helpful for more profitable topics keep supporting Office Demy.


