
To Set up an Automatic Reply in Outlook
App:
- Open the Outlook desktop app.
- Click “File” > “Info” > “Automatic Replies (Out of Office)“.
- Enable automatic replies.
- Set start and end dates.
- Compose your message > Save changes.
Web:
- Open Outlook web version.
- Click on the gear icon.
- Click “View all Outlook settings” > “Mail” > “Automatic replies“.
- Enable automatic replies.
- Set start and end dates.
- Compose your message.
- Save changes.
Hi. Today, we will learn how to set up an automatic reply in Outlook. In today’s digital age, managing communication effectively is crucial, especially when we can’t always be available to respond promptly. Microsoft Outlook provides a valuable solution with its automatic reply feature. It can be used when you are on vacation, engrossed in important work, or simply need a break. Setting up automatic replies allows you to keep contacts informed and maintain a professional image.
In this article, we will guide you through the process of configuring automatic replies in Outlook, empowering you to streamline your communication and ensure that no important messages go unanswered.
Importance of using an Automatic Reply in Outlook
In today’s fast-paced world, effective communication is crucial for personal and professional success. However, there are times when we can’t respond promptly to emails or messages due to various reasons like vacations, important meetings, or unforeseen circumstances. Learning how to set up an automatic reply in Outlook is essential in such situations. By mastering this skill, you can ensure important messages don’t go unnoticed, maintain a professional image, and demonstrate your commitment to responsiveness and efficient communication even when you’re unavailable physically. Automatic replies provide peace of mind and help you manage expectations effectively.
Getting an automatic reply in Outlook offers practical benefits. Firstly, it helps manage expectations by informing others that you are temporarily unavailable, preventing frustration and misunderstandings caused by delayed replies. Automatic replies also serve as a courtesy, demonstrating your commitment to addressing communication promptly upon your return. Additionally, they streamline workflow and productivity. Instead of individually responding to each email or message received during your absence, you can use automatic replies to provide a standardized message conveying essential information and alternative contact options if needed. Learning how to set up an automatic reply in Outlook enhances communication efficiency and showcases professionalism and consideration towards those trying to reach you during your absence.
How to Set up an Automatic Reply in Outlook?
So as our normal practice, we have two methods for how to set up an automatic reply in Outlook. We will first learn how to set up an automatic reply in the Outlook desktop app, and then in the web version, so you can easily do that whatever version you use. So, let’s get started with the Desktop app method.
Set up an Automatic Reply in Outlook App
In this section, I will show you how to set up an automatic reply in Outlook app using some simple steps. You just need to follow the steps with me, and you will do it very easily.
Step 1
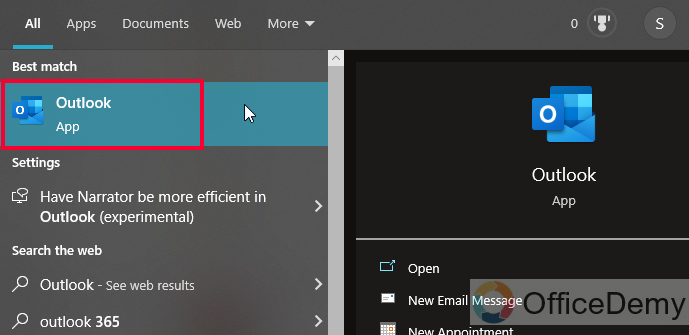
Open Microsoft Outlook on your computer and log in to your Outlook account.
Step 2
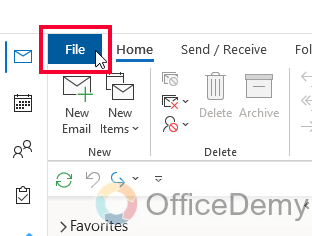
In the top left corner of the Outlook window, click on the “File” tab to access the Outlook menu.
Step 3
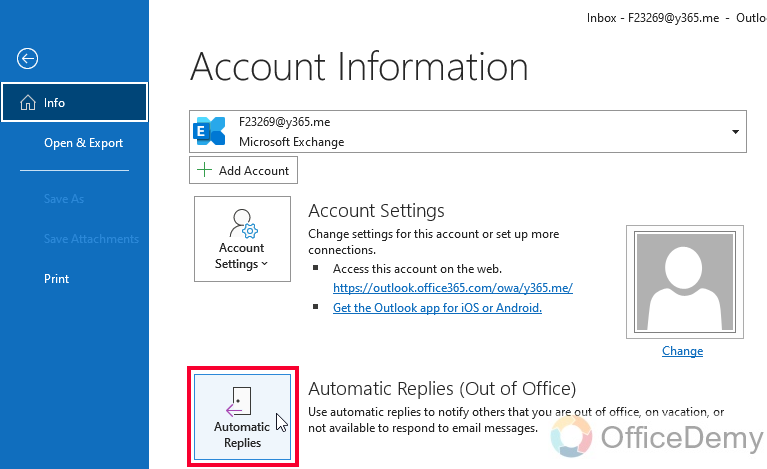
Within the Outlook menu, select the “Info” tab located on the left-hand side.

Step 4
Under the “Info” tab, click on the “Automatic Replies (Out of Office)” button. This will open the Automatic Replies window.
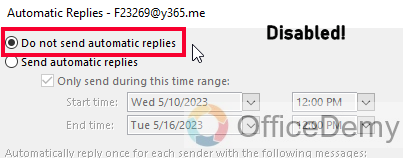
Step 5
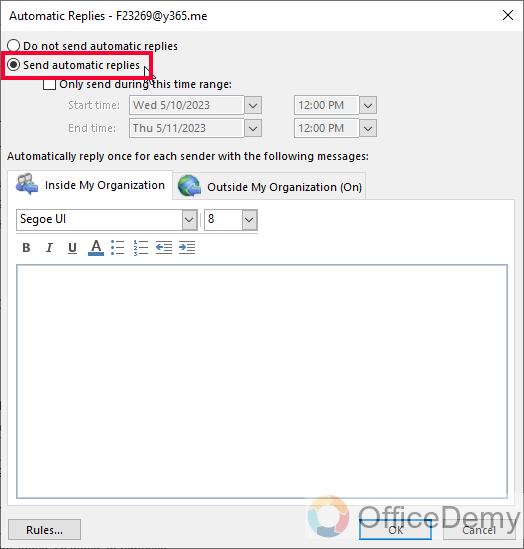
In the Automatic Replies window, select the option to enable automatic replies. You will typically find this option under the “Automatic Replies” or “Out of Office Assistant” section.
Step 6
Specify the start and end dates and times for which you want the automatic replies to be active. This determines the duration during which your automatic replies will be sent.
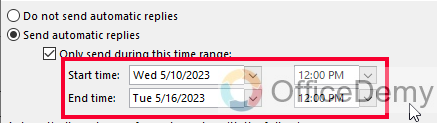
Step 7
Craft your automatic reply message in the provided text box. Customize the subject and body of the message according to your requirements. Make sure the message is concise, informative, and professional.
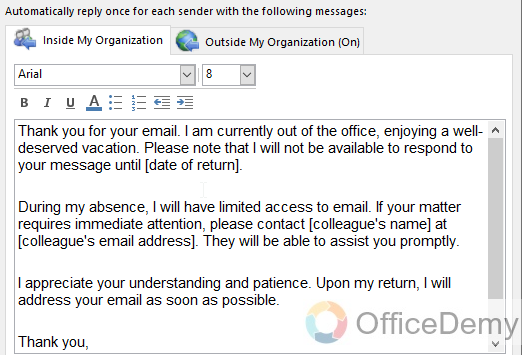
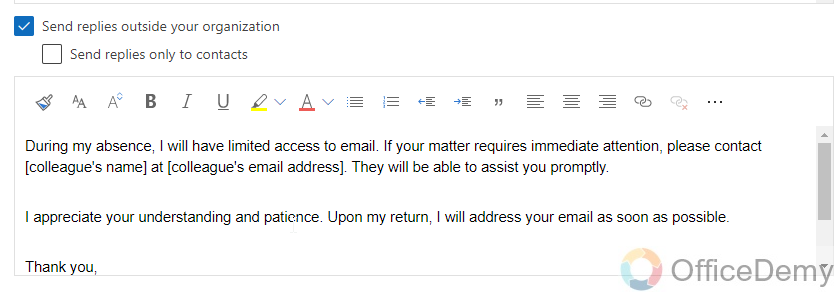
A sample Auto reply for a Vacation:
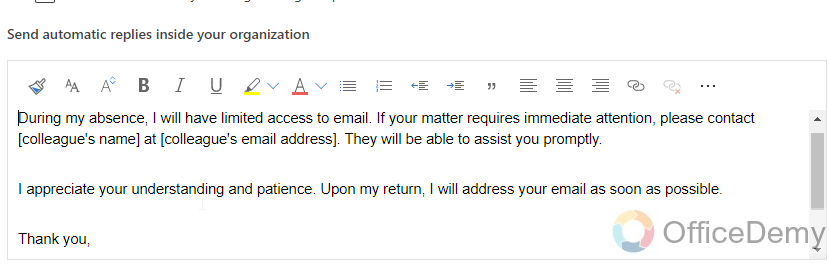
Thank you for your email. I am currently out of the office, enjoying a well-deserved vacation. Please note that I will not be available to respond to your message until [date of return].
During my absence, I will have limited access to email. If your matter requires immediate attention, please contact [colleague’s name] at [colleague’s email address]. They will be able to assist you promptly.
I appreciate your understanding and patience. Upon my return, I will address your email as soon as possible.
Thank you,
[Your name]
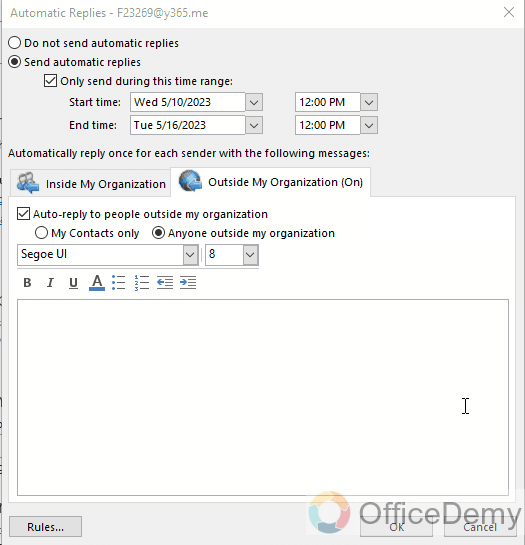
Step 8
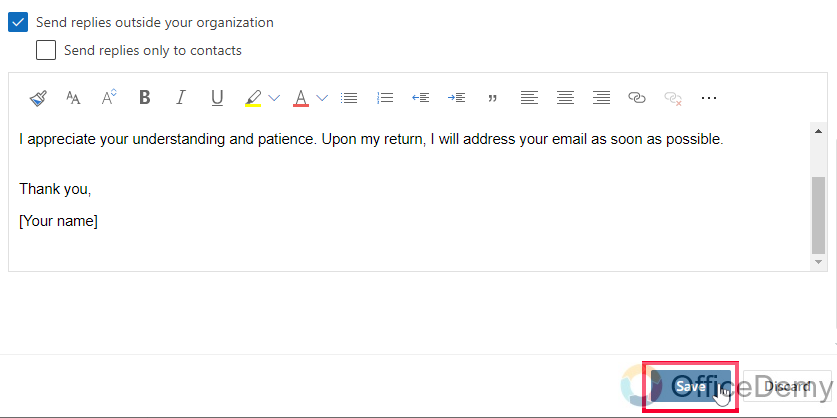
If you want to set different automatic replies for internal and external contacts, click on the “Inside My Organization” and “Outside My Organization” tabs. Customize the messages for each audience as desired.
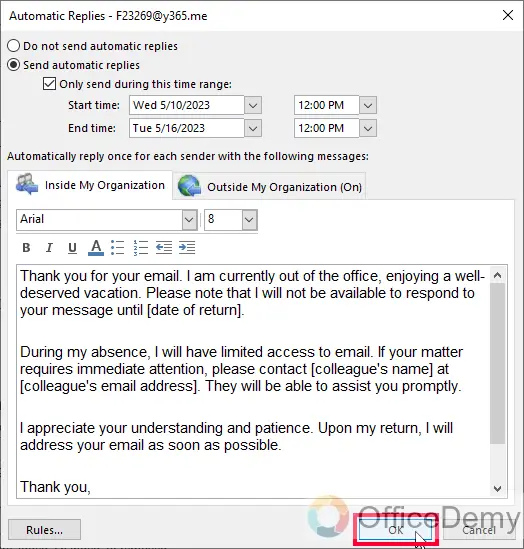
Step 9
After finalizing your automatic reply message, click on the “OK” button to save your settings and activate the automatic replies. Outlook will now send your automatic reply message to incoming emails within the specified date and time range.
Step 10
To stop sending automatic replies, follow the same steps and select the option to disable automatic replies or turn off the Out of Office status.
This is how to set up an automatic reply in Outlook.
Set up an Automatic Reply in Outlook Web Version
In this section, we will learn how to set up an automatic reply in Outlook web version. In this way, we easily do that even without having the Outlook App set up on our PC. This is more suitable when you are away and need to log in to your Outlook to any other system. So, let’s the steps.
Step 1
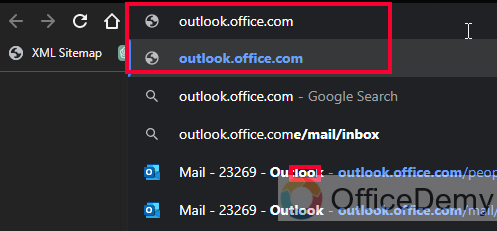
Open your web browser and go to the Outlook website. Sign in to your Outlook account using your email address and password.
Step 2
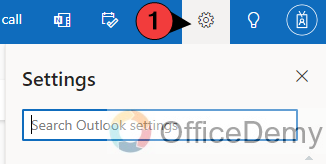
Once you are logged in, locate the gear icon in the top-right corner of the Outlook web interface. Click on it to open the Settings menu.
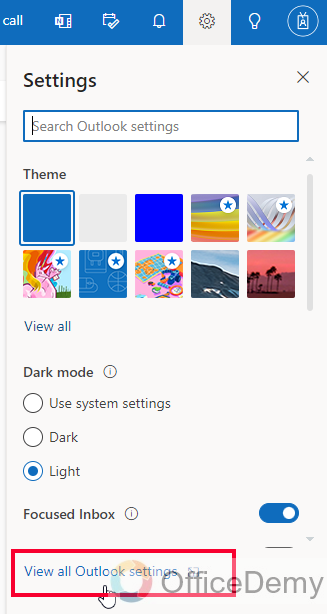
Step 3
In the Settings menu, scroll down and click on the “View all Outlook settings” link at the bottom. This will open the full Settings menu.
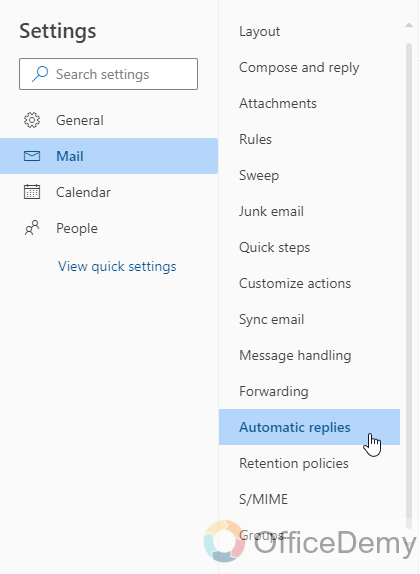
Step 4
In the Settings menu, locate and click on the “Mail” option. Then, select “Automatic replies” from the options listed on the left-hand side.
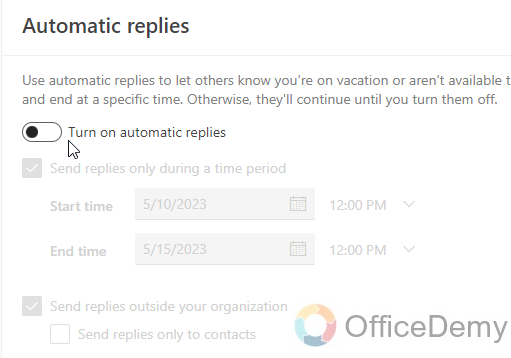
Step 5
Within the Automatic Replies settings, toggle the switch to enable automatic replies.
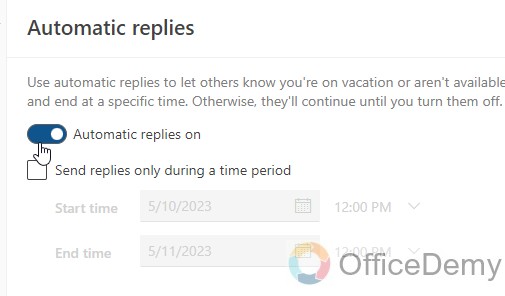
Step 6
Specify the start and end dates and times for which you want the automatic replies to be active. This determines the duration during which your automatic replies will be sent.

Step 7
Compose your automatic reply message in the provided text box. Customize the subject and body of the message to convey the necessary information to your contacts. Keep the message concise, professional, and informative.
Step 8
Below you can repeat the same method, but a different message for the people outside your organization.
Step 9
Once you have finalized your automatic reply message, click the “Save” or “Apply” button to save your settings and activate the automatic replies. Outlook will now send your automatic reply message to incoming emails during the specified time range.
Step 10
To stop sending automatic replies, revisit the Automatic Replies settings and toggle the switch to disable them.
This is how to set up an automatic reply in Outlook web version.
Things To Remember
- Automatic replies in Outlook help manage expectations and inform others of your unavailability.
- Customize your automatic reply message to include essential information and alternative contact options.
- Set a specific date and time range for your automatic replies or choose to enable them indefinitely.
- Remember to disable automatic replies once you’re available again to resume regular communication.
- Automatic replies demonstrate professionalism and consideration towards those trying to reach you during your absence.
- Use automatic replies to streamline workflow and productivity by providing a standardized message.
- Check if your version of Outlook offers the option to set different automatic replies for internal and external contacts.
Frequently Asked Questions
How to set different automatic replies for internal and external contacts?
Some versions of Outlook provide the option to set separate automatic replies for internal colleagues and external contacts, allowing you to tailor your messages accordingly.
How to ensure my automatic replies are professional and informative?
Craft a concise message that includes the duration of your absence, alternative contact options, and any other pertinent information. Review and proofread your automatic reply message to ensure clarity and professionalism.
How to schedule automatic replies in advance?
You can set a specific date and time range for your automatic replies to activate and deactivate, allowing you to plan for periods of unavailability.
Conclusion
That’s all about how to set up an automatic reply in Outlook. I hope you find this guide helpful. Thank you so much!


