
To Stop Emails Going to Junk Outlook 365
Outlook Web:
- Go to “Junk Folder“.
- Select a Sender.
- Right-click, and select “Not Junk“.
- A new pop-up will appear “Add to Safe Senders“.
- Click “OK“.
Outlook App:
- Go to a “Mailbox” > Select a mail.
- Right-click, and select “Not Junk“.
- A new pop-up will appear “Mark as Not Junk“.
- Check on “Always trust emails from ‘example.com’” Click “Ok”
OR
- Go to the “Home” tab.
- Click on the “Junk” dropdown.
- Select “Junk E-mail Options” Go to the “Safe Senders” tab.
- Click “Add” > “OK“.
OR
- Go to a “Mailbox“.
- Select a mail.
- Click on the “Junk” dropdown.
- Select “Never Block Sender“
Welcome back, in today’s article, we will learn how to stop emails going to Junk Outlook 365. Are you distressed? By getting your emails going to be junk in Outlook.
Now, calm yourself because Office Demy has brought to you how to stop emails going to junk Outlook 365. With the help of the following article, you will completely prevent emails from going to junk in Outlook.
Why learn to Stop Emails Going to Junk in Outlook 365?
Microsoft Outlook automatically moves the email to the Junk folder, when it detects any junk or spam email. But in this filtration of Outlook, most often normal emails are also moved to the junk folder by Outlook.
If you want to stop these trusty emails from going to junk in Outlook, then you should learn the following tutorial on how to stop emails going to junk in Outlook 365.
How to Stop Emails Going to Junk in Outlook 365?
In this tutorial, we are going to learn four different methods of stopping emails from going to Junk Outlook 365.
- Stop emails going to junk Outlook Web
- Stop emails going to Junk Outlook Desktop
- Stop emails going to Junk Outlook by Safe Senders
- Stop emails going to Junk Outlook by Never Block Sender
Stop Emails Going to Junk Outlook 365 – Outlook Web
In this tutorial, we will learn how to stop emails from going to junk on the Outlook web version.
Step 1
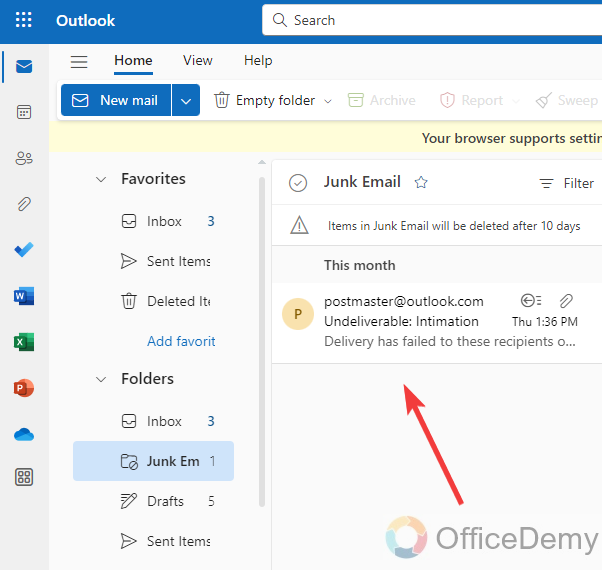
Once you have logged in to your Outlook account, to see junk emails in your account, look at the left folder list panel where you will find the “Junk Emails” folder. When you open this folder, you will be able to see all junk emails as can be seen below.
Step 2
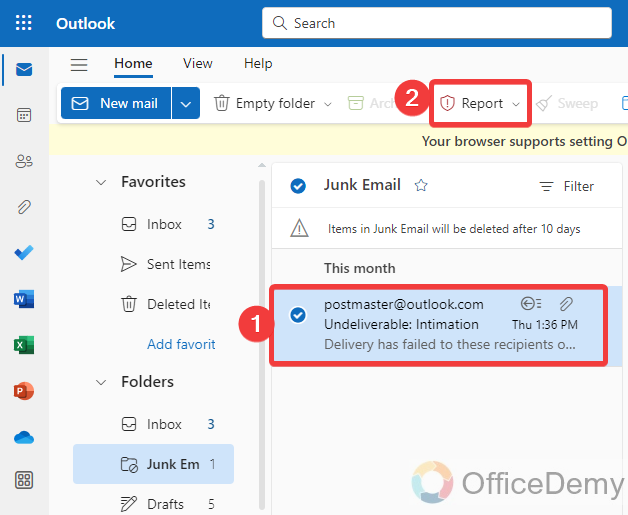
Select the email that you want to stop by going to junk as I have selected the following email. After selecting the email, click on the “Report” button as highlighted in the following picture.
Step 3
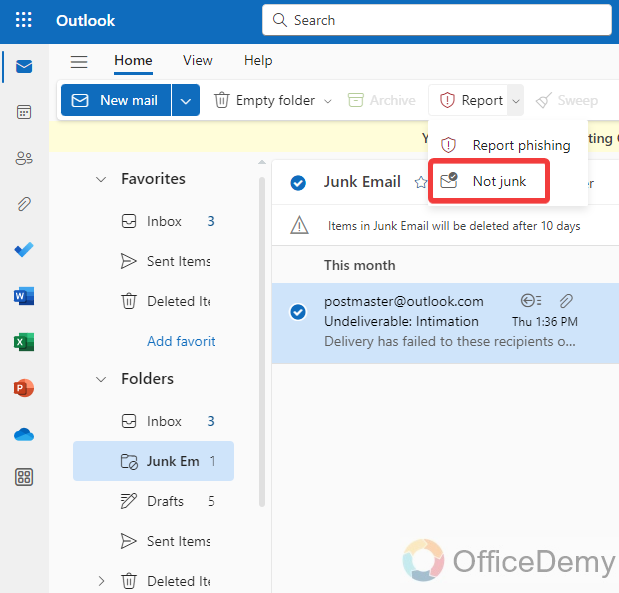
When you click on this Report button, a small drop-down will drop, in this drop listed, you will find a “Not Junk” button. Click on it to stop going your email to junk in Outlook.
Step 4
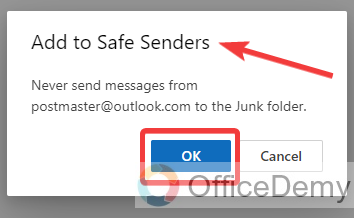
When you click on the “Not Junk” option, a small pop-up will appear in front of where it will ask you to add your recipient to safe senders.
That means that the user will be added to a safe senders list that will never go for junk.
Click on the “OK” button to add the recipient to the safe sender.
Stop Emails Going to Junk Outlook 365 -Desktop App
In this tutorial, we will learn how to stop emails from going to junk on the Outlook web version.
Step 1
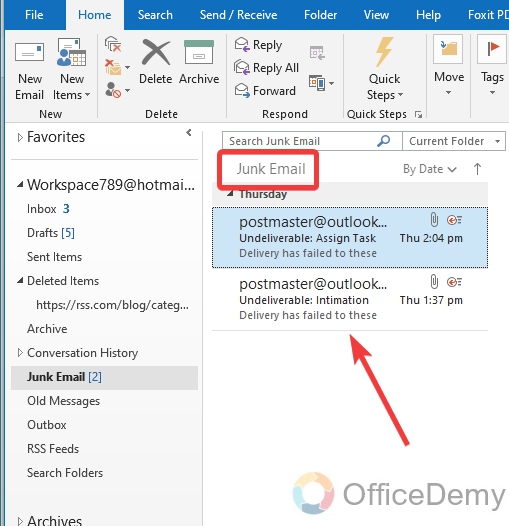
As you can see in the following example, these are the junk emails we have in our account. Let’s see how to stop them from going to the junk in Outlook.
The first thing you need to do, just select your email.
Step 2
After selecting the email press, the right click of the mouse on it, and a drop-down menu will open where you will find a “Junk” option, clicking on this junk option will give you another expanded menu, click on the “Not Junk” option in this menu.

Step 3
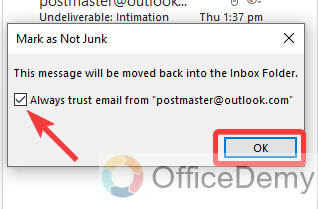
When you click on the “Not Junk” option, a small pop-up will appear in front of you where you will see an unchecked option labeled “Always trust email“. Check mark this option to add the sender to the trust emails list that will never go for junk. Now just click on the “OK” button to close this window.
Stop Emails Going to Junk Outlook 365 – By Safe Senders
One of the hundreds of Outlook’s features is the “Safe Senders” feature. If you have trust in any user, you can add it to the safe sender’s list then it will never go to junk in Outlook. In the following tutorial, there is a complete guide on how you can add the recipient to the safe senders list.
Step 1
After opening Outlook to see junk emails first navigate the junk folder, find the email or user you want to stop going to junk in Outlook. Once you find the user, just note the email address of this user.
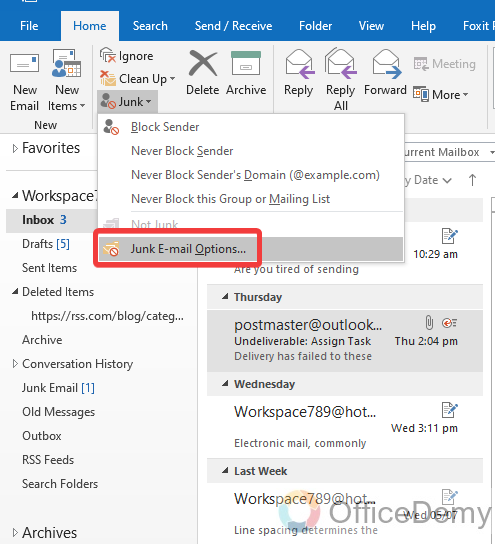
Step 2
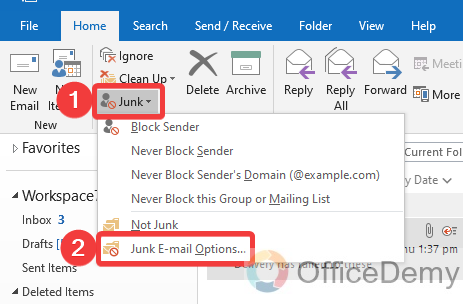
Now look at the delete section in the home tab, you will see the “Junk” option. When you click on this junk option, it will drop down for more options where you will find “Junk Email Options” as mentioned below.
Step 3
When you click on “Junk email options“, a new dialogue box will open as can be seen in the following screenshot. On this dialogue box go into the “Safe Senders” tab as directed below.
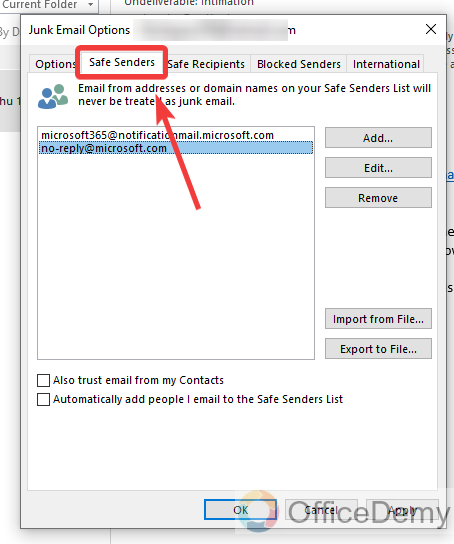
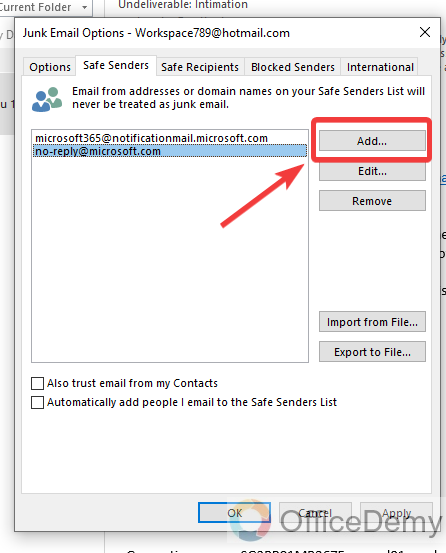
Step 4
After opening the “Safe Senders” tab, click on the “Add” button to add a new email to the safe senders list.
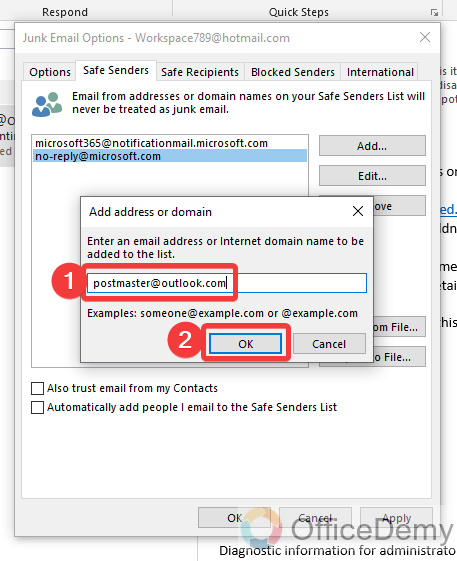
Step 5
As you click on add button, a small pop-up will appear in front of you where you will write the email address that you have noted before. After writing the email address simply click on the “OK” button.
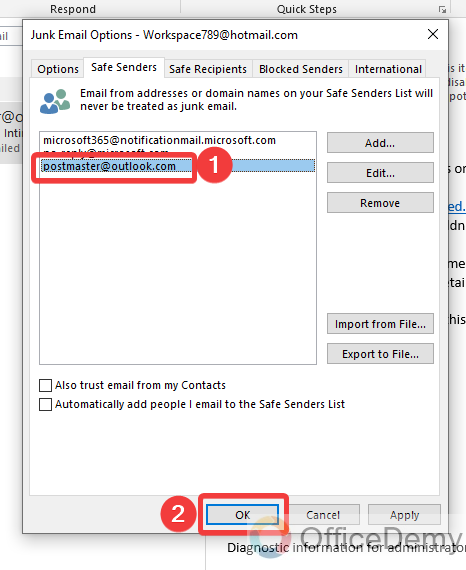
Step 6
As you can see in the following example that email address has been added to the safe senders list. Now click on the “OK” button to save this window.
Once an email address is added to the safe senders list, any email regarding this email address will never go to junk in Outlook.
Stop Emails Going to Junk Outlook 365 – By Never Block Sender
Although all the above methods are quite enough to stop emails from going to junk in Outlook there is one more method by Never Block Sender through which you can stop emails from going to Junk Outlook.
Step 1
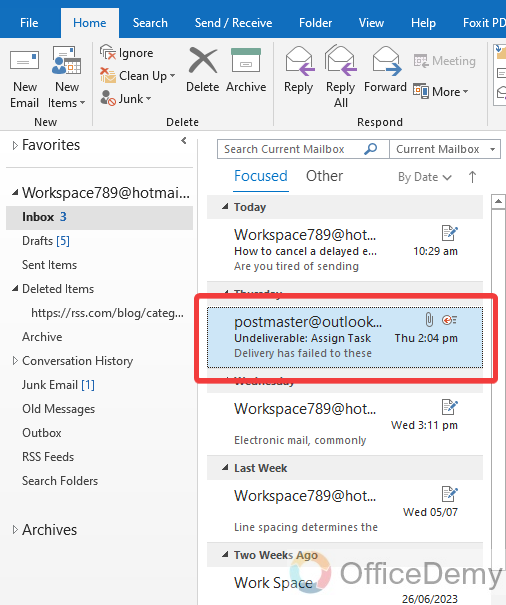
First, find the user in your inbox that you want to stop from going to junk in Outlook. Once you find it, select the email I have selected below.
Step 2
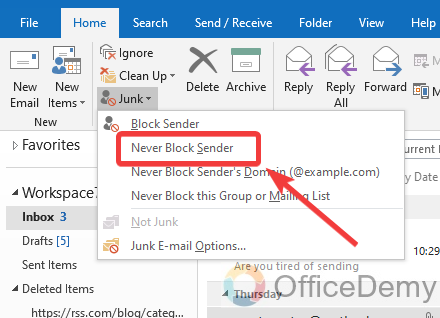
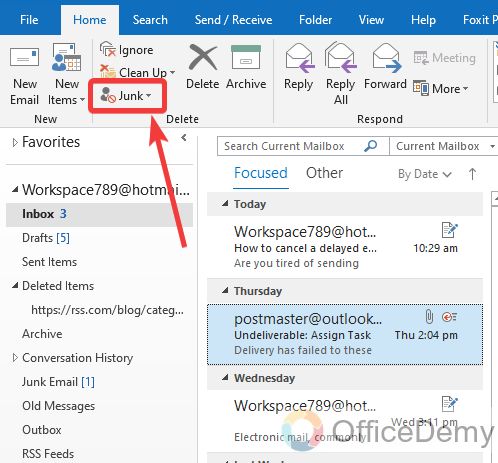
After selecting the email click on the “Junk” option located at the home ribbon in the delete section as can be seen in the following picture. You will see the “Never Block Sender” option when you click on this junk option.
Step 3
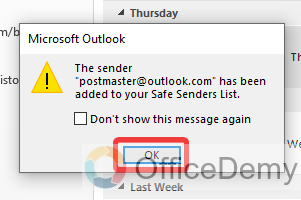
When you click on this “Never Block Sender” option, a small pop-up will appear in front of you that will notify you to add the recipient to the safe sender list. Click on the “OK” button to confirm.
In this way, you can stop emails from going to junk for any email address.
Frequently Asked Questions
What Are the Recommended Methods to Prevent Spam Emails in Outlook?
To effectively tackle the issue of blocking spam in outlook, there are a few recommended methods to consider. Firstly, regularly updating and maintaining your spam filters and settings can help identify and divert potential spam emails. Additionally, being cautious while sharing your email address, refraining from clicking on suspicious links, and marking spam emails as such, all contribute to a more secure email experience.
Q: How to stop emails from going automatically to junk Outlook 365?
A: Microsoft Outlook can indicate spam or junk emails, once you have received any spam or junk email from any address Microsoft Outlook automatically detect it and automatically move it to the junk folder. If you want to stop Outlook by filtering these emails and stop it to move to the junk folder, follow the following steps as described below.
Step 1
If you are on the home tab of the menu bar of Outlook, then look at the delete section where you will see a “Junk” option as highlighted in the following picture.
Step 2
When you click on this “Junk” option, a small drop-down will open where you will have to click on it. “Junk Email Options” as highlighted below.
Step 3
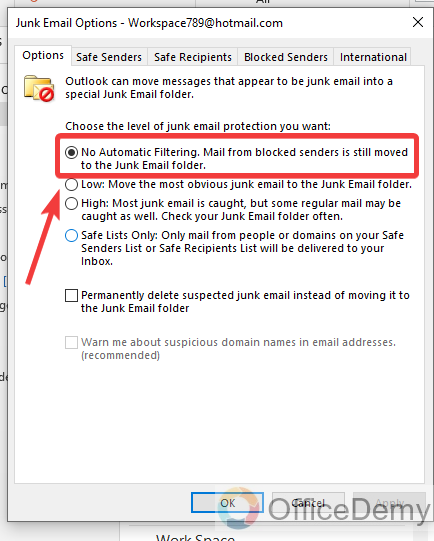
A small new window or dialogue box will open in front of you when you click on “Junk Email Options“. On this window, there is a first option labeled “Automatic filtering mail” as can be seen in the following picture. Check marked this option.
Step 4
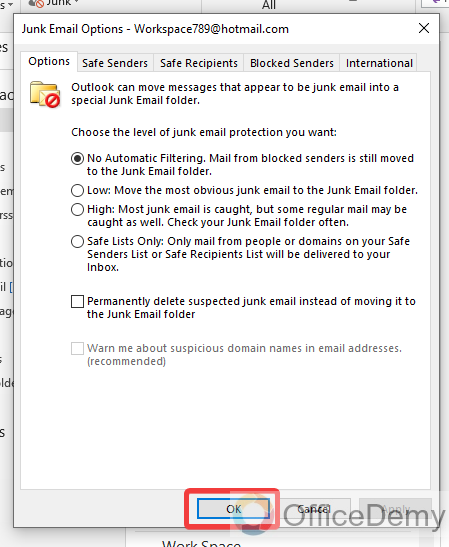
Now just click on the “OK” button to close this window.
Can Changing the SMTP Port Number Help Prevent Emails from Going to Junk in Outlook 365?
Changing the smtp port number in outlook can indeed be helpful in preventing emails from being marked as junk. By using a non-standard port, such as 587, instead of the default 25, you can avoid being flagged as spam by some filters. Adjusting the port settings can improve email deliverability and ensure important messages reach the recipient’s inbox.
Q: How to recover junk emails to the Outlook inbox?
A: As I have discussed above Outlook automatically detects junk emails and automatically moves them to the junk folder of your Outlook. If you have also lost some emails to the junk folder, then there is nothing to worry you can easily recover them in your inbox with the help of the following steps.
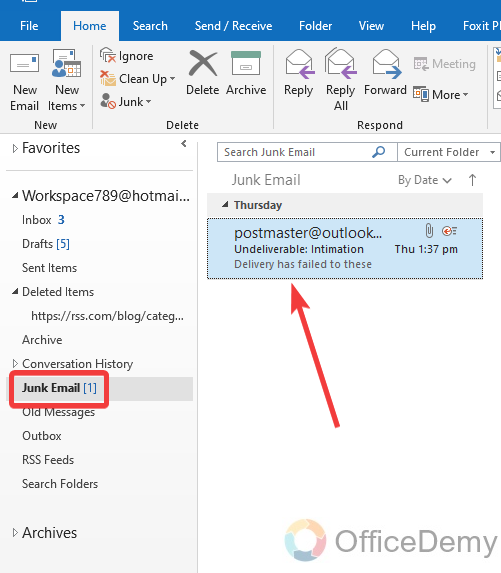
Step 1
Go into the “Junk Folder” from the folder list at your left as highlighted below. You will find all your junk emails in this folder. Select those emails that you want to recover to your inbox as I have selected below.
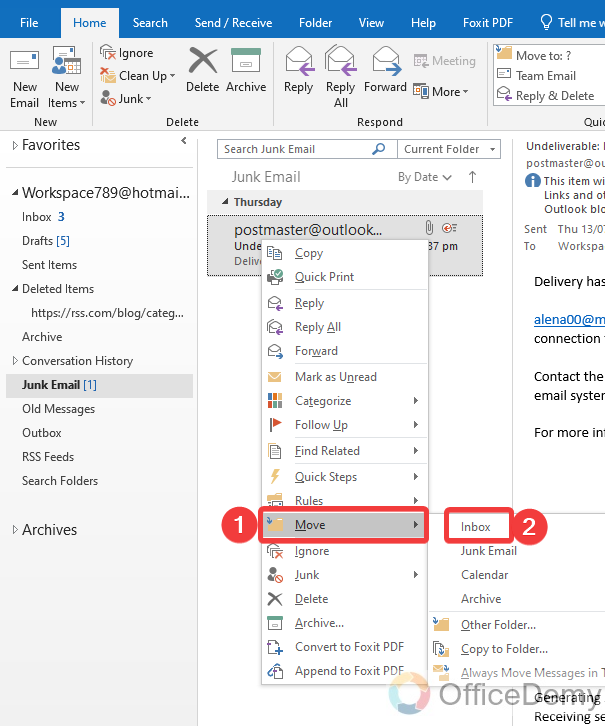
Step 2
After selecting the emails, press the right click of the mouse on it, and a drop-down menu will open click on the “Move” option to expand it more. As we have to move this email to our inbox so here, we will select the “Inbox” folder to recover these emails from the inbox.
Step 3
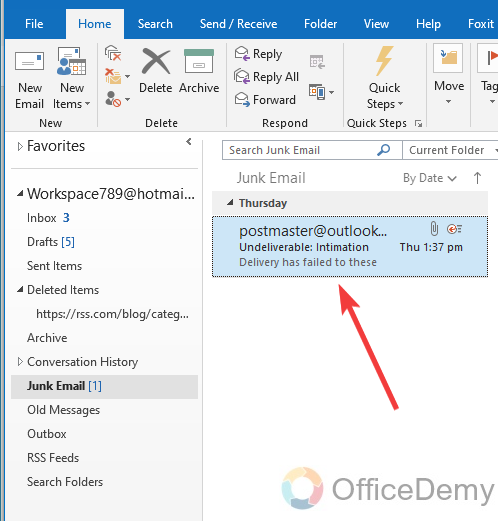
As you can see the result in the following picture that all those selected emails have been moving to our inbox.
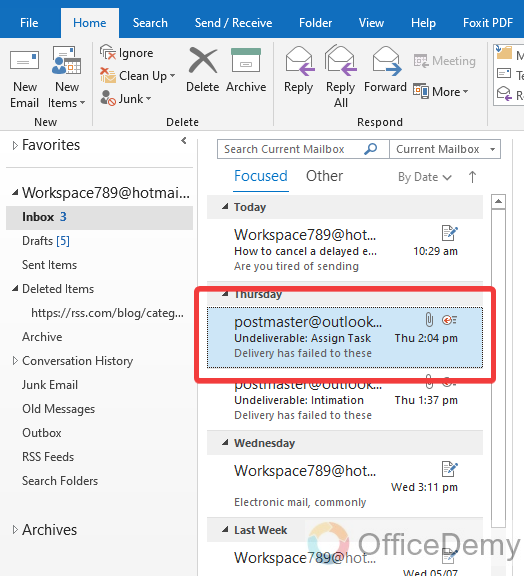
In this way, you can easily recover your junk emails to Outlook inbox or any other folder.
Conclusion
I hope you have got all the topics that are described in the above article on how to stop emails going to Junk Outlook 365. For more related topics keep visiting Office Demy.


