
To Transfer Outlook Emails to Gmail
- Export Emails from Outlook.
- Use “Google Workspace Migration for Microsoft Outlook“.
- Transfer Emails for free.
Hello, and welcome to another guide. Today, we will learn how to transfer Outlook emails to Gmail. Microsoft Outlook is an inseparable part of email handling, managing emails, scheduling tasks, meetings, events, and address books. But maybe suddenly you think that Gmail is more of a features provider than Outlook and want to turn to the Gmail services then do not wonder how to transfer your Outlook emails to Gmail.
In this article on how to transfer Outlook emails to Gmail, we will teach you the easiest way to transfer Outlook emails to Gmail.
Importance of Transferring Outlook Emails to Gmail
Outlook allows you to send and receive email messages, manage your calendar, store names and numbers of your contacts, and track your tasks.
But sometimes you don’t want to invest in a subscription for email services and decide to move for free Webmail to manage your email communication or if you want to use both services then you should learn how to transfer Outlook emails.
How to Transfer Outlook Emails to Gmail
The procedure of transferring Outlook emails to Gmail is a little long but not as hard as it seems. You will just have to export all your Outlook data into the .PST file and then you can import it to your Gmail account. Don’t get worried or confused, let’s move towards the next section in which we will describe to you a complete step-by-step guide on how to transfer Outlook emails to Gmail so let’s start without wasting our time.
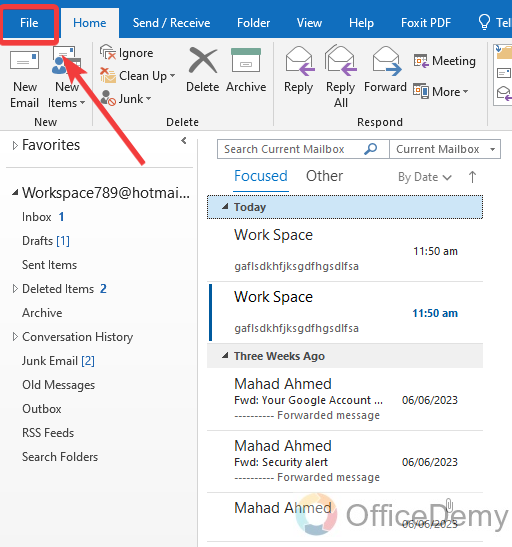
Step 1
After opening Microsoft Outlook, go into the file tab of the menu bar located at the left corner of the window.
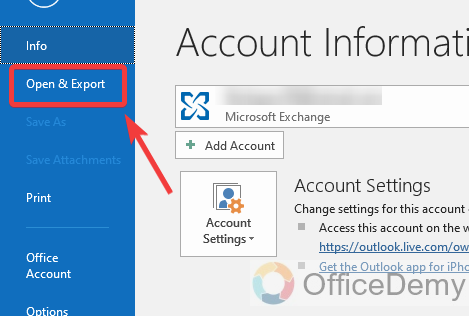
Step 2
When you click on the file tab the following window will appear where you will see a blue panel at the left side of the window. On this panel find and click on the “Open & Export” tab as directed below.
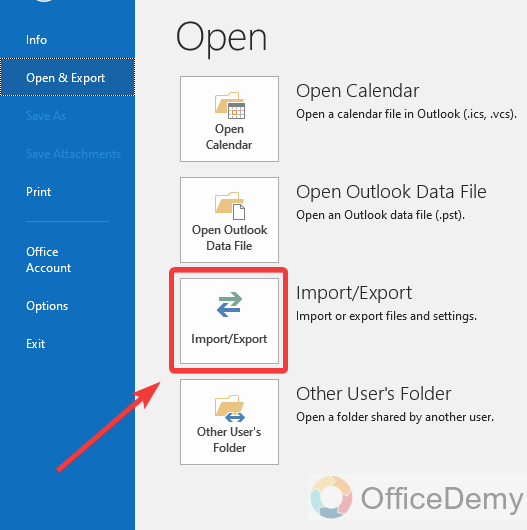
Step 3
This Open & Export tab will give you the following option in which click on the “Import/Export” button as highlighted in the following picture.
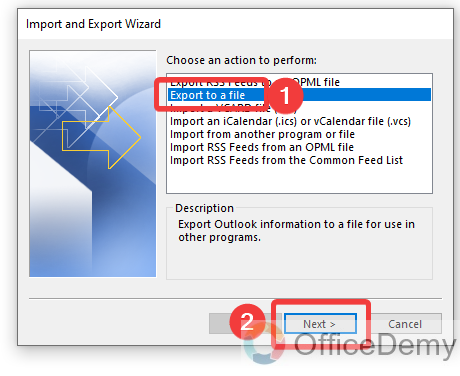
Step 4
When you click on the Import/Export button the following small window will appear in front of you where you will have to choose an action. In this list, we will select “Export to a file” to export our Outlook emails and then we will click on the “Next” button to move to the next step.
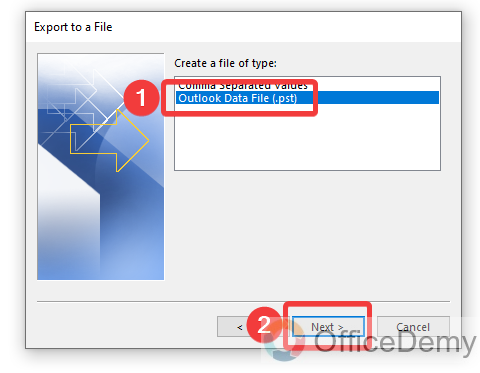
Step 5
In the next step, Outlook will ask you to select the file type in which you want to export your file. As we need to export our Outlook data, here we will select “Outlook Data File (.PST)“, and then simply click on the “Next” button to move ahead.
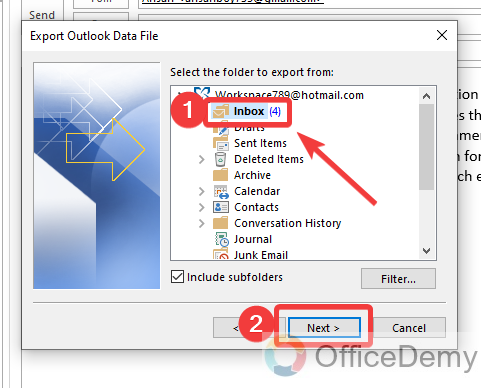
Step 6
After selecting the file type, we will have to select the folder that we want to export to a file. As we need to export all emails so here, I am selecting my Outlook inbox and then again clicking on the “Next” button.
Step 7
In the next step, you will have to select the file location where you want to save your exported file. You can select the path by clicking on the “Browse” button as highlighted below.
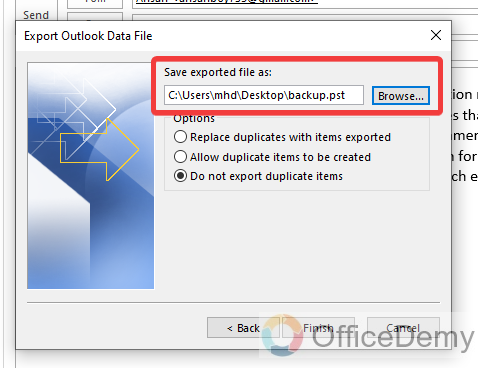
There are some more options that you will have to select according to your required criteria.
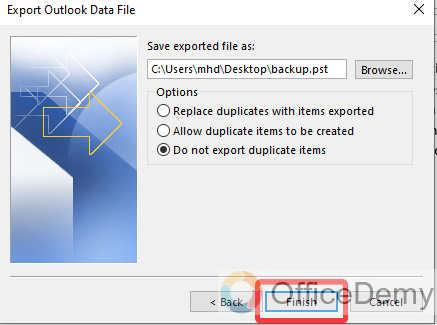
Step 8
You are almost done with exporting Outlook data now it’s time to finalize the procedure by clicking on the “Finish” button.
Step 9
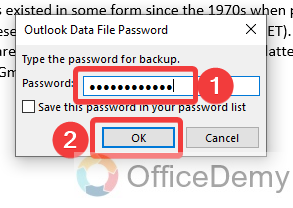
When you click on the finish button, you may have an additional pop-up that will ask you to set up an Outlook data file password. Write the password that you want to set for the file in the password dialogue box and then click on the “OK” button. This option is optional, you can also skip it by clicking on the “Cancel” button.
Step 10
Once you have got the Outlook data file now let’s start the procedure of importing Outlook data into Gmail.
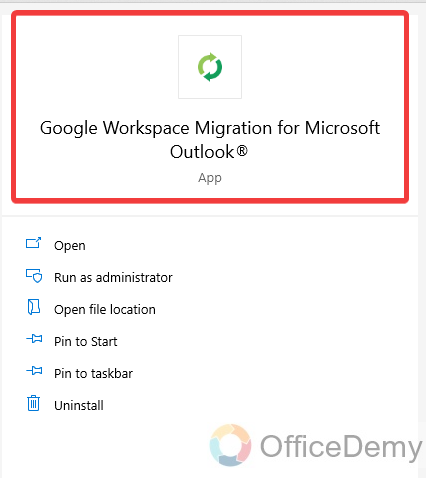
Go onto the start menu of your windows and search for “Google Workspace Migration for Microsoft Outlook” and click on it to open it.
If you don’t have “Google Workspace Migration for Microsoft” in your Windows then you can download it from the link below,
https://tools.google.com/dlpage/gssmo/thankyou.html
Once your file gets downloaded, install it, and launch it then follow the following instructions.
Step 11
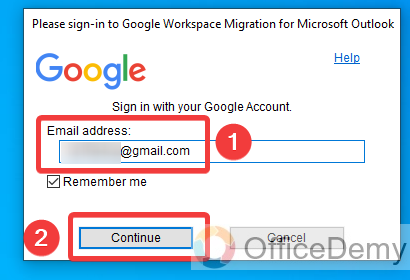
When you click on that application the following small window will appear in front of you like a Run command. Write the “Email” of your Gmail account in the email address dialogue box and then click on the “Continue” button.
Step 12
As you click on the “Continue” button, you will be automatically directed to Gmail on your web browser where you will be asked to grant permission to the Google Workspace Migration app from your account. Click on the following allow button to grant this permission.
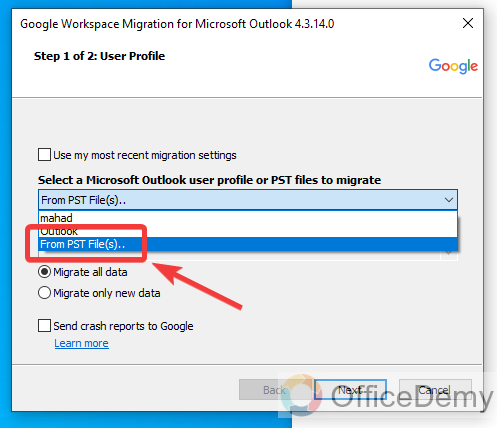
Step 13
As you permit the Google Workspace Migration app, it will automatically launch instantly in the following window. As we need to migrate data from a .PST file, here I am selecting the “From PST File” option.
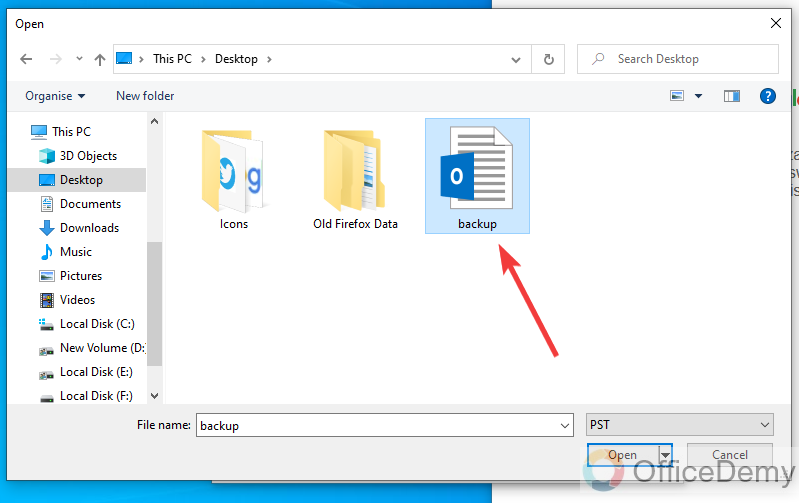
Step 14
When you click on “Select from a .PST file“. A pop-up will automatically appear in front of you which will ask you to select a .PST file from where you want to migrate data. Select the .PST file that you have downloaded before and click on the “Open” button.
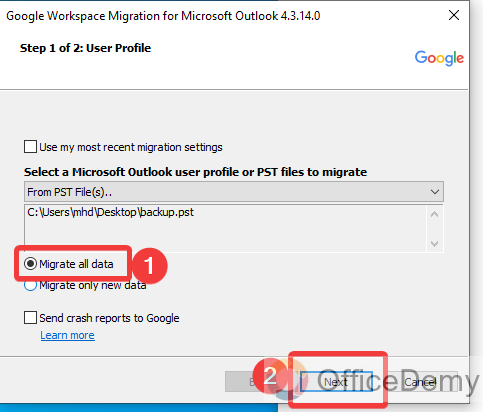
Step 15
Once you have selected the .PST file then check mark the option “Migrate all data” as highlighted in the following screenshot then click on the “Next” button to proceed with the further procedure.
Step 16
In the next tab, the Google Workspace Migration app will diagnose your .PST file and detect all the containing folders of your data. Select the folders by check mark that you want to transfer to your Gmail. After selecting the folder click on the “Migrate” button at the right bottom of the window

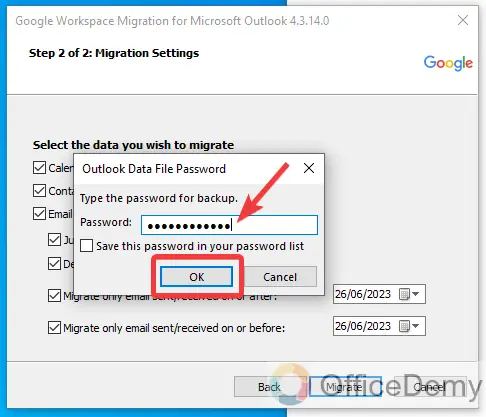
Step 17
Before transferring data from a .PST file, it will require you to enter the password that you have set before exporting the file. Enter the password and then click on the OK button.
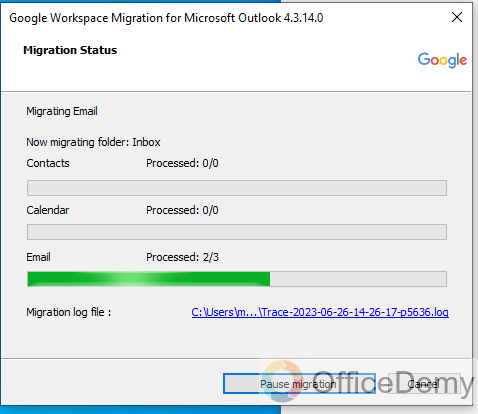
Step 18
You will see that migration will instantly start as can be seen in the following picture. Wait for a while. It may take a few minutes while filling up this green field.
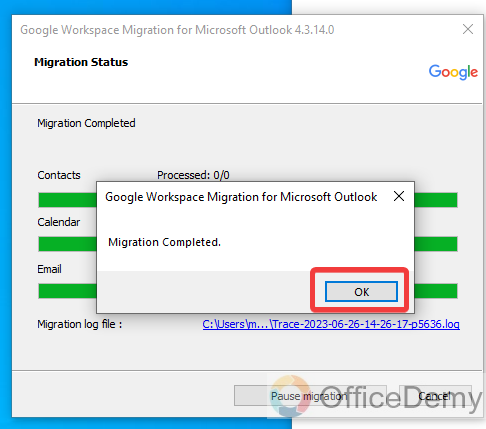
Step 19
Once that green field is filled up, you will get a pop-up message that migration has been completed that’s mean your Outlook data has been transferred to your Gmail. Click on the “OK” button to close the window.
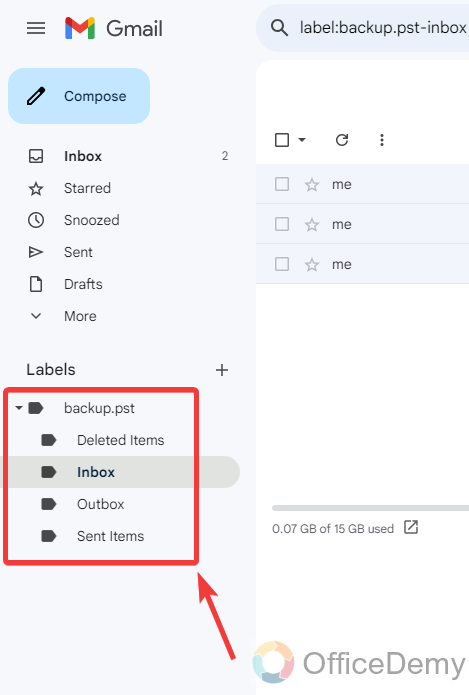
Let’s check our Gmail account to verify whether Outlook data has been transferred or not.
Step 20
Go on to your Gmail account and look at the left bottom, you will see a “Backup.pst” folder where you will see all your Outlook data as we require.
In this way, you can transfer your Outlook data to your Gmail.
Frequently Asked Questions
Is the Process for Moving Emails from Outlook to Thunderbird Similar to Transferring Outlook Emails to Gmail?
The process for transferring Outlook emails to Thunderbird involves exporting the emails from Outlook as a .pst file, and then importing them into Thunderbird. However, this process is distinct from transferring Outlook emails to Gmail, which relies on configuring Gmail as an IMAP account within Outlook. Therefore, the steps to transfer outlook emails to thunderbird differ from transferring Outlook emails to Gmail.
Q: How to remove Outlook data from your Gmail?
A: If you had added Outlook data to your Gmail previously, but now you want to remove this data from your Gmail account then there is nothing to worry about, follow the following steps to remove your Outlook data from your Gmail.
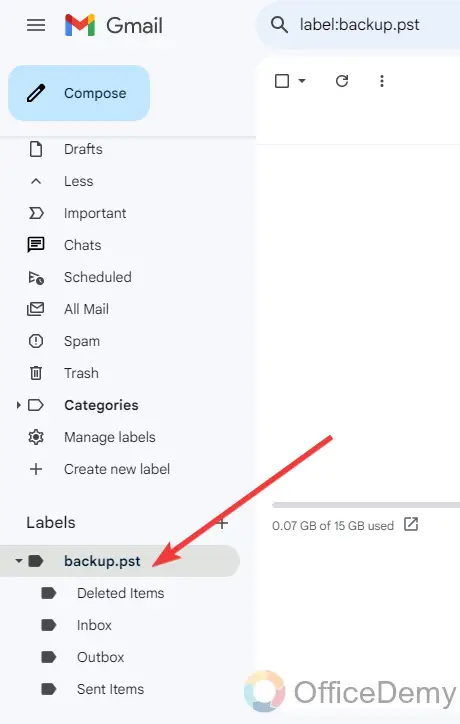
Step 1
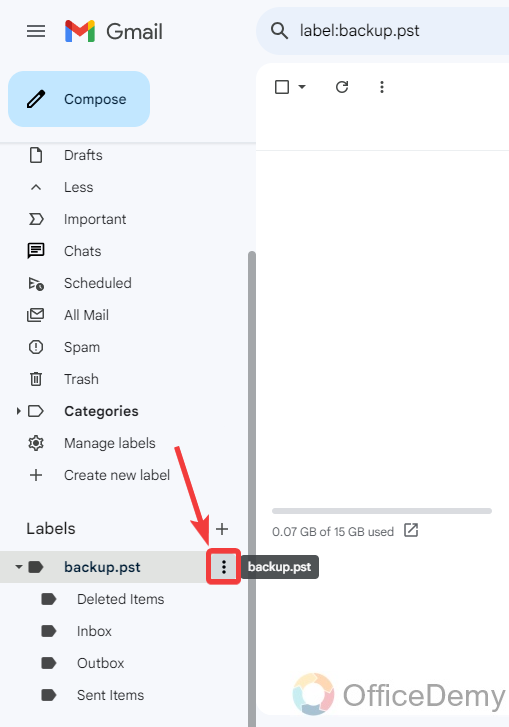
As you can see in the following picture, in the labels section, Outlook data is attached to your Gmail.
Step 2
To remove this data from your Gmail, click on this three dots option as highlighted in the following picture.
Step 3
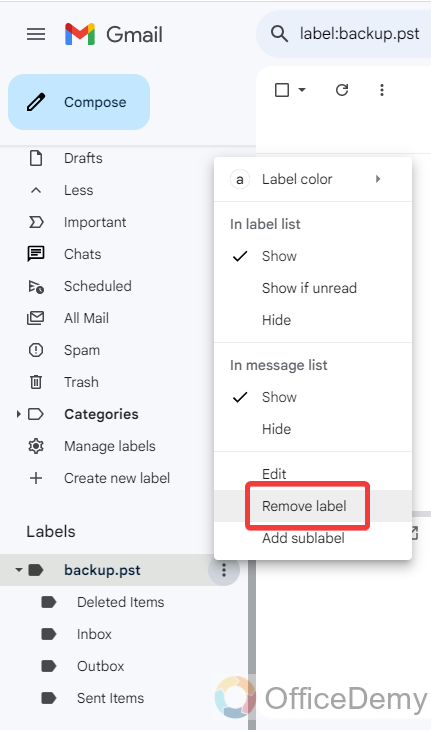
When you click on this three dots option, a drop-down menu will appear where you will see a “Remove label” option as can be seen in the following picture click on it to remove it.
Step 4
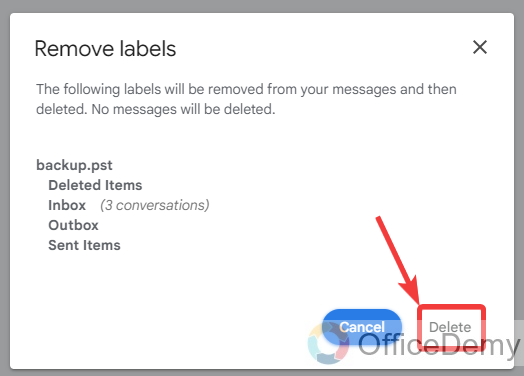
When you click on the “Remove” button, a small pop-up window will appear where it will ask you to confirm and delete the Outlook data. Click on the “Delete” button to confirm delete the data.
Step 5
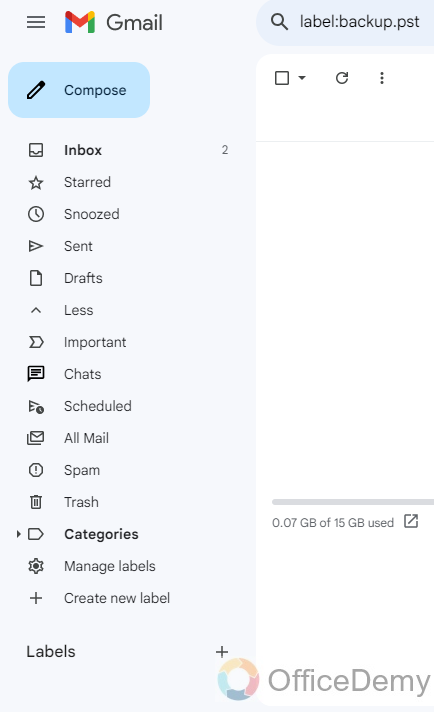
As you can see from the result in the following screenshot the Outlook data has been removed from your Gmail account.
Conclusion
That’s all about how to transfer Outlook Emails to Gmail. Moving emails from Outlook to Gmail can be hard, but it can also be easy. That depends on how you approach the task. Hope the above article on how to transfer Outlook emails to Gmail will make it easy for you. Thanks and keep learning Microsoft 365 and Google Workspace with Office Demy.


