
To Copy, Delete, Undo, Move & Resize a Text Box in Google Slides
Copy a Text box
- Select the text box.
- Click “Edit” > Choose “Copy“.
- Open the slide where you want to paste.
- Click “Edit” > Select “Paste” from the dropdown list.
Delete a Text box
- Select the text box.
- Click “Edit” > Choose “Delete“.
- The text box will be removed from your slide.
Undo a Text box
- Open your Google Slides presentation.
- Click “Edit” > Choose “Undo” from the dropdown.
- The deleted text box will be restored.
Move a Text box
- Click and drag it to your desired location.
Resize a Text box
- Select the text box.
- Click “Format,” and use the “Size & Rotation” options.
In this article we will learn about how to copy, delete and undo a text box in google slides.
The use of texts in presentations is surely an important part of making a presentation lively. This is why it’s important to know How to copy a text box in google slides. If you want your presentation to look alive you need to add text box in the slides. When a presentation is visually attractive then it is usually a useful way of getting your message across in a very simple and direct way.
For instance, how would you add a description or an explanation of your topic in a comprehensible way without the use of texts? Indeed, images, videos, illustrations, and other elements can truly help build the idea, but it would be incomplete
Texts are one of the most important elements in presentations. They are used for conveying information, for explaining the topic, or for making it more comprehensible. For instance, if you have to add a description or an explanation of your topic in a comprehensible way without the use of texts, what would you do? Indeed, images, videos, illustrations, and other elements can truly help build the idea; but it would be incomplete.
How to Copy a text box in Google Slides
To help you make better presentations, here’s a simple guide of inserting and removing text box in Google Slides. You should follow each step so that you can greatly benefit from the feature.
This is why it’s really important to know how to copy a text box in google slides. The process is easy and straightforward that even a novice can do it.
Copy Textbox using menu bar
This is one of the easiest methods. Here you can copy an entire text box using menu bar. So, let´s learn how to copy text box in google slide using menu bar,
Step 1: open your google slide presentation first on which you would like to copy text box.
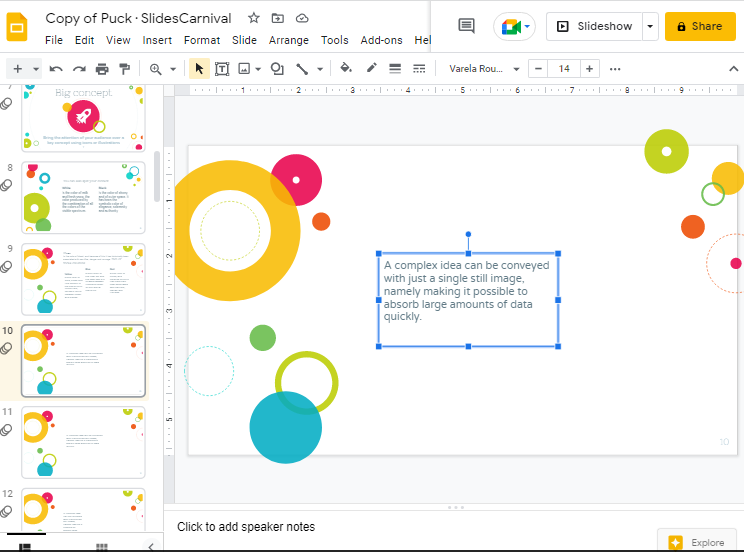
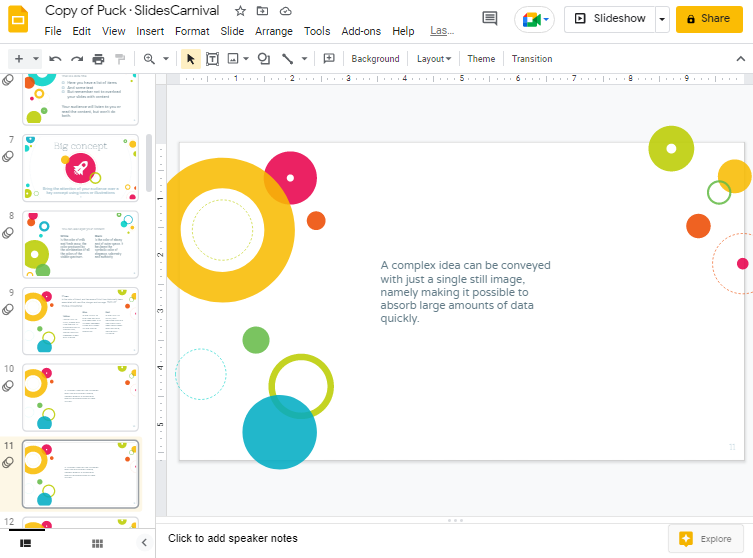
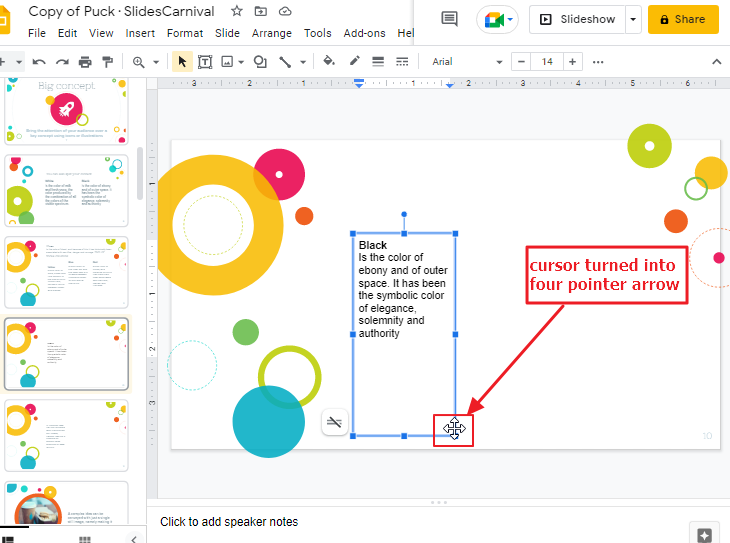
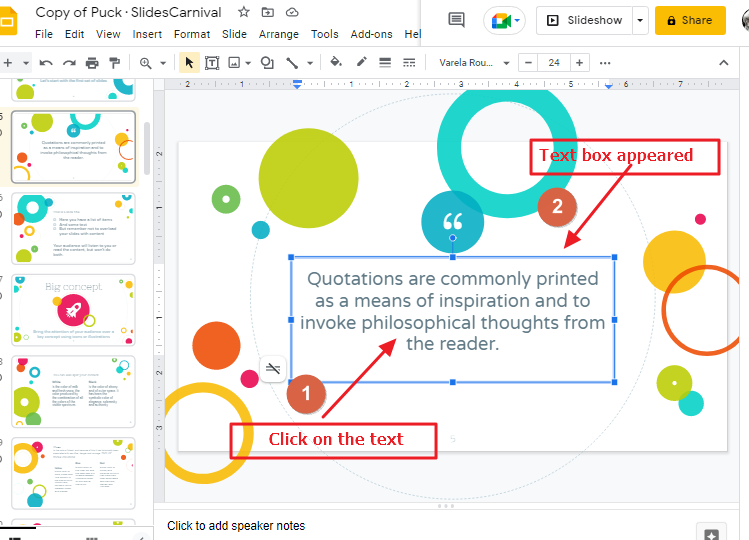
Step 2: select the text box which you would like to copy. To select a text box, click on the text so that a blue box around the text will appear.
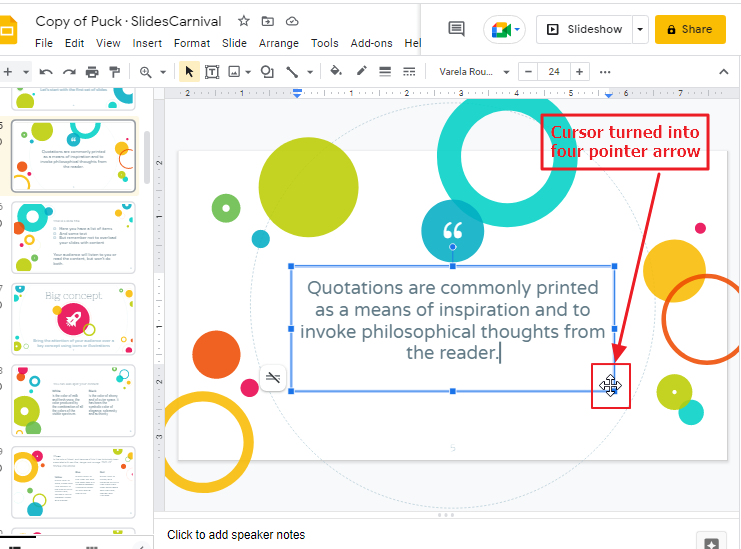
Now place your cursor over the box so that the cursor will turn into four pointer arrows. As soon as the cursor turns the new shape, click on that so that the entire box will be selected.
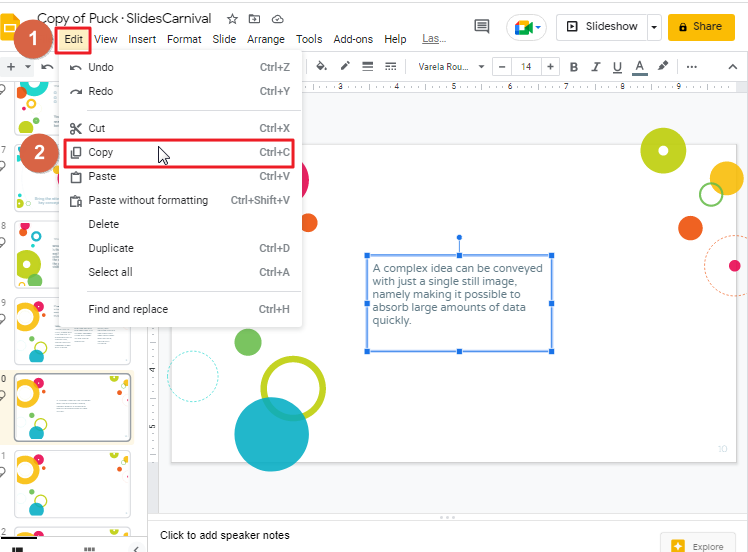
Step 3: After you have selected the text box, click on the Edit in the menu bar so that a drop-down menu will appear. Click on Copy from the list.
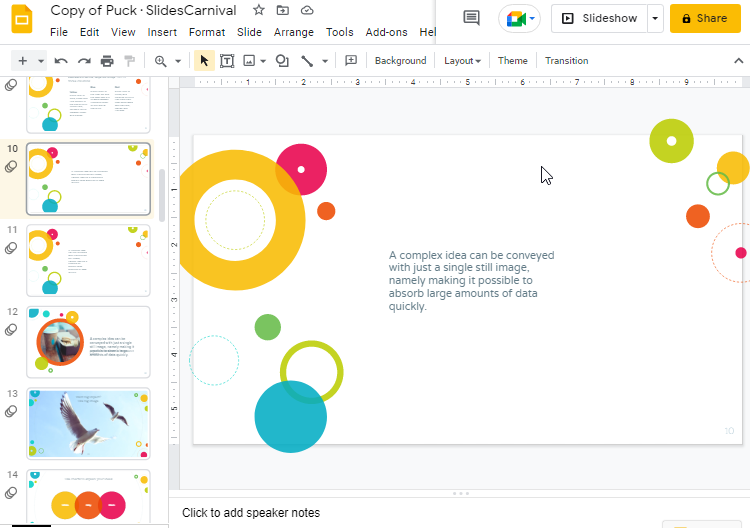
Step 4: open that exact slide on which you would like to paste the text box. Click on Edit in the menu bar. A drop-down will appears. Select Paste from the list.
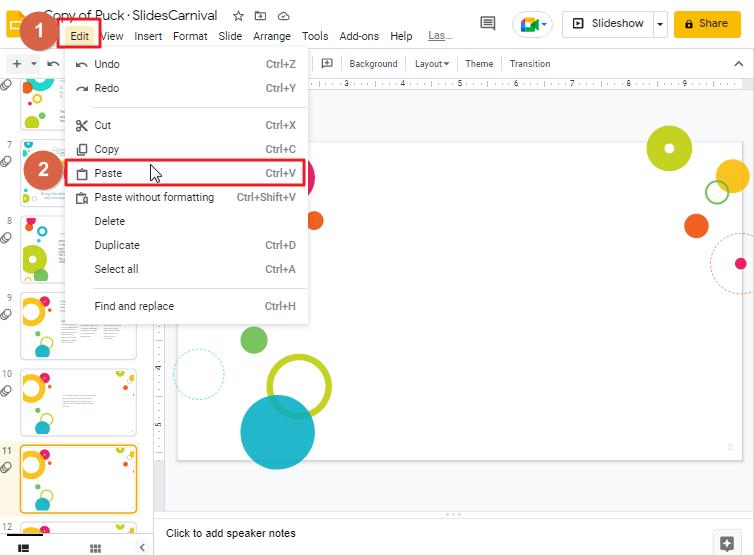
When you click on the Paste, the text box should be copied immediately.
That’s it. You are done. This is how menu bar can be used to copy and paste a text box.
Copy Textbox Right Click Option
We have already learned the technique of copying a text box by using menu bar in the method 1. Now I will describe another method of copying a text box in google slide using right click option.
Follow the steps mentioned below to copy and paste a text box using right click option,
Step 1: open your google slide presentation first on which you would like to copy text box.
Step 2: Select the text box which you would like to copy. To select a text box, click on the text so that a blue box around the text will appear.
Now place your cursor over the box so that the cursor will turn into four pointer arrow. As soon as the cursor turns the new shape, click on that so that the entire box will be selected.
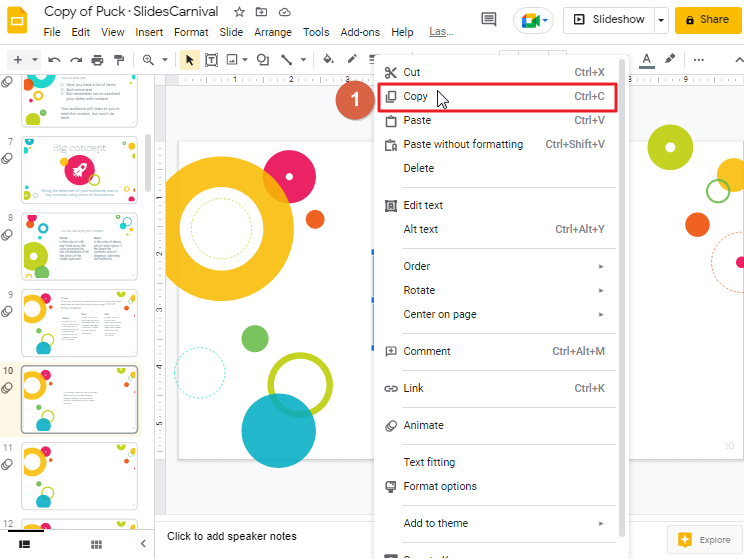
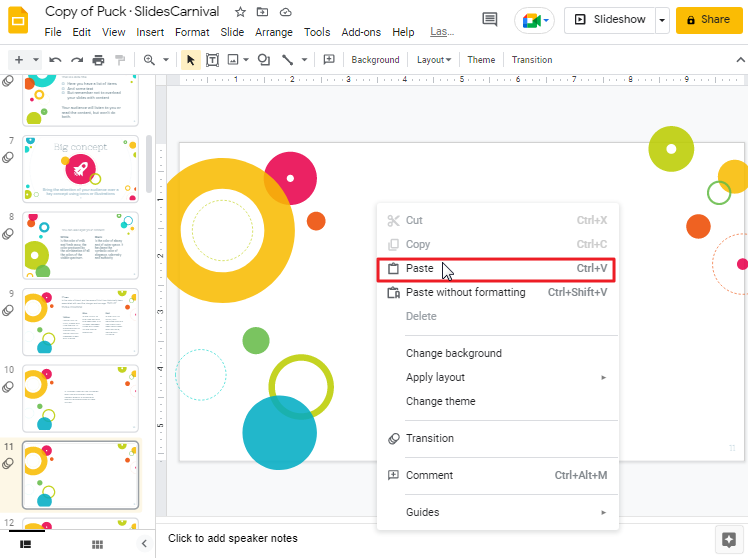
Step 3: Once the text box is selected, right click so that a context menu will appear. Select copy from the list.
Step 4: Open that exact slide on which you would like to paste the text box. Then Right click on the slide so that a context menu will appear. Click on the Paste option from list.
When you click on the paste, the text box should be copied immediately.
That’s all about coping a text box via right click option. You can follow this method and copy a text box in google slide if you don’t want to follow the method 1.
Copy Textbox using Keyboard Shortcut
If you like to work faster and only prefer using keyboard shortcuts then I would say this method will benefit you the most. Follow these steps to copy a text box in Google Slide using key board shortcut.
Step 1: open your google slide presentation first on which you would like to copy text box.
Step 2: Select the text box which you would like to copy. To select a text box, click on the text so that a blue box around the text will appear.
Now place your cursor over the box so that the cursor will turn into four pointer arrow. As soon as the cursor turns the new shape, click on that so that the entire box will be selected.
Step 3: Once the text box is selected, press CTRL+C in your keyboard.
Step 4: Open that exact slide on which you would like to paste the text box. Press CTRL+V in your key board so that the text box will be pasted on your new slide.
That’s all about copying and pasting the text box using key board short cut, which is the third method.
You can choose any of the method according to your preference.
How to Delete a Text box in Google Slides
When you are using google slide for creating presentations, presentations are not to be used with only text boxes. there is a lot more to do in google slides. but sometimes we need to delete a text box from it. so, what I am going to tell you in this article, how to delete a text box from your google slide presentation. I will describe two methods. one way is through the menu bar and another is via right-click.
Delete a Textbox in Google Slides using Menu Bar
To delete a text box, follow these steps mention below,
Step 1: Open your google slide presentation on which you would like to delete a text box.
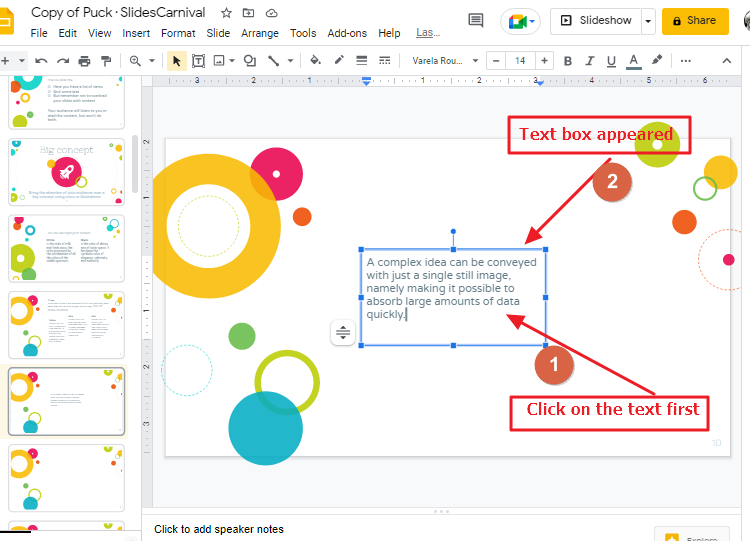
Step 2: Select the text first. To select the text, place your cursor over the text and click so that a text box will appear around the text.

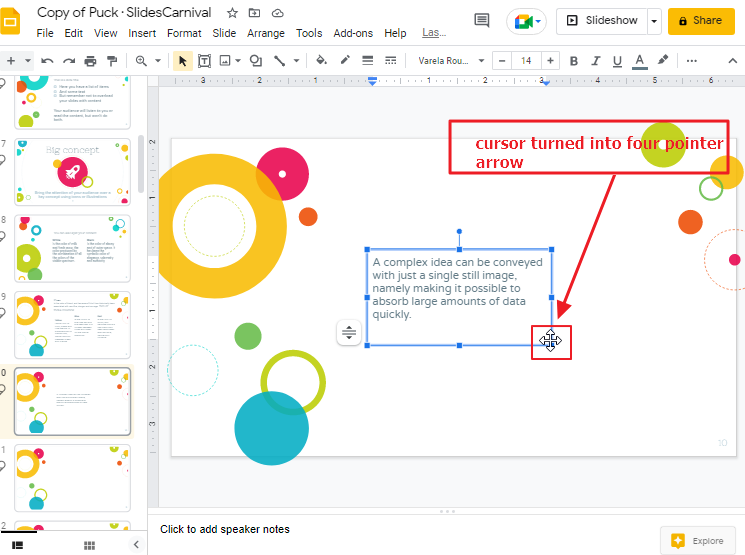
Place your cursor over the text box. You will notice that the shape of your cursor has changed, your cursor will look like a four-pointer arrow. As soon as the cursor turns its shape into four pointer arrow click on the box so that the entire box will be selected.
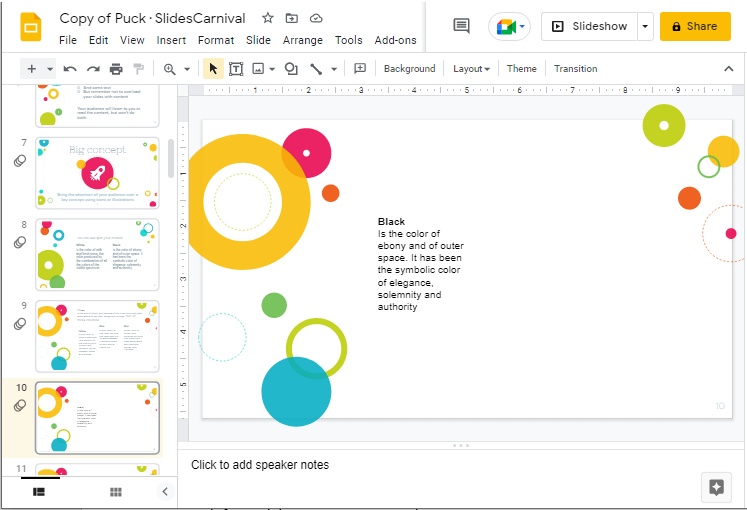
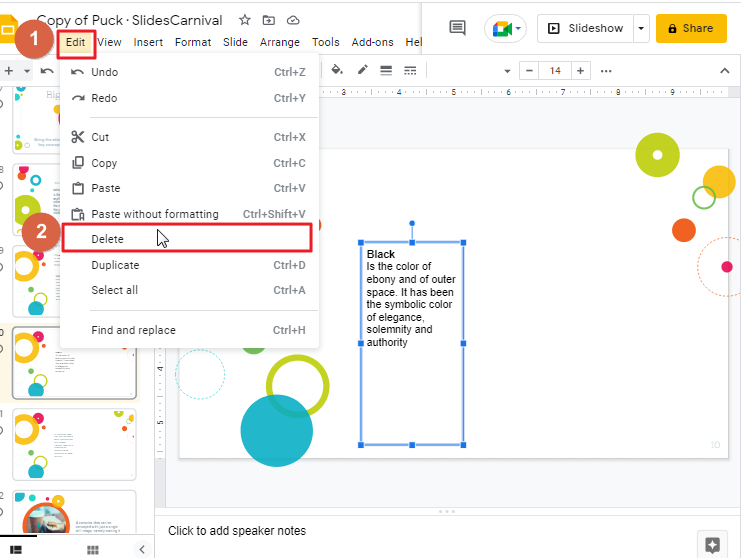
Step 3: Now click on Edit in the menu bar so that a dropdown menu will appear. then select Delete. The text box will be removed immediately from your slide.
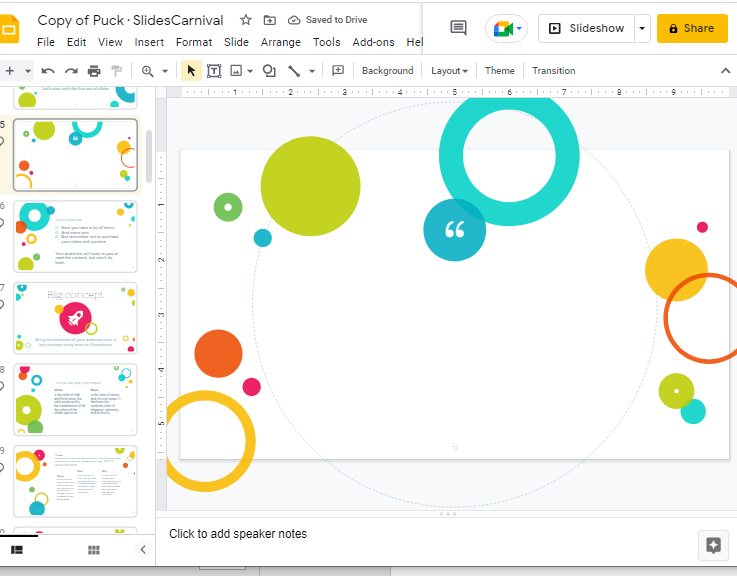
Look at your slide. The text box should disappear now.
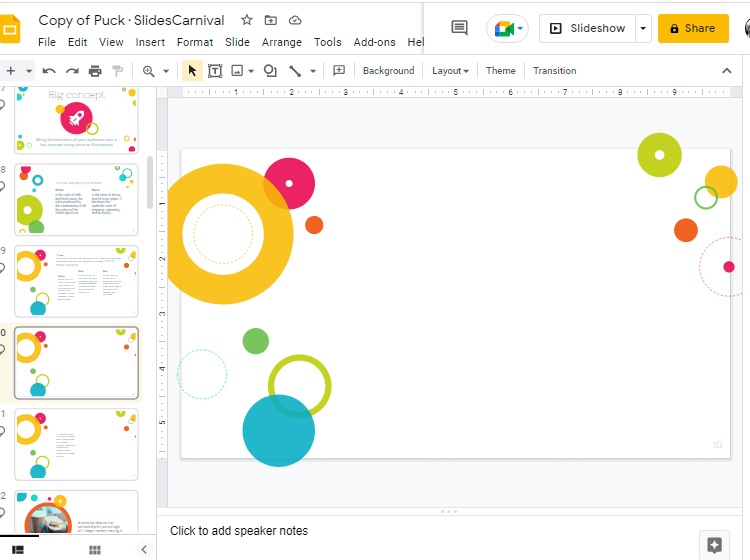
that’s it. You are done. You have successfully learned how to delete text box in google slide.
Delete a text box in google slide via right click
We already have learned how to delete a text box in google slide using menu bar. If you want to use only your mouse and want to work even faster, you can use right click method to delete a text box in google slide. This method is even faster than the previous one.
So without further delay, lets learn how to delete a text box in google slide using right click method,
Step 1: open your google slide presentation on which you would like to delete a text box.
Step 2: Select the text first. To select the text, place your cursor over the text and click so that a text box will appear around the text.
Place your cursor over the text box. You will notice that the shape of your cursor has changed, your cursor will look like a four-pointer arrow. As soon as the cursor turns its shape into four pointer arrow click on the box so that the entire box will be selected.
Step 3: After selecting the entire text box, press right-click. A context menu will appear. Select Delete from the list.
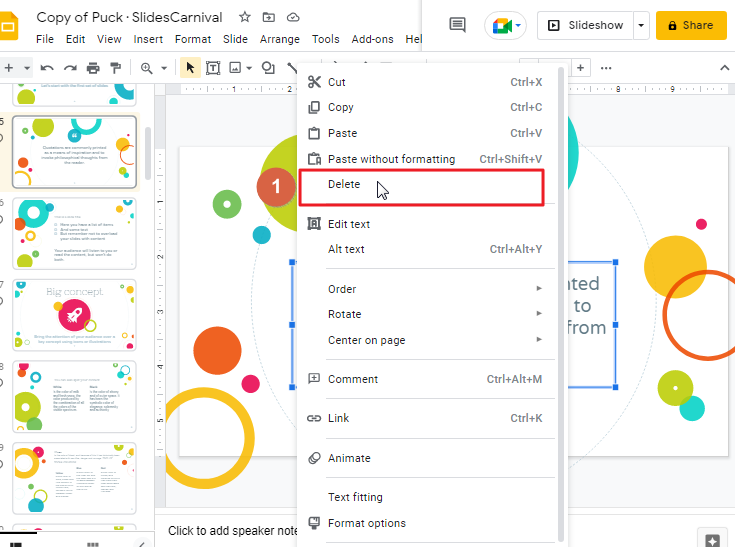
Clicking on Delete option will make the entire text box disappear.
That’s it. You are done.
Delete text box in google slide using keyboard shortcut
We have already learned how to delete a text box in Google Slides in the last two Methods described above. If you prefer to use only your keyboard then this method is for you. You can use this method to work faster. This will save you a lot of time and increase your productivity.
So lets learn how to Delete text box in google slide using keyboard shortcut,
Step 1: open your google slide presentation on which you would like to delete a text box.
Step 2: Select the text first. To select the text, place your cursor over the text and click so that a text box will appear around the text.
Place your cursor over the text box. You will notice that the shape of your cursor has changed, your cursor will look like a four-pointer arrow. As soon as the cursor turns its shape into four pointer arrow click on the box so that the entire box will be selected.
Step 3: After selecting the entire text box, press Back Space or Delete button on your keyboard.
That’s it. You are done. Your text box is deleted
You have learned how to Delete a TextBox in Google Slide. Even though google slide is very user friendly, and it offers vast options for creating presentations but sometimes you may face some issues like: What if I want to delete certain text box from my slide? How it can be possible? Well, I have figured out three easiest ways of doing this task. So, deleting a text box on your google slide should no longer be a problem for you.
How to Undo after Deleting a Text Box in Google Slides
A definition of undo in google slides is a feature to revert changes made to the presentation.
Undo allows you to undo past actions that have been recorded. This includes typing, deleting and formatting as well as changes made by other participants.
Sometimes it becomes necessary to undo a deleted text box. Let’s see how we can undo a deleted text box.
If you wish to undo deleted a text box, then there are three methods.
- By using Menu bar
- By using undo option directly
- By using keyboard shortcut
By using Menu bar
One of the most popular methods to undo a deleted a text box is using menu bar. This will bring the text box immediately back which you deleted mistakenly. So, lets learn how to do it,
Step 1: to bring back a deleted text box, click on Edit in the menu bar.
Step 2: a dropdown menu will appear. Select Undo from the list.
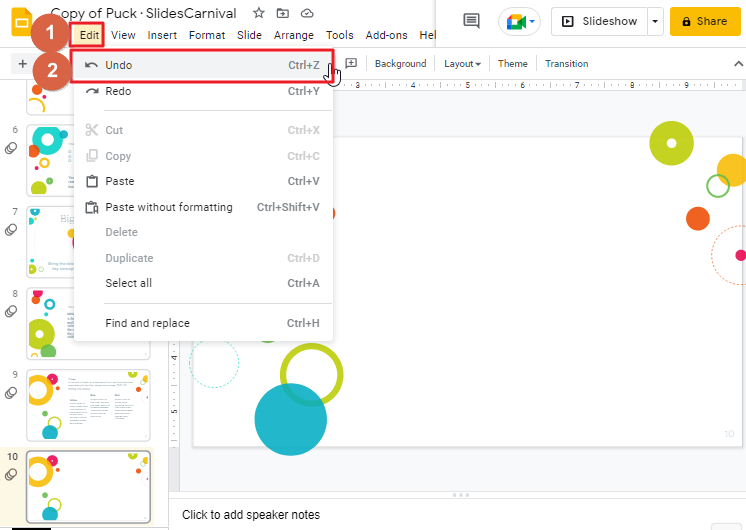
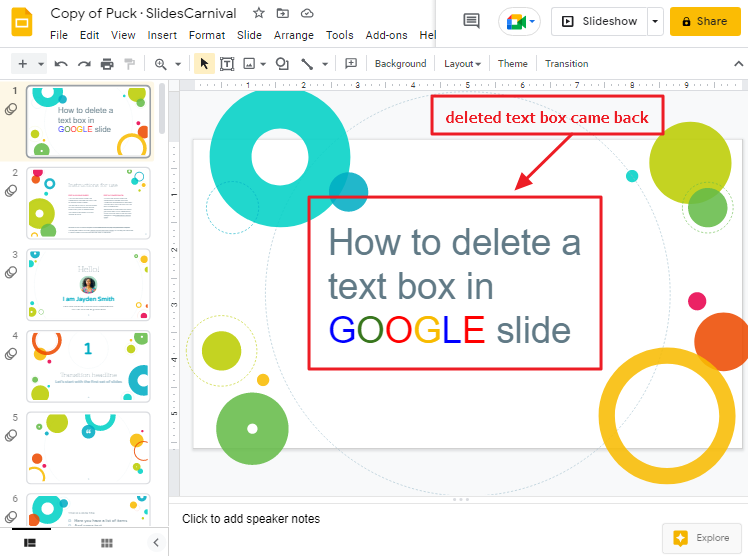
Once you click on undo. This will bring your deleted text box back.
That’s it, you are done.
By using undo option directly
The easiest way to undo a text box deletion is to use the curved arrow button in the menu bar directly. This will also bring the text box back that you deleted mistakenly. So, let’s learn about it:
To perform this method, you just need to use a single step that is click one the curved arrow in the top left of you screen.
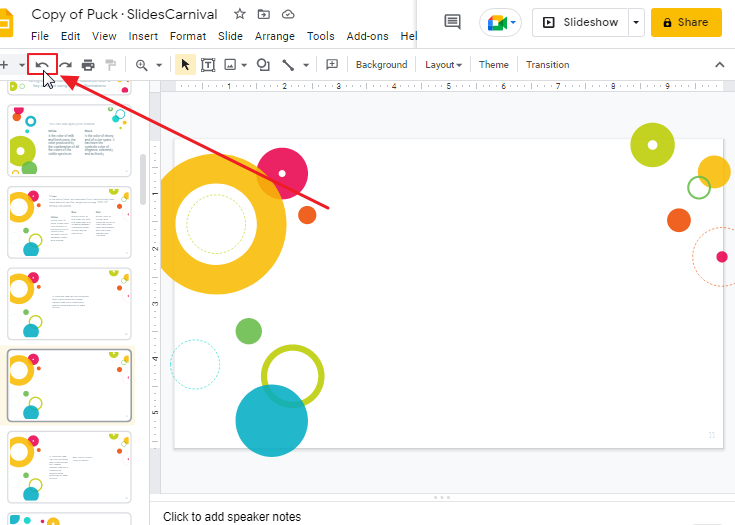
When you click on this curved arrow, this will bring your deleted text box back instantly.

By using keyboard shortcut key
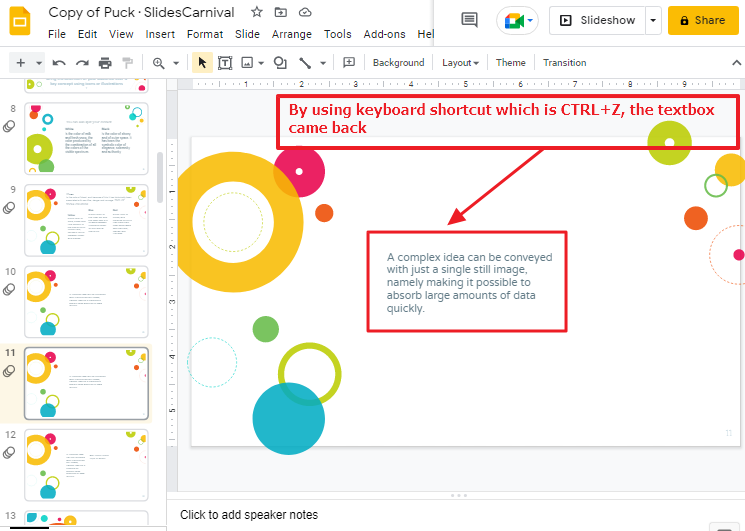
If you prefer keyboard shortcut then this method is for you. By using key board, you can undo a deleted textbox in no time. For this you need to type CTRL+Z on your keyboard.
Follow the steps mentioned below to undo a deleted textbox in google slide using keyboard shortcut.
Step 1: to bring back a deleted text box, press CTRL+Z in your key board. This action will bring back your deleted text box in just a single step.
That’s it you are done.
How to Move a Text Box in Google Slides
You can move a textbox to another position on the slide using two methods. Both of these methods are demonstrated below:
By Using the Menu bar
The tex box is a great tool for adding text to your slides. You can also move the text box quickly and easily using your mouse. In fact, you can move most of the elements on the slide in this manner. For moving a textbox through the Position feature from the menu bar, there are three quick steps:
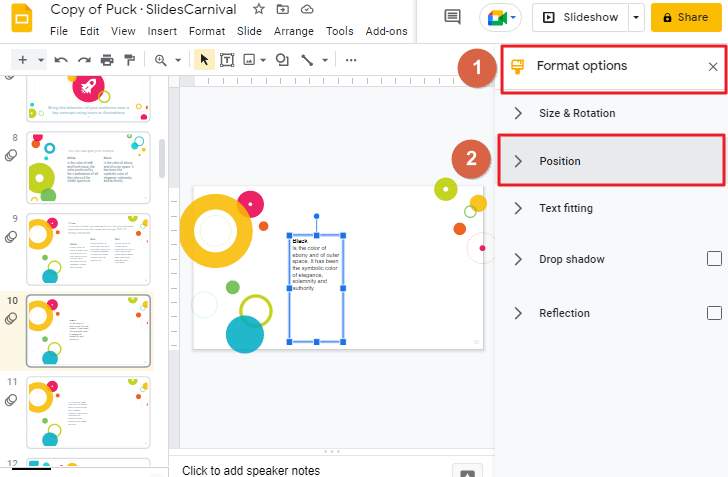
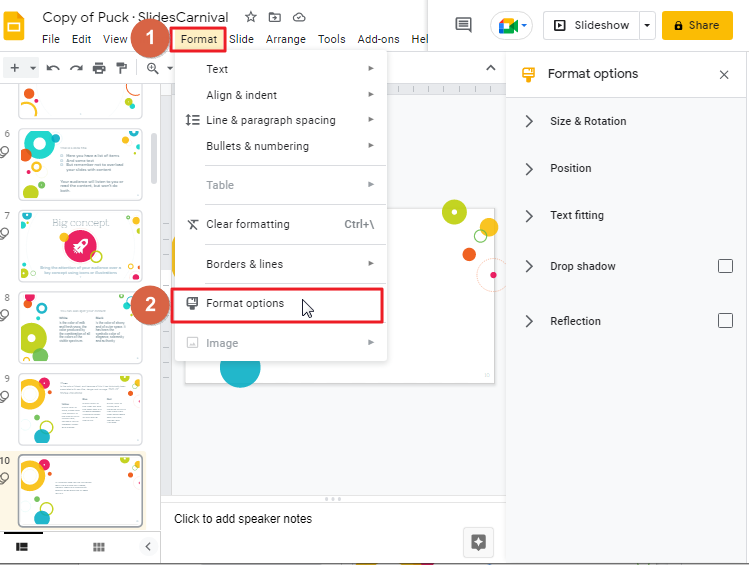
Step 1: First select textbox by clicking on it. Then click on the Format in the menu bar. A drop-down menu will appear. Select the Format options from the list.

This will open a sidebar on the right side of your screen.
Step 2: To reposition the text box, click Position in the Format options sidebar. This will reveal options for changing the position of the text box.
Step 3: Click on the Position option, another small drop-down menu appear. From here then you can change the position of text box by changing value of X, Y.
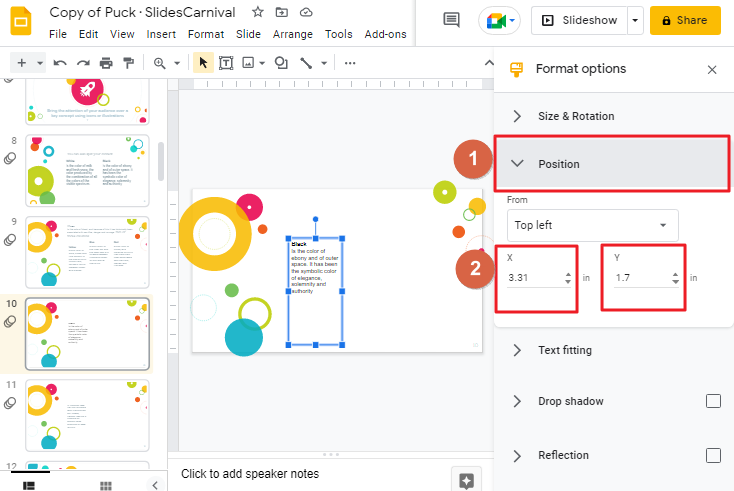
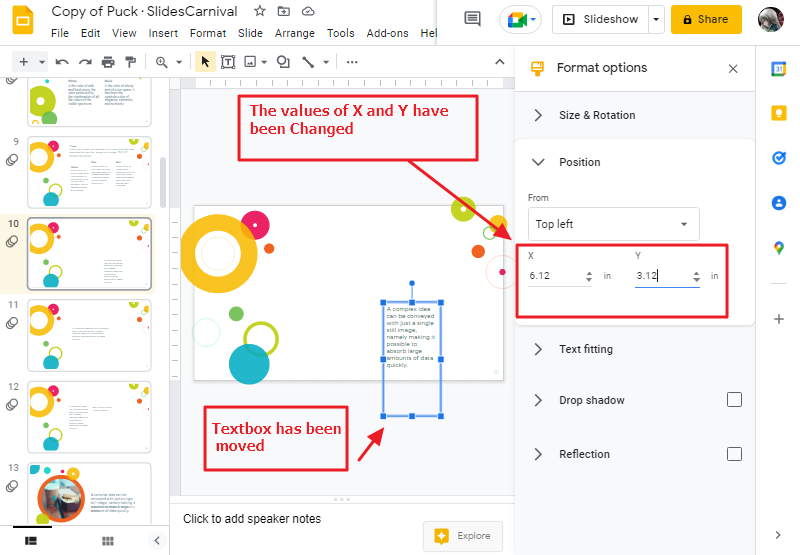
Step 4: To change the values of X and Y, click inside the X and Y value boxes. Erase the previous values which is inside the box by default once you have erased the previous values, now you can insert your preferred values. Once your values are inserted your textbox will be moved according to it.
That’s it you are done.
By using Mouse
Moving a text box is easy. Just hover over the text box, and your cursor will turn into a cross with four arrows pointed to all four sides. Now you can click and hold on to the text box, and move it wherever you like!
That’s all. You are done with moving a text box.
How to Resize a Text Box in Google Slides
Often our presentation requires modification such as resizing the textbox so that the presentation looks engaging and to create a balance in between images, texts and other elements of the slide, we must resize the text box. You can use the resize feature in a text box in a google slide to change the height and width of the text box. Follow these 3 quick steps to resize a textbox in google slide.
You can use the resize feature in a text box in Google Slides to change the height and width of the text box. Follow these 3 quick steps.
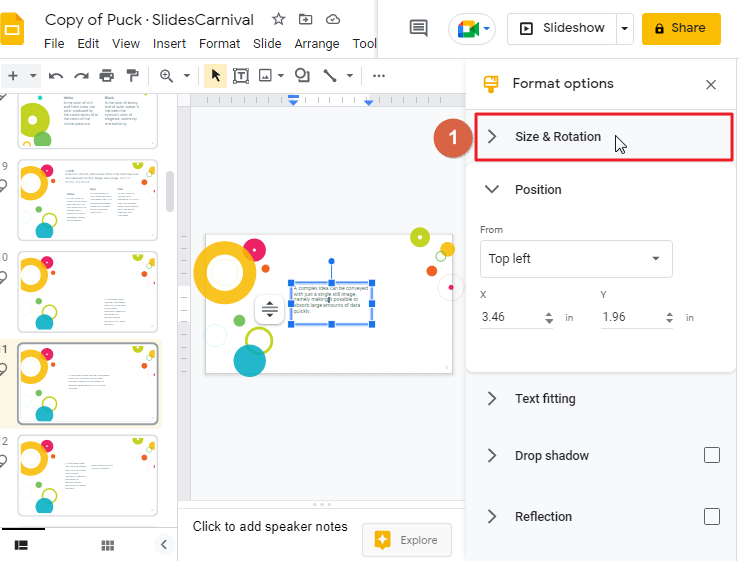
Step 1: To begin, click on the text box then select the Format option which is at the top of your screen in the menu bar. Then from the drop-down menu, click on Format options.
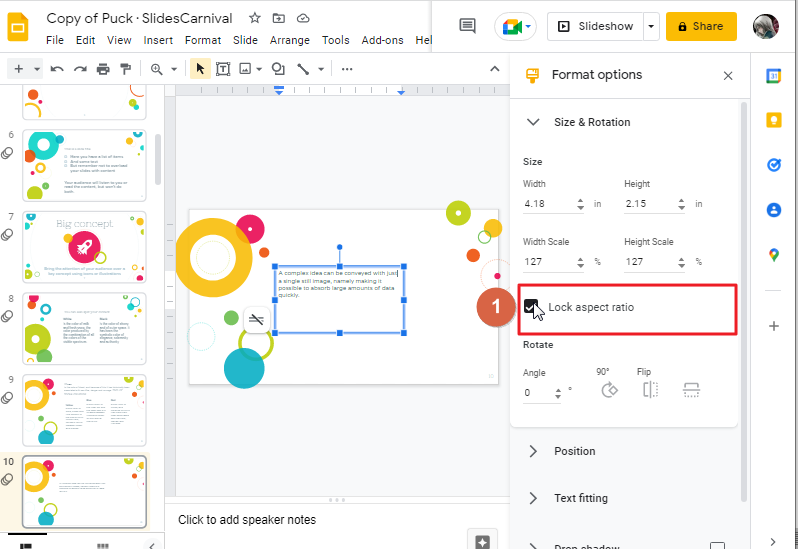
Step 2: From the Format options sidebar which is on the right side of screen, select the Size & Rotation to resize Text box
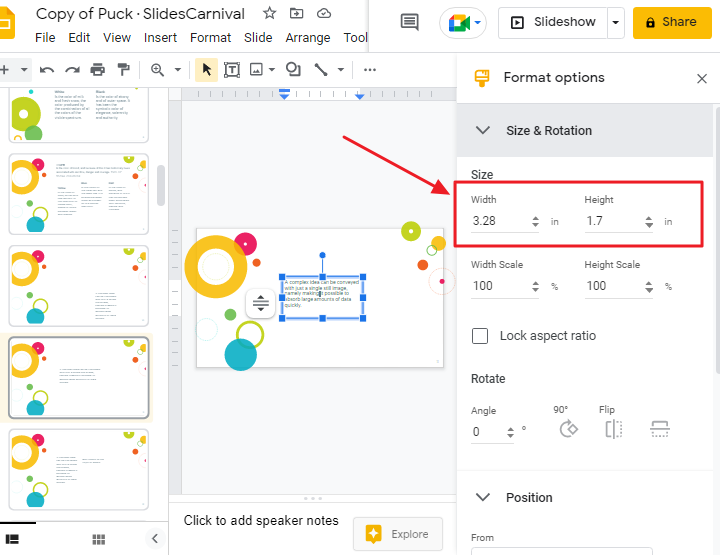
Step 3: Clicking on the size option will make another dropdown appear.
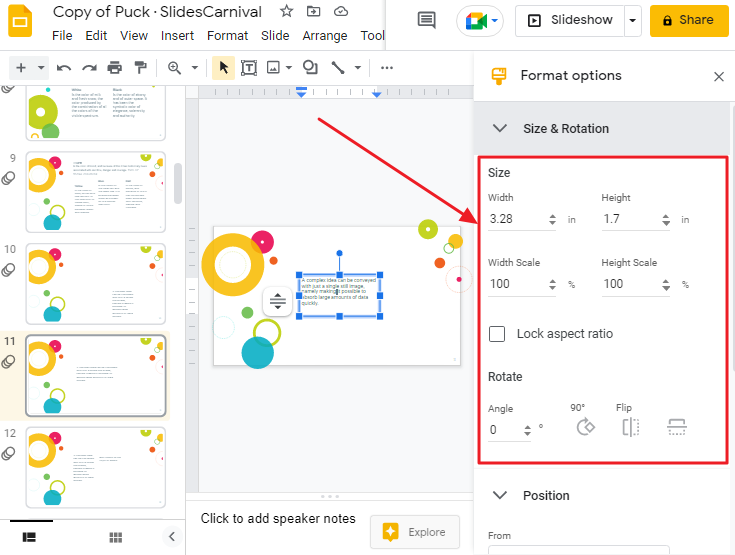
To change the size of a textbox, you have to click on the width and height boxes under the size option. There you will find values which are by default. You have to change the values.
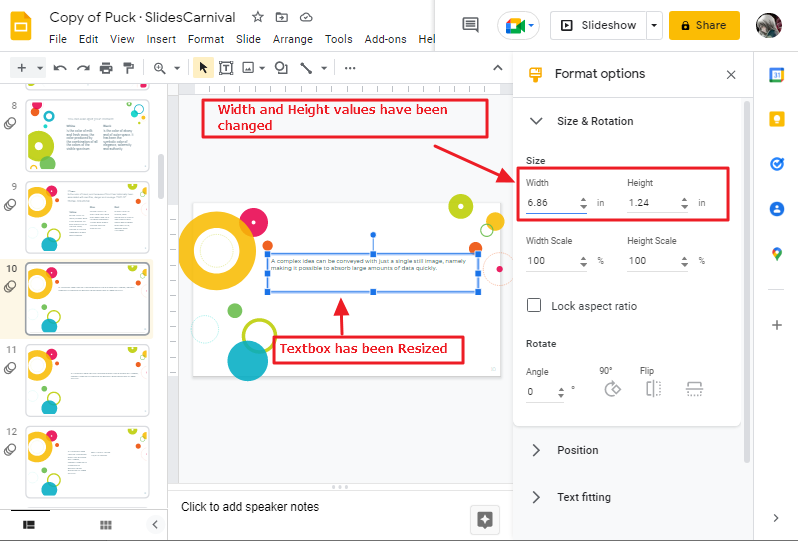
Step 4: Here I have inserted a new width value which, is 6.86 and a new height value which is 1.24
Bonus Tip
You can also preserve the width and height ratio when resizing by clicking on the Lock aspect ratio box.
Some FAQs to help you organize your work
Can I resize text boxes in Google Slides to make them easier to read?
Yes, you can resize text boxes in Google Slides. Just click and hold an edge of the box and drag your mouse to adjust the size.
How can I insert other elements into my Google Slides presentations?
You can insert images, shapes, graphs, diagrams, tables, charts, lines, and word art into your Google Slides presentations. These things are particularly helpful for creating dramatic or interesting visual aids for your presentation.
How to Change the Background Color of a Text Box in Google Slides?
To add a background color to a text box in Google Slides, first select the text box. Then click on the Fill Color option from the toolbar and choose a color as per your preference. Select a light background color if you have text that has a dark color.
Is it possible to change border color of a text box?
Yes, it is possible by following easy process. Click on the border of the textbox so that the border color icon in the menu bar will be enabled which is disable by default. Click on the border color icon so that a list of colors will appear on your screen. Select a color according to your choice.
How to Insert a Text Box in Google Slides?
In Google Slides, you can insert new text into a slide without using a text placeholder by using the Textbox feature. To add a text box in your slide, follow these 2 easy steps.
Step 1: To begin, open the slide where you would like to insert a text box. Click the Insert
Button in the menu bar, which is at the top of your screen. A dropdown menu will open.
Step 2: A drop down menu will appear now, select Text Box from the list. Now, you can draw a new empty text box in the slide.
Is there any shortcut to insert a Textbox in google slide?
Google Slides offers a quick shortcut for adding a text box in a slide. Users simply click on the Text box icon—which looks like a capital letter T, located on the toolbar at the top of the screen and then draw the box inside the desired slide.
Conclusion
It is true that visual elements can help in building your idea, while images and videos can surely be used to convey messages, it won’t be complete without the use of textbox. By now you must have understood the importance of adding textboxes in presentations.
So, now you know how to add, copy, and delete textbox in google slides. So, when you create a presentation, make sure that you include some textbox descriptions for your topic.
Well, the article is about to end. Hope you enjoyed the article on how to copy a text box in google slide. Don’t forget to share your article with your friends and colleagues. If you need some more solutions, don’t forget to check our other sections here in OfficeDemy .com


