
To Add Sections in Google Form
- Create a New Form.
- Customize the Form.
- Find the sidebar on the right, then click the “Add section” button.
- A new section (Section 2) will be created.
- Label and Describe the Section: Click on “Untitled Section” to give it a name (e.g., “Personal Information“) and provide a brief description if necessary.
Google Form allows us to collect information from the desired public in the form of responses. It also allows us to structure the questions in sections so that questions belonging to the same type can be grouped together and later reviewed together. For example, the section of Personal Information, section for Education, section for Job experience, etc. In this article, we will demonstrate how to add sections in Google Form and discuss its uses and importance.
Why do we add a section in Google Form?
Sections are like different pages on a Google Form. Each section can have its own type of question that’d help us gather more information in a structured way. For example, we can have a section for personal information where we will ask people for names, age etc. Another section can be for interests and hobbies, etc. This way, different sections of data in the form of responses can be classified. And hence, reviewing the responses from any particular section will become easier.
In the same way, any company taking job applications through Google Forms may take personal information in one section and education and experience in other sections. This way it is easier to sort out the information of the job applicants and hence they can easily call the deserving candidates for the interview. Evidently, the information structuring becomes much easier after breaking down the form questions under different sections.
How to add sections in Google Form?
We will first create a Google Form and demonstrate how to add sections in Google Forms. Let us demonstrate how to add sections below:
Create a Google Form
Let us create a new Google Form to demonstrate how to add sections. Follow the steps below for making a new Google Form.
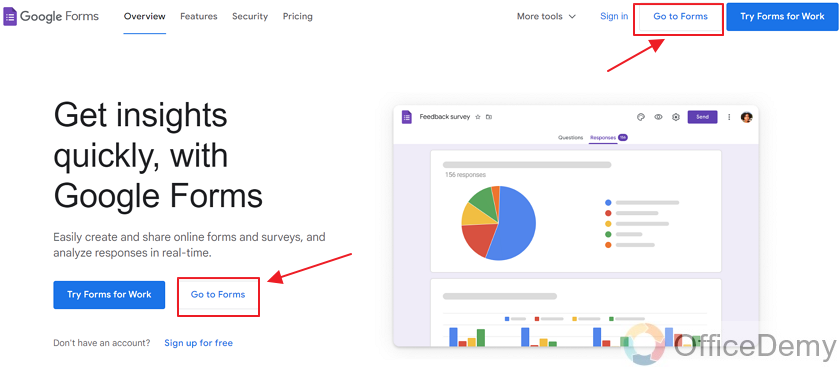
Step 1: Go to “Google Forms” website.
Click here to go to Google Forms website
Step 2: Click on “Go to forms”
There are two buttons for navigating to Forms. You can click either of the two.
You may use any of the templates provided by Google Forms as:

Or use a “blank” template to make a new empty form as:
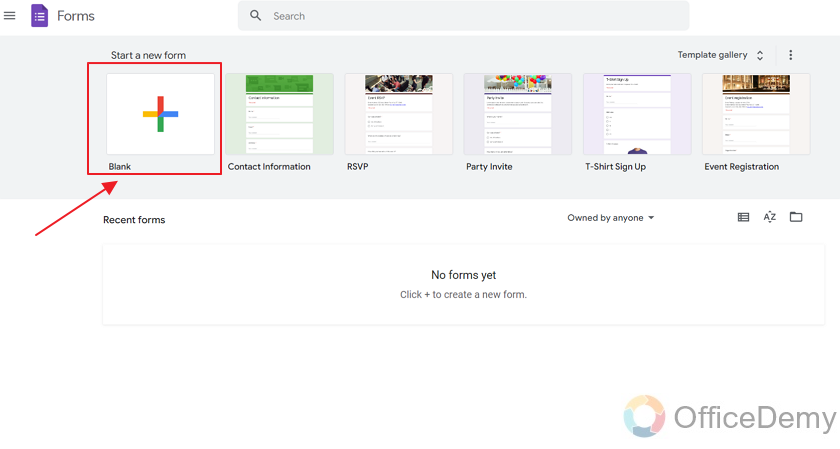
Here is a blank and empty newly created form.
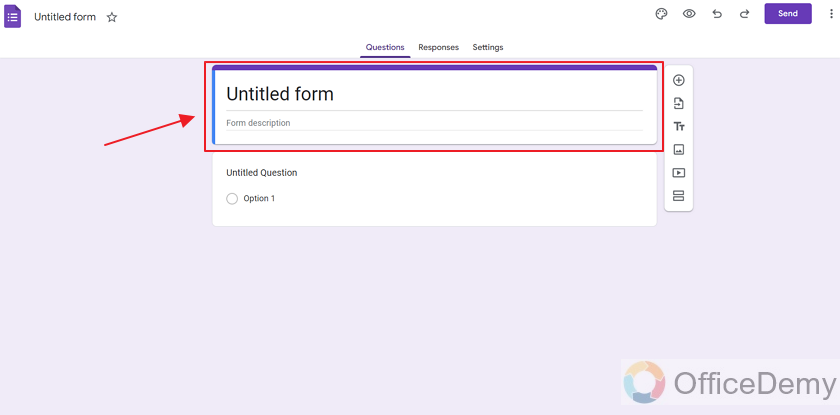
You may customize its labeling and theme as required.
In order to learn how to change background and customize theme, please refer to our article How to change the background of Google Form
Add section in Google Form
Now that we are done with creating a Google Form, let’s go ahead and see how to add a section in Google Form.
Step 1: Add section from Sidebar
A sidebar appears right next to questions which have various different options as:
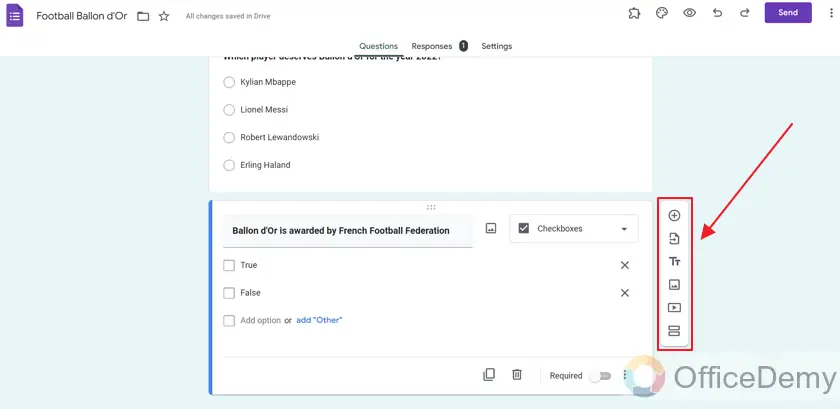
On this side bar, there is a button named “Add section” represented by a pair of boxes.
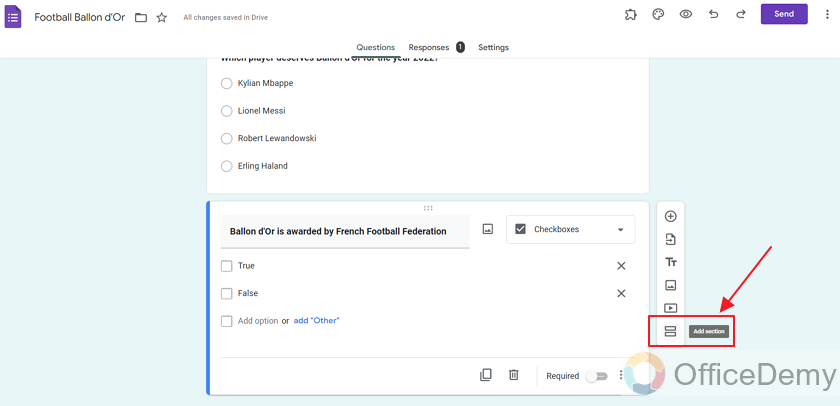
Click on this button to add a different section.
Section 2 is added as:
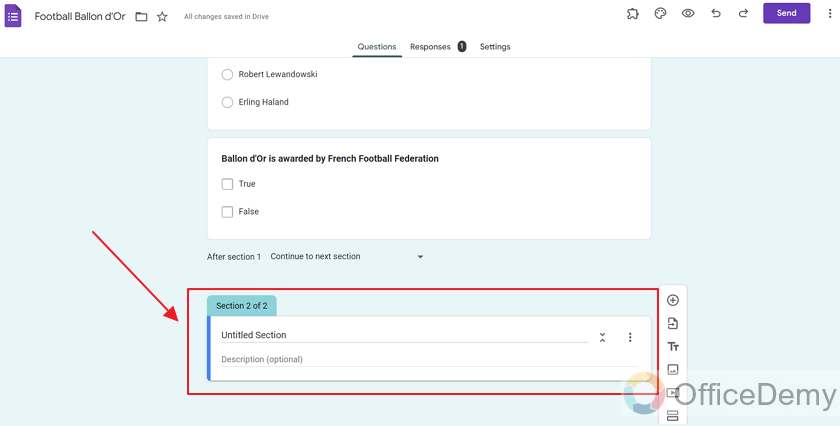
Let’s work on our section 2 now.
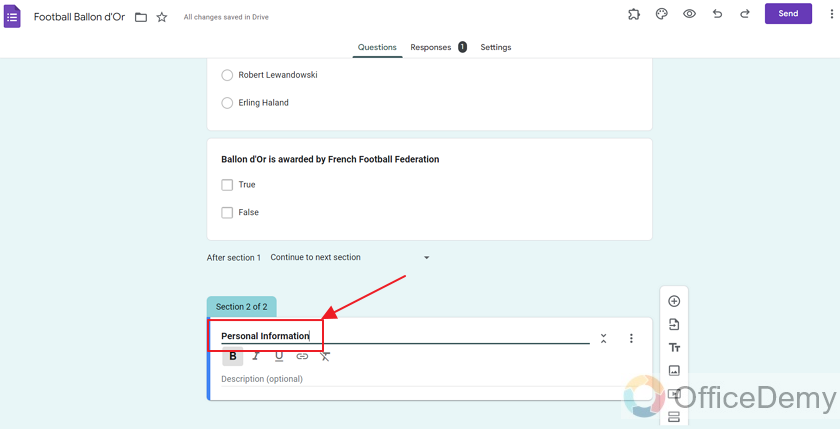
Label Section and add description in Google Form
As a new section is added to the form, we will name our section and add some description to it. So it’s easy for our desired respondents to easily understand the purpose of the section.
Let’s name it “Personal Information” by clicking on the “Untitled Section” as:
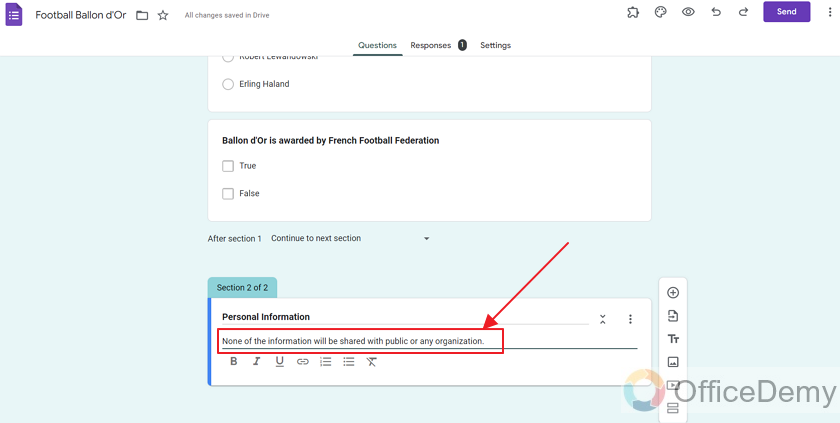
Also, add some description to the section as:
Add questions to the Section in Google Form
Now that the description is done, let’s add some questions in this section.
Click on “+” from the sidebar to add questions.
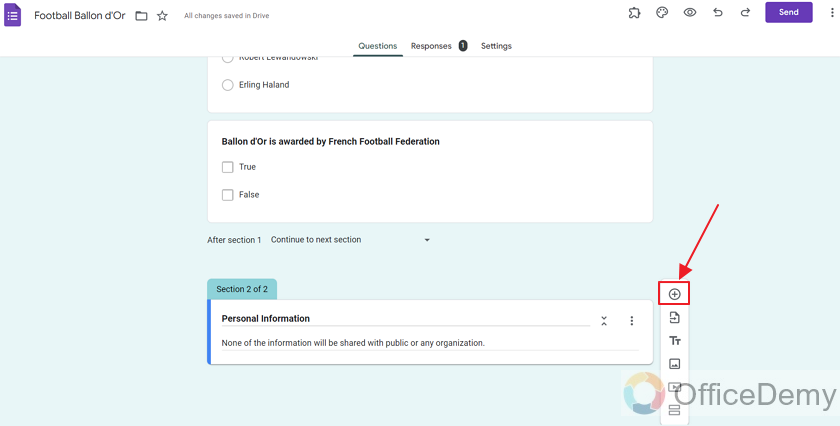
Remember that question will be added according to the placement of the sidebar. As the sidebar is on the right of Section 2, the question will automatically be a part of section 2.
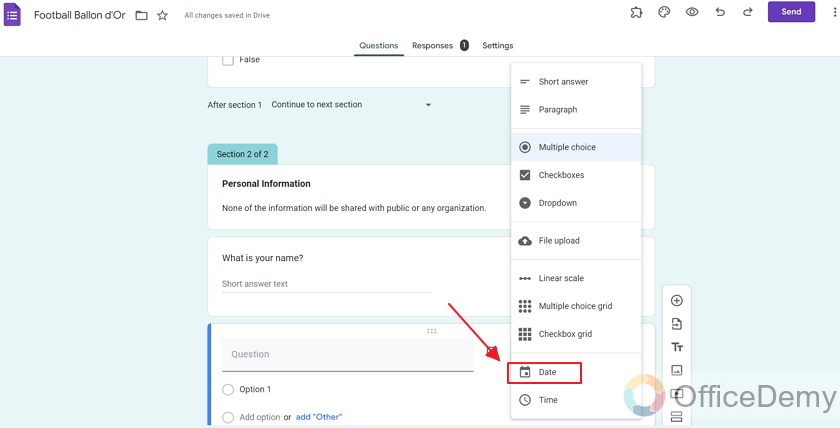
Change the type of question according to your need.
For changing the question type, click on the drop-down arrow as:
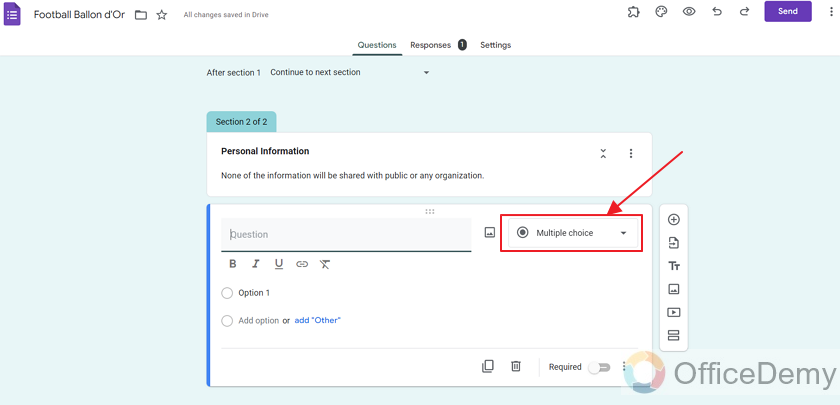
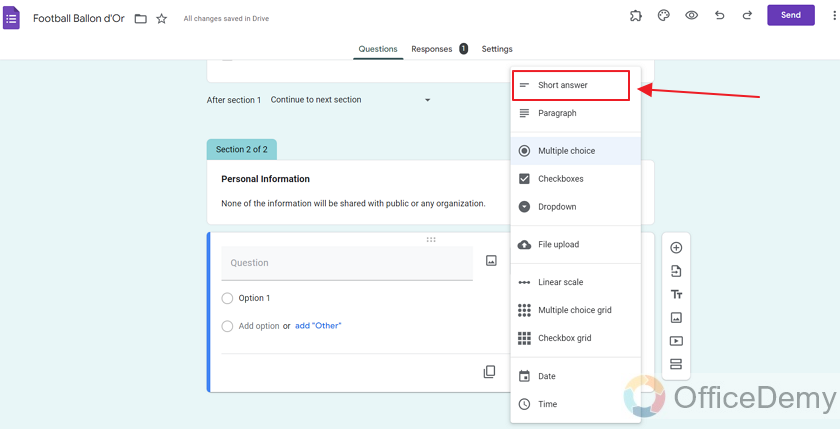
From the drop-down, there are many options. Let’s choose “Short Answer” for our first question.
Short answer question appear as:
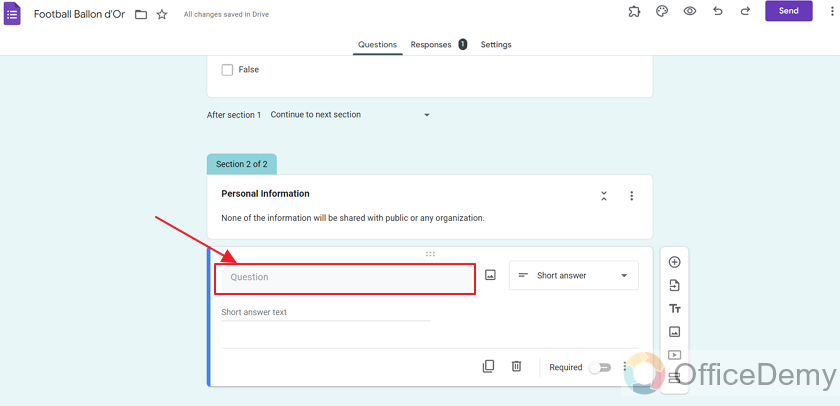 Let’s label our question now.

Now, let’s add another question and wrap up this section before we see how it looks in the preview.
This time, let’s add a question for “date of birth” and use the “date” type of question.
The question appears as: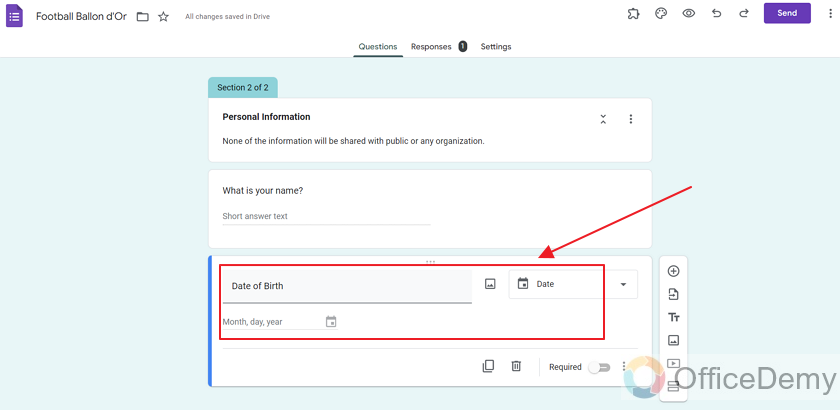
We have added two questions in this section. Of course, we can add more, but let’s keep it to that for the sake of simplicity. Now, let’s see Section’s function.
Section functions in Google Forms
Let’s have a look at what happens after section 1.
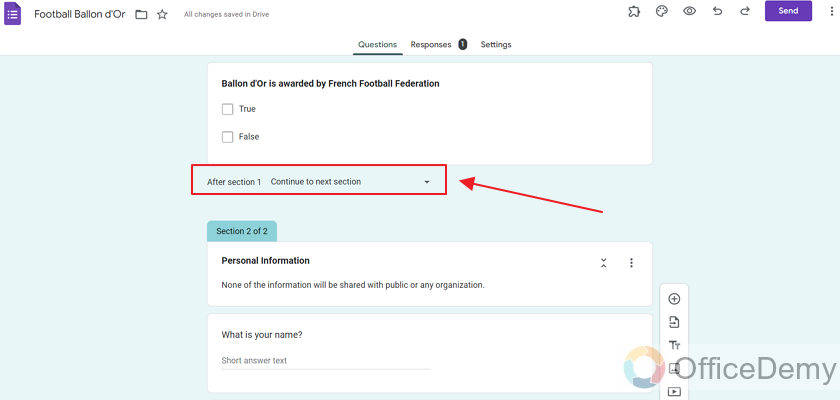
It says, “Continue to next section”, let us click on the dropdown arrow to see more details as:
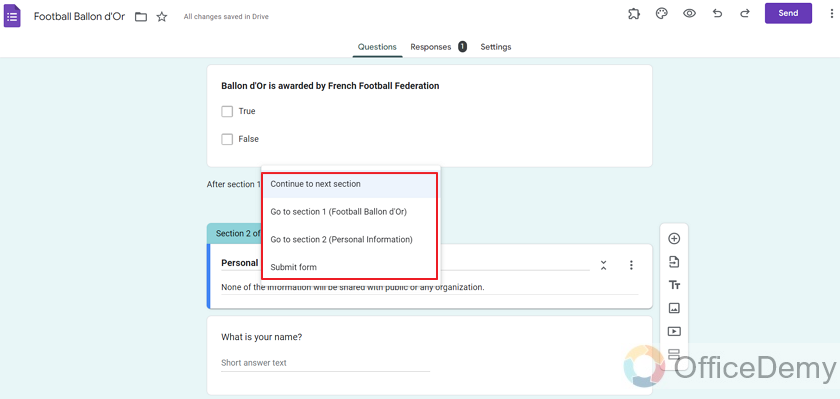
Click on “Continue to next section” as it’s the best option. After section 1, respondents will be asked to fill section 2.
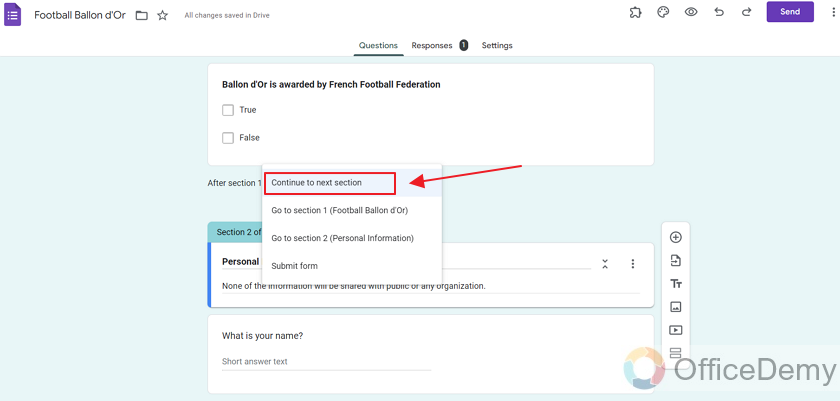
If there were more sections and we would like respondents to make a jump to other sections, we can choose that above.
Preview Sections in Google Forms
Before sharing the form to the respondents, we will preview to see how our form will look to its respondents.
Click on the eye button to see the preview as:
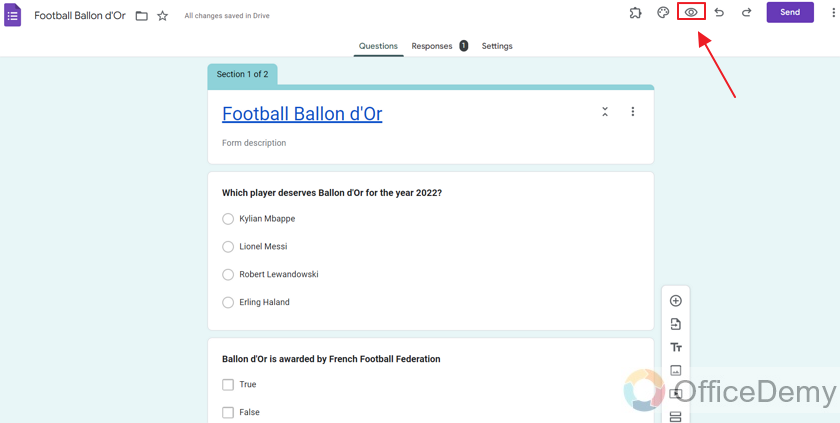
This is how it looks to respondents.
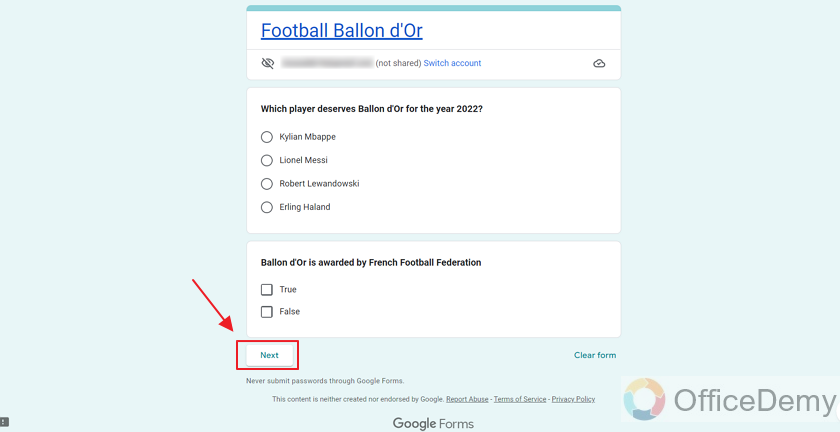
Clicking on “next” will take us to the next section which is section 2.
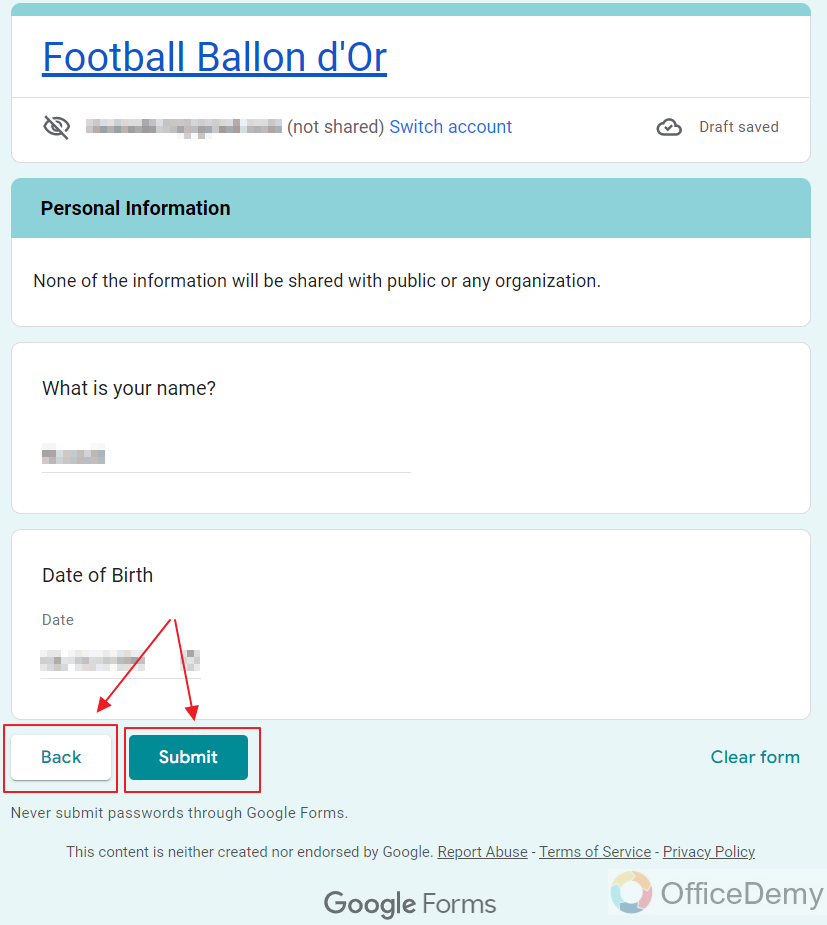
The section 2 appears as:
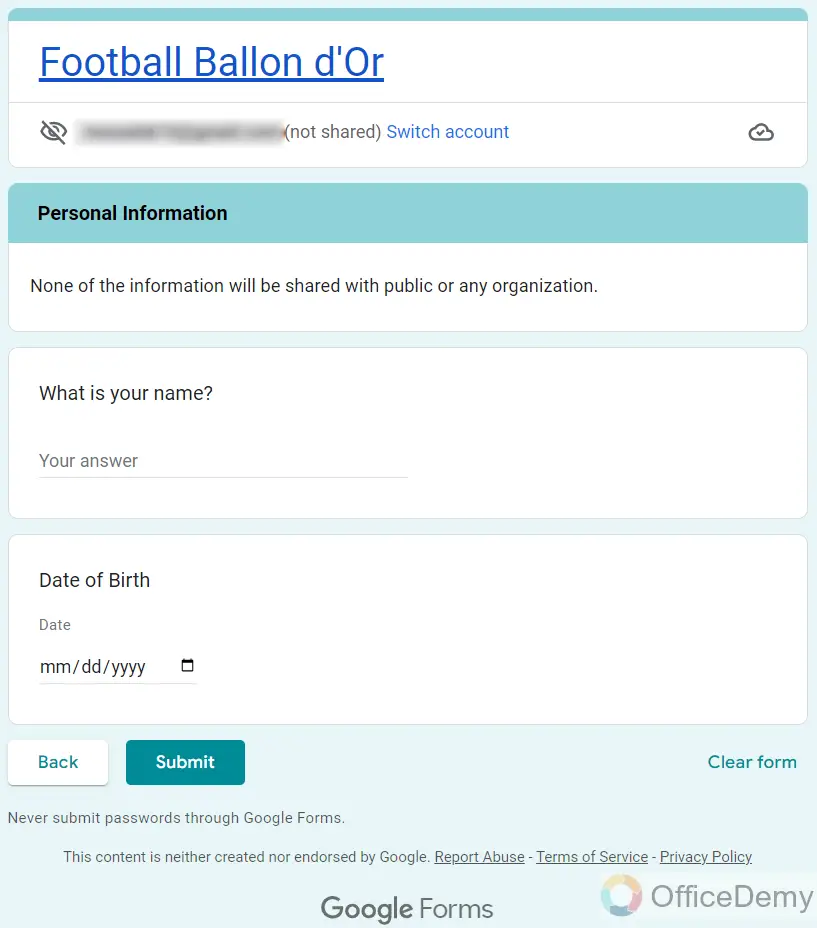
Now there are 2 buttons, i.e., “Back” and “Submit”.
Clicking on back takes back to section 1 while clicking on “Submit” submits the form.
The submitted form will submit all the responses in every section.
Important Notes
- Authorized individuals having access rights over the Google Form can add sections to it. They may also add questions to the sections.
- Sections enable us to group questions of a particular type into categories. On top of that, adding sections can cut down the length of the form. Also, it gives the respondents a sense of progress by mentioning how many sections are submitted and how many are remaining.
- Multiple sections can be added in a single form. Also, questions can be moved from one section to another.
- We can also label sections and provide descriptions to them. It is also possible to make jumps between the sections through section settings.
Frequently Asked Questions
Who can add sections in a Google Form?
Owner, editor or collaborator of the form may add sections to the form to make it look structured. He or she may also move questions between forms or add new questions to any particular section.
How can I move a question from one section to another in Google Forms?
Form owner(s) may move questions from one section to another by dragging the questions from their positions to the desired sections.
What Are the Steps to Adding Descriptions in Google Forms?
When creating descriptive fields in google forms, follow these steps: Firstly, open Google Forms and create a new form. Secondly, click on the question type dropdown menu and select Short answer. Thirdly, click on the three dots menu and choose Description. Lastly, enter the desired description text and click Save.
Can I add multiple sections in a Google Form?
Yes, multiple sections can be added to a Google Form. You may also add multiple questions to a section of the form.
Conclusion
In this article, we discussed the importance of making sections in a Google Form and learned that sections can help us to structure the information in a much better way. The complete procedure on how to add a section to a Google Form along with adding questions to the section is elaborated in detail.
If you have any query related to Google Forms, do let us know in the comment section below.
Thanks for reading!


