
To Change Language in Outlook
App:
- Open Outlook.
- Go to “File” > “Options“.
- Head to “Language“.
- Select and add the new language.
Web:
- Click the gear icon.
- Select “View all Outlook settings“.
- Go to “General” and under “Language and time zone” choose your preferred language.
Hello and welcome to this guide. Today, we will learn how to change language in Outlook. In today’s globalized world, communication knows no boundaries. Outlook, Microsoft’s popular email and productivity platform, allows users to connect with others across different languages. However, sometimes you may find yourself needing to change the language settings in Outlook to suit your preferences or accommodate multilingual communication. Whether you want to switch to your native language or explore new linguistic horizons, learning how to change the language in Outlook can greatly enhance your user experience.
In this article, we will guide you through the process of changing the language settings in Outlook, empowering you to communicate effectively and comfortably in your preferred language.
Importance of Changing Language in Outlook
Learning how to change the language in Outlook is essential for several reasons.
Firstly, it allows you to personalize your Outlook experience by using the language that you are most comfortable with. Whether it’s your native language or a language you are proficient in, using Outlook in your preferred language can enhance your productivity and overall user experience.
Additionally, changing the language in Outlook enables effective communication with individuals who speak different languages. It allows you to compose emails, read messages, and navigate the interface in a language that is familiar to both you and your recipients. By learning how to change the language in Outlook, you gain the flexibility to adapt and connect with others on a global scale.
So, these are some common reasons we should learn how to change language in Outlook both in desktop App and web interfaces.
How to Change Language in Outlook?
I will show you two easy and simple ways to change language in the Outlook desktop app and the Outlook web interface. So, without further ado let’s get started.
Change Language in Outlook – in Desktop App
In this section, I will show you step by step guide on how to change language in Outlook. Sometimes, it’s a requirement from our school or organization, and sometimes, we prefer our native language to use Outlook, whatever the purpose is, the solution is here. Let’s see the required steps for changing language in Outlook.
Step 1
Open Outlook on your computer.
Step 2
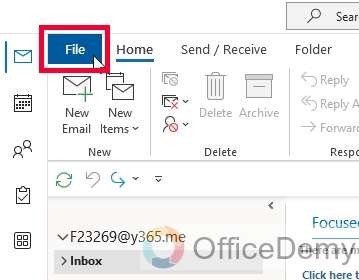
Click on the “File” tab located in the top left corner of the Outlook window.
Step 3
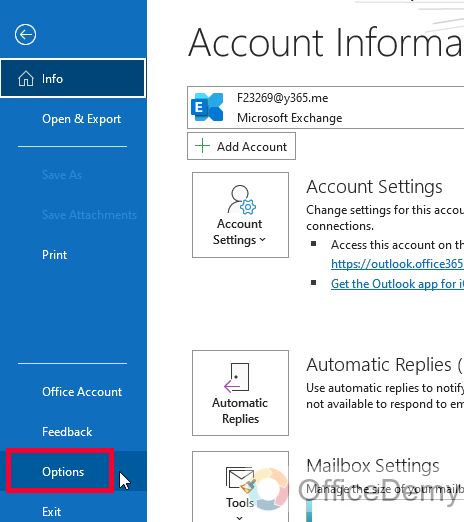
In the left sidebar, click on the “Options” button to open the Outlook Options window.
Step 4
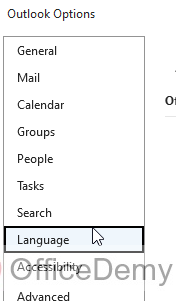
In the Outlook Options window, select the “Language” tab.
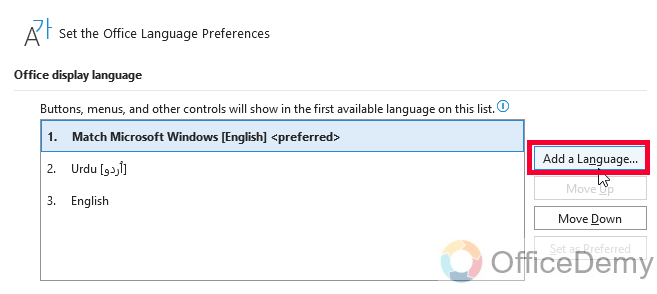
Step 5
Under the “Office display language” section, click on the “Add a language” button
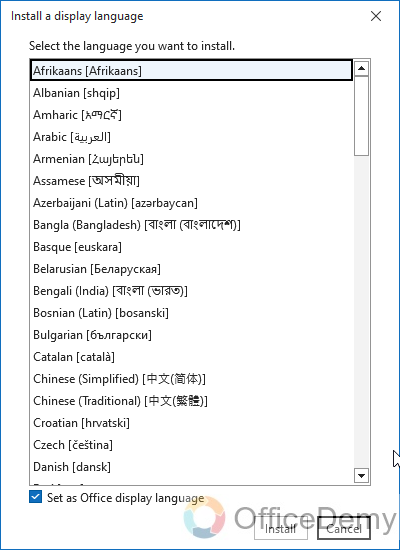
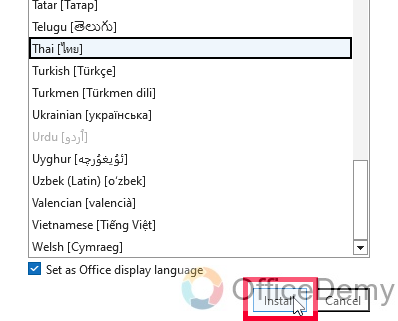
Step 6
A new window will appear with a list of available languages. Select the language you want to add by checking the box next to it, then click “Install“.
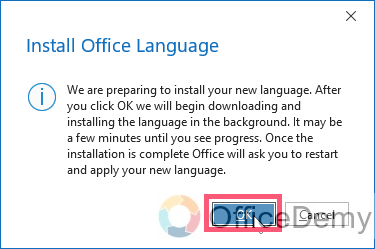
Step 7
It will ask you to confirm your selection before starting the installation process for the selected language, click on the Ok button to proceed.
Step 8
It will take some time to install the language, wait until it’s done in the background.
Note: The above two steps required an internet connection to work.
Step 9
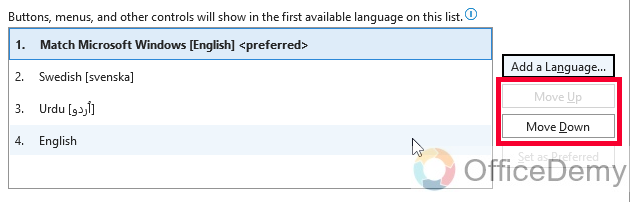
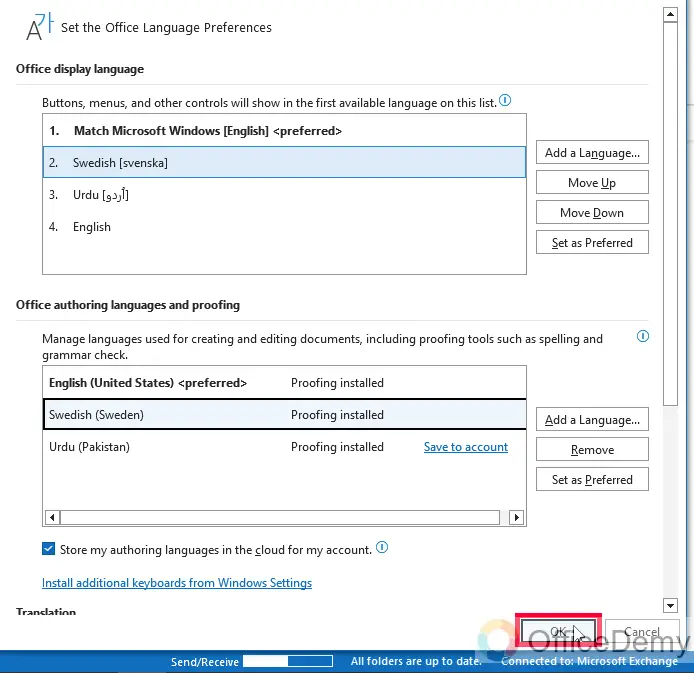
The selected language will now appear in the “Choose editing languages” section. Use the up and down arrows to prioritize the languages if you have multiple languages added.
Step 10
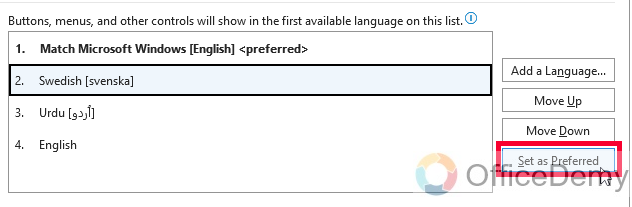
Select the newly added language and click on the “Set preferred” button to apply it as the display language
Step 11
Click “OK” to save the changes and close the Outlook Options window.
Step 12
Now you can see the display language is changed.
Note: The Outlook interface and spell-checker will now be in the selected language.
This is how easily we can change language in Outlook desktop app version.
Change Language in Outlook – in Web Version
In this section, we will learn how to change language in Outlook web version. Some of us use Outlook web version, again sometimes it is a requirement from the organization, or in some cases, it can be a personal choice, so we must learn all the important skills in the web version too. So, let’s see how to change language in Outlook web interface.
Step 1
Open your web browser and go to Outlook.office.com

Step 2
Sign into your Outlook account using your email address and password, and select the Outlook App from the list
Step 3
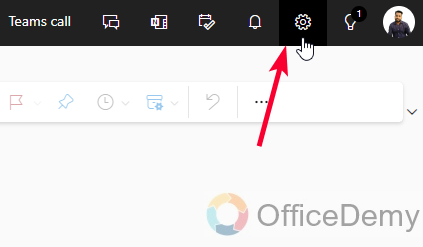
Once you’re logged in, click on the “Settings” (gear) icon located in the top right corner of the Outlook web page.
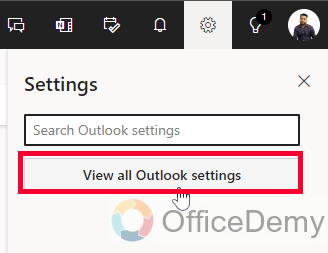
Step 4
In the dropdown menu, select “View all Outlook settings” at the bottom.
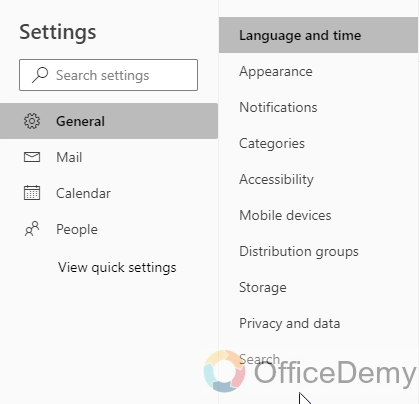
Step 5
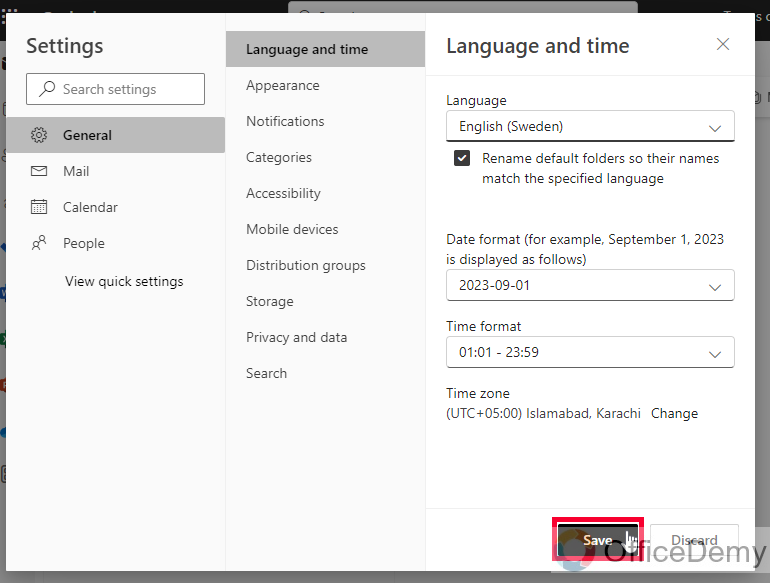
The Settings pane will open. Click on the “General” tab.

Step 6
Then select “Language and time” from the sub-sidebar.
Step 7
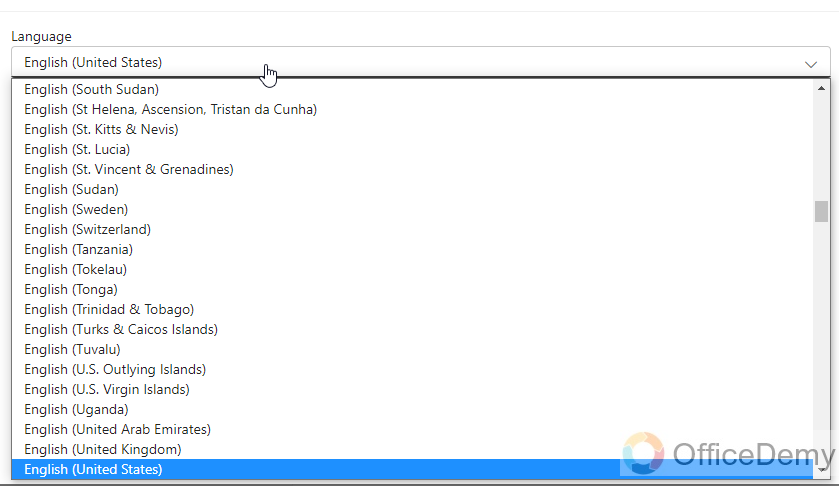
From the Language dropdown menu, click on the dropdown menu and select your desired language from the list.
Step 8
After selecting the language, click on the “Save” button at the top right corner of the Settings pane to apply the changes.
Outlook will refresh, and the interface will now be displayed in the newly selected language.
This is how easily we can change language in Outlook web version.
Things To Remember
- Changing the language in Outlook can help personalize your experience and enhance productivity.
- You can communicate more effectively by using Outlook in your preferred language.
- Outlook allows you to add and prioritize multiple languages for editing and spell-checking purposes.
- Remember to close and reopen Outlook after changing the language settings for them to take effect.
- Changing the language in Outlook Web affects the interface and menus, but not the content of your emails or calendar.
- Language settings in Outlook Web are specific to the web version and may differ from other devices or apps you use.
Frequently Asked Questions
How to change the language in Outlook Desktop App?
To change the language in the Outlook Desktop App, go to File > Options > Language, and follow the steps to add and prioritize your preferred language.
How to change the language in Outlook Web?
To change the language in Outlook Web, click on the settings (gear) icon, select “View all Outlook settings,” go to the General tab > Language and time > and choose the desired language under “Language and time zone”
Can I Change the Language of Google Forms to Match the Language in Outlook?
Yes, you can change the language of Google Forms to match the language in Outlook. In Google Forms, click on the More menu (represented by three dots) and select Settings. From there, go to the General tab and choose the desired language from the Form Language drop-down menu. This google form language option allows you to customize the language according to your preference.
How to add multiple languages in Outlook for spell-checking?
In the Outlook options, under the Language tab, click “Add additional editing languages,” select the languages you want to add, and prioritize them using the up and down arrows.
How to change the language for Outlook Web without affecting other devices?
Changing the language in Outlook Web only affects the web version. Language settings on other devices or apps may be separate and require individual adjustments.
How to ensure the language change in Outlook takes effect?
After making language changes in Outlook, close and reopen the application for the new language settings to be applied.
Can changing the language in Outlook translate existing email content?
Changing the language in Outlook affects the interface and spell-checking, but it may not automatically translate existing email content. It applies primarily to new messages and content created after changing the language settings.
Conclusion
That’s all from how to change language in Outlook desktop app and web versions. I hope you like the above article and you have learned everything about changing the language in Outlook. Outlook gives you full control over your email work and productivity, and there are almost all the languages available in Outlook. Thanks for reading and keep learning Microsoft 365 and Google Workspace with Office Demy.


