
To Copy a Slide in Google Slides
- Select the slides.
- Right-click > “Copy“.
- Open a new Google Slides File.
- Select Home > Paste.
- Choose the desired style: Keep original styles or match styles in this presentation.
OR
- Select the slides you want to copy.
- Click on File.
- Click on Make a copy.
- Click on Selected Slides.
- Rename the file if desired and click OK.
OR
- Remove the last part of the URL.
- Delete the part you’ve selected.
- Write “Present” at the end of the URL.
- Share this link for direct access to the presentation view.
Learn more workarounds in the Article below!
Fortunately, making a copy of your Google Slides presentation is easy. This tutorial will walk you through the easy steps for creating a copy of your original Google Slides presentation so you can make all the changes you want without worrying about messing up the original.
In this article, we will cover this topic in detail. We’re going to start by explaining the basics of copying Google Slides, and then follow this with more advanced strategies for cloning Google Slides. After reading this article, you should be able to create sophisticated copies of your own Google Slides. So, let’s not waste any more time; let’s get started!
How to Copy a Google Slide (Copy Complete Presentation)
I am going to describe two methods about how to copy a slide in google slides.
Method 1:
First method is the simplest one among all. This will create an exact copy of your presentation, which you can then rename and use to make edits to the original. You can make a copy directly from the file using the File menu if you prefer.
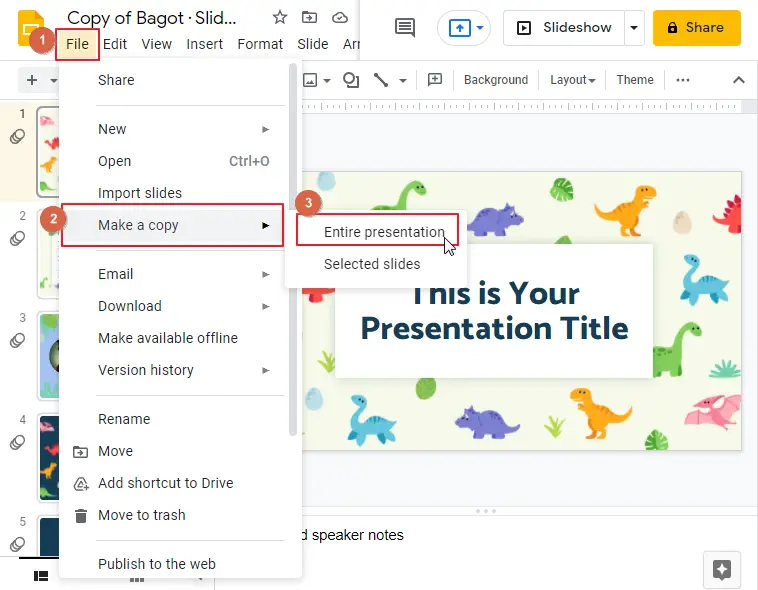
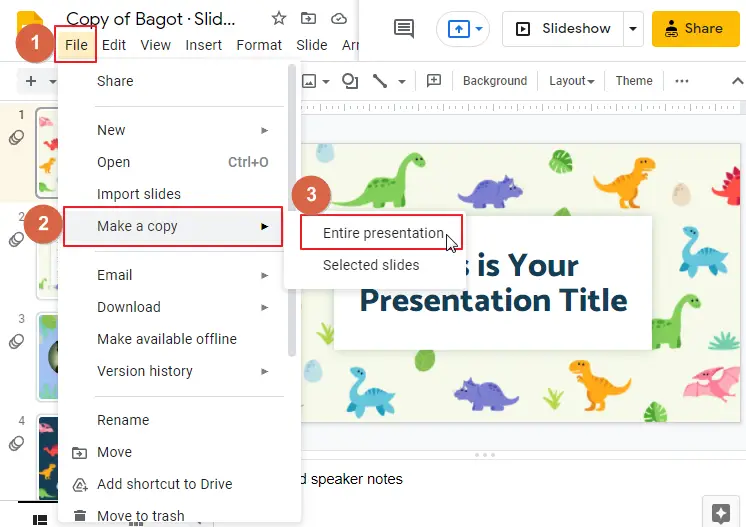
Step 1: Click on FILE.
Step 2: Click on Make a Copy from the drop-down menu.
Step 3: click on Entire Presentation.
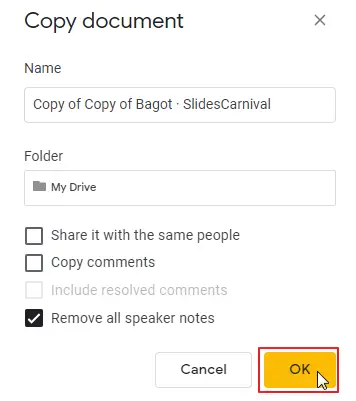
Step 4: As soon as you click on the entire presentation, a new window opens.
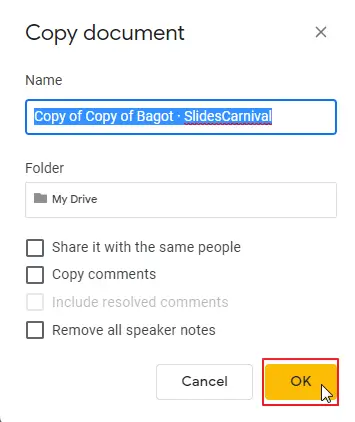
Step 5: Select a location for the new copy of the file and click OK. This is how the file will be saved.
Method 2:
Luckily, it’s easy to make a copy of your Google Slides presentation. This is the second method. Here’s how:
Step 1: Open your web browser and go to drive.google.com
Step 2: Find the file that you want to make a copy of and right-click on it
Step 3: Click on “Make a copy” from the drop-down menu
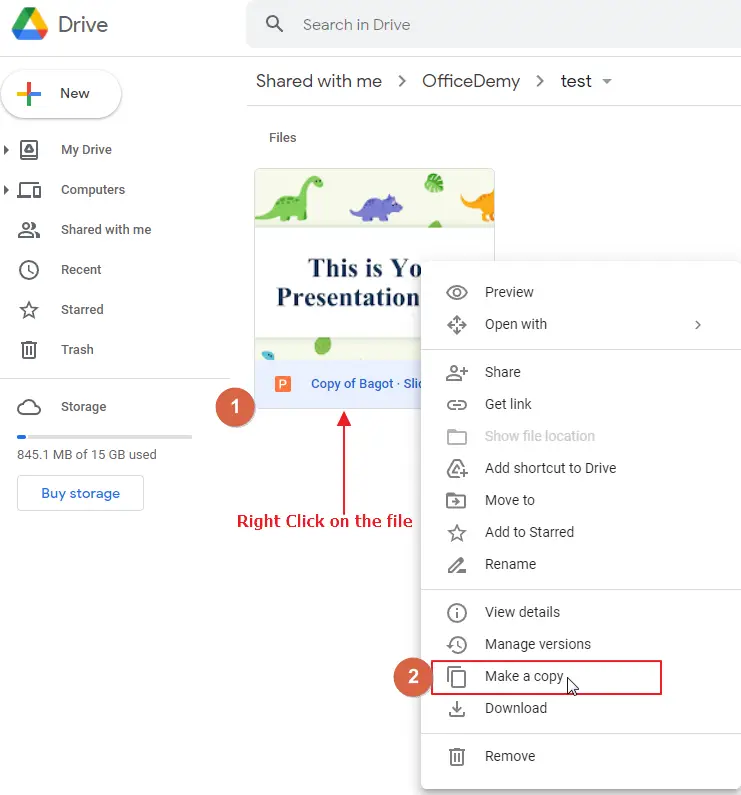
Step 4: A copy of your file will automatically be saved in your Google Drive
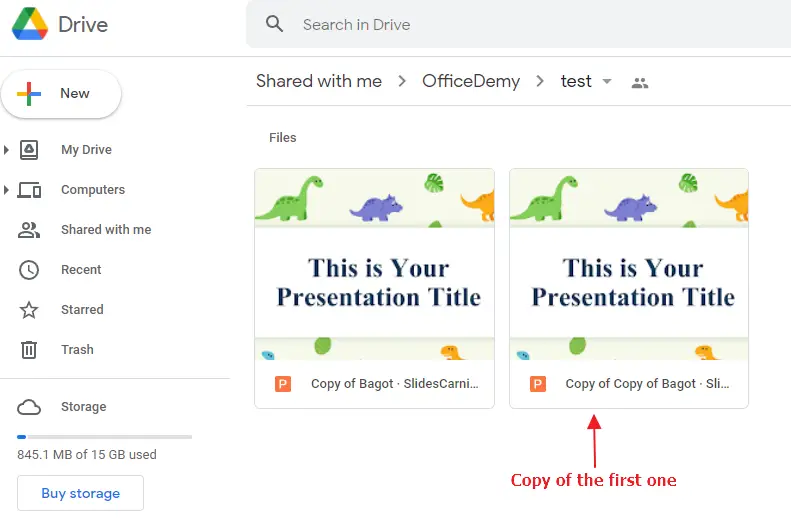
And just like that, you’ve got two copies!
How to Copy a Slide in Google Slides (Copy Selected Slides)
Method 1:
Making a copy of selected slides in your web based Google Slides presentation is straightforward. Simply select the slides which you want to make a copy of, right-click on one of them, and then select the Copy option from the context menu.
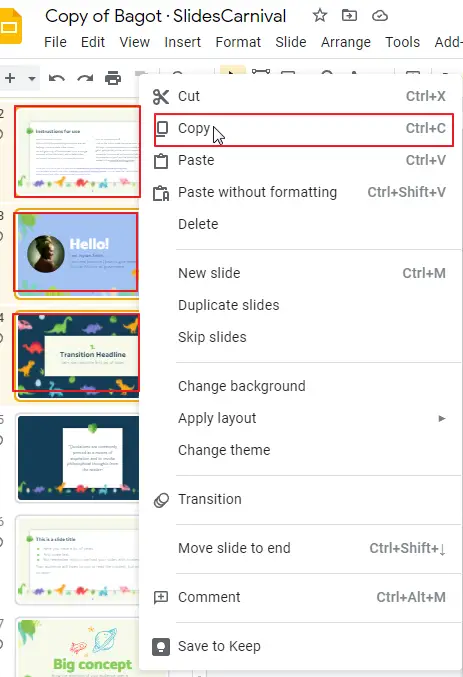
To Select Multiple slides, press CTRL+Left Click.
Now, open a new Google Slides presentation on which you want to paste these copied slides. Then select Home > Paste from the toolbar at the top, click on the Paste dropdown button,
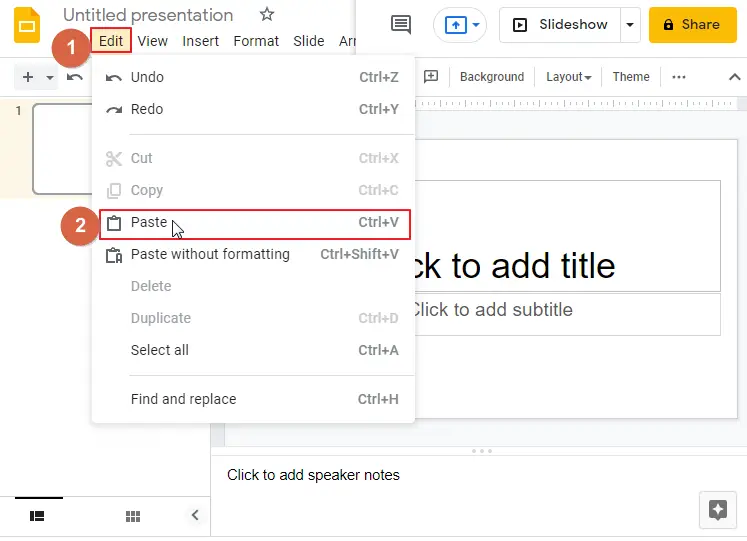
That’s it! The copied slides will be pasted on your new Google Slides presentation.
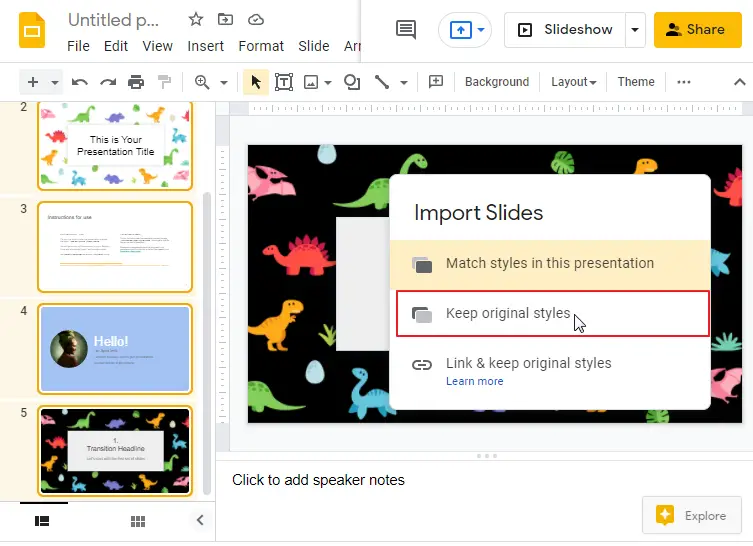
But you need to select the style. You can keep the original style by selecting Keep original styles or you can also use the current presentation style by selecting match styles in this presentation.
Method 2:
You can copy the selected slides this way as well.
step 1: select the slides that you want to make a copy of Click on File. Click on Make a copy. Click on Selected Slides.
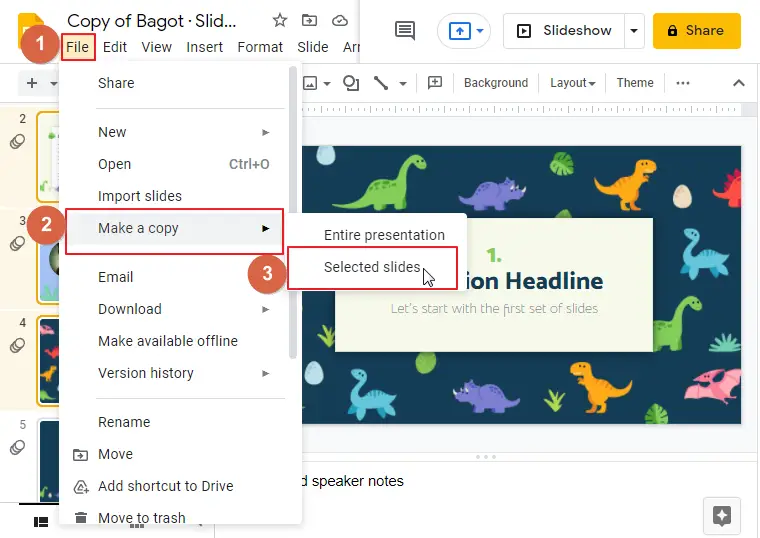
Step 2: A new window will open. Rename the file (This is optional). Click ok.
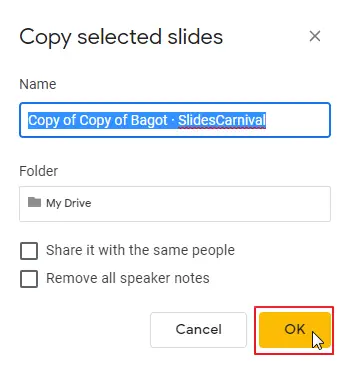
This is how a copy of your selected slide will be saved on google drive.
Example below,
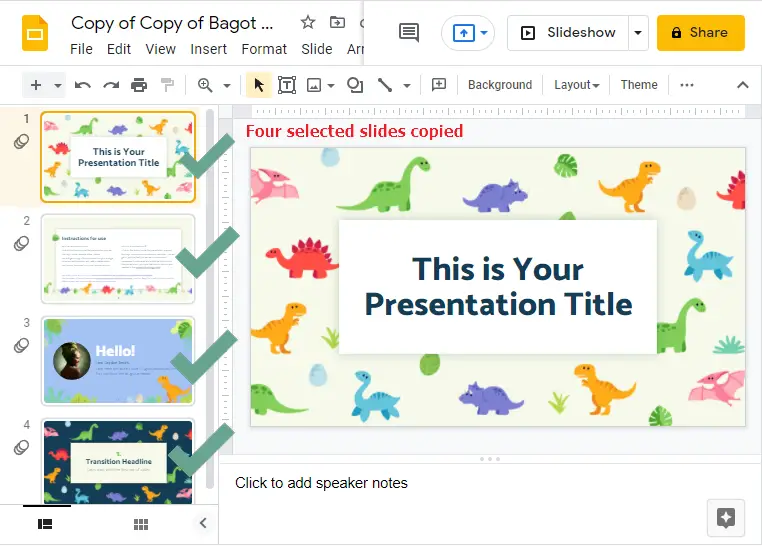
NOTE: You can select a single slide or as many slides as you want to and create a copy.
How to Force User to Make a Copy of Google Slides
Google Slides is a great tool for uploading presentations online and sharing them with other users. But sometimes, you may not want to allow other users to make changes to your original file. You can prevent this from happening by forcing the user to make a copy of the file when you share it with them!
Take a look at how we can do this:
Step 1: Last part of the URL must be removed.
Select the part of the URL after the last “/”.
Step 2: Delete the part you have selected.
Step 3: Write “Copy” at the end of the URL.
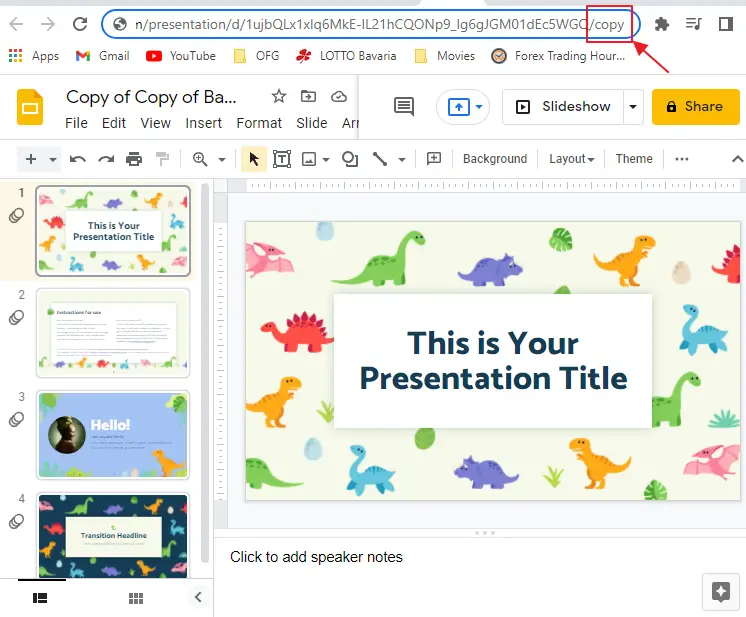
Step 4: Now you can share the link with anyone. The receiver of the link will be forced to make a copy of this.

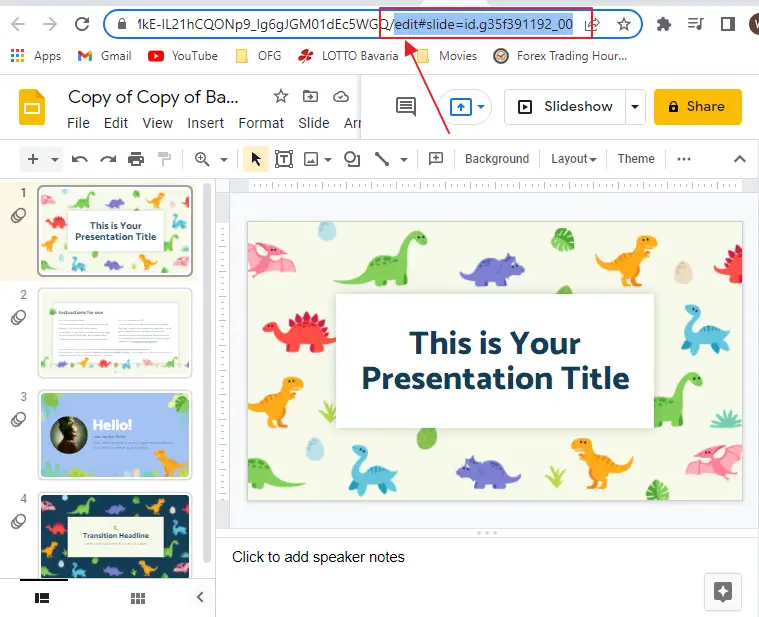
How to Copy a Slide in Google Slides in Presentation Mode
Sometimes you don’t want your audience to have access to the content of your presentation, but you also don’t want to have to share it as a PDF. A workaround is to create a duplicate of your slides that automatically opens in Presentation Mode when you share it with your audience.
Follow the steps to make a copy of google slide in presentation mode,
Step 1: Last part of the URL must be removed.
Select the part of the URL after the last “/”.
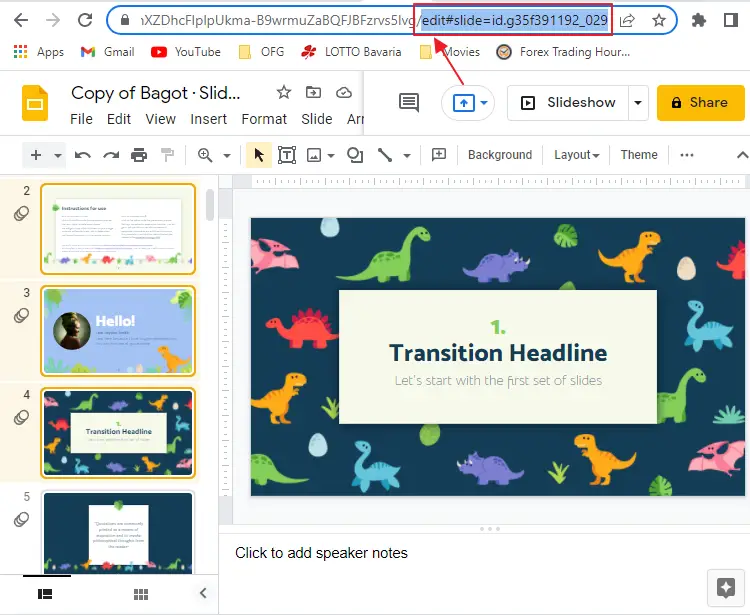
Step 2: Delete the part you have selected.
Step 3: Write “Present” at the end of the URL.
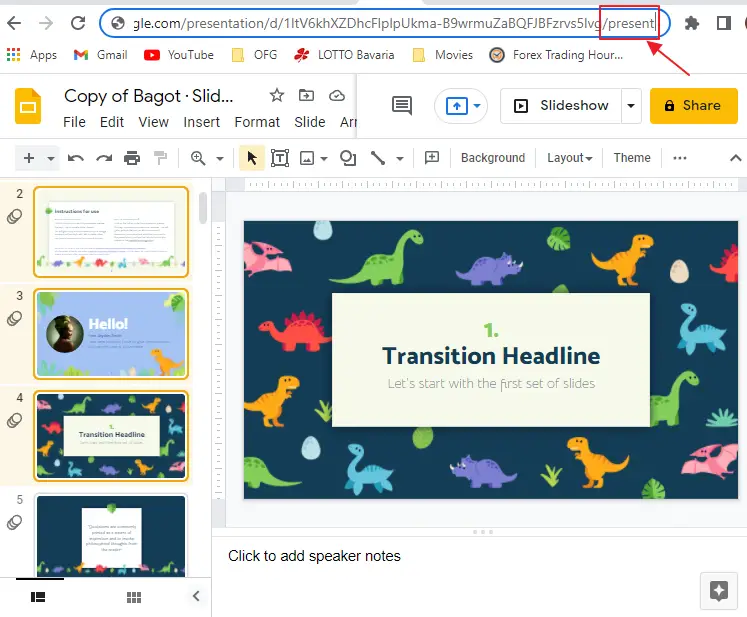
Step 4: You can now share your Google Slides presentation with a link that takes users directly to the presentation view. Share this link with others only after you have given permission to access the Google Slides presentation.
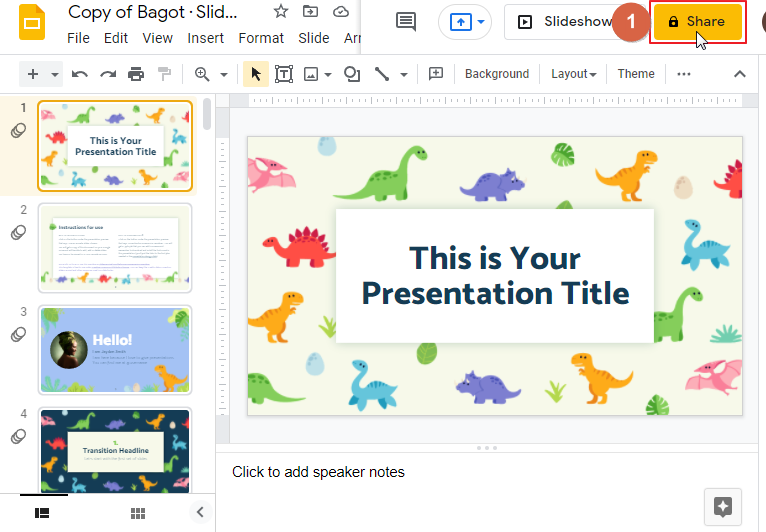
How to Copy a Slide to Another Account in Google Slides
You can copy a Google slides presentation to another account by sharing the Slides to the other account using their email address. To copy a presentation to another account, follow these 2 steps:
Step 1: Click on “SHARE”.
Step 2: as soon as you click on share. A new window will pop up on your screen. Now type the recipients Email address. Also don’t forget to provide the EDITOR access. Otherwise, the recipient won’t be able to edit the presentation file.
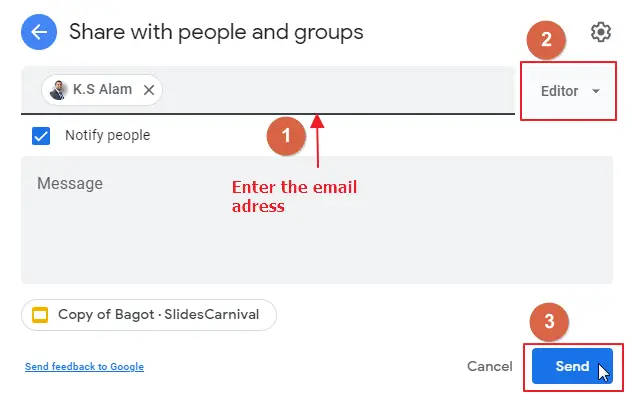
Step 3: Lastly, click on Send so that the presentation slide will be copied to the recipient’s google drive account.
How to Copy a Slide in Google Slides without Speaker Notes
If you’re working with a Google Slides presentation, it’s easy to remove speaker notes that are already in a presentation. Just follow the steps described below.
Step 1: Click on File. Click on Make a Copy. Click on Entire Presentation.
Step 2: as soon as you click on the entire presentation, a new window will open on your screen. Here Tick on Remove all speaker notes box. Click ok.
This is how the presentation slide will be copied without speaker notes.
Frequently Asked Questions
Is Copying a Text Box in Google Slides Similar to Copying a Slide?
Copying a text box in Google Slides is not the same as copying a slide. While copying a slide duplicates the entire content, copying a text box only replicates the text within it. However, when adjusting text box size, the changes apply to both the original and copied text boxes.
What Is the Best Method to Duplicate a Slide in Google Slides?
When it comes to copying slides effectively in Google Slides, there are a few methods that can be of great help. One way is to right-click on the slide thumbnail and choose the Duplicate slide option. Another method is to use the keyboard shortcut Ctrl + D while selecting the desired slide. These techniques allow you to effortlessly replicate slides and enhance your presentation efficiency.
Conclusion
As you can see, this has been an interesting topic to explore, and I hope that you’ve learned a lot from it.
Don’t forget to share this article with your friends!


