
To Edit a Contact Group in Outlook
Outlook App:
- Open Outlook.
- Navigate to “People“.
- Locate the contact group, and Double-click it.
- Click “Edit” or the pencil icon.
- Make desired changes and click “Save & Close“
Outlook Web:
- Open Outlook Web.
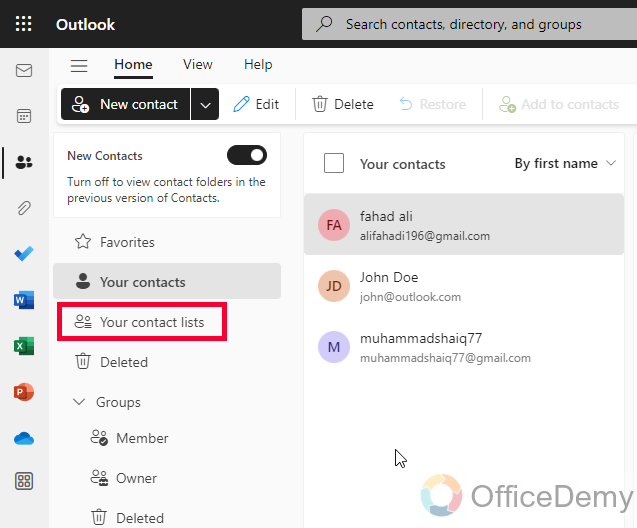
- Go to “People” from the left sidebar.
- Click “Your Contact Lists“.
- Select your contact group.
- Click the pencil icon “Edit“.
- Make changes and click “Save“
Hello everyone. Welcome to another Outlook tutorial. Today, we will learn how to edit a contact group in Outlook. Managing Outlook contacts efficiently is essential for staying organized and communicating effectively. In Outlook, contact groups provide a convenient way to group multiple contacts for easy access and streamlined communication. However, as your contact list evolves, you may need to make changes to your existing contact groups.
In this article, we will guide you through the step-by-step process of editing a contact group in Outlook. Whether you want to add or remove contacts, update group names, or modify email addresses, our easy-to-follow instructions will help you customize your contact groups to fit your evolving needs. Let’s dive in and discover how to effortlessly edit and maintain your contact groups in Outlook.
Why do we need to Edit a Contact Group in Outlook?
Learning how to edit a contact group in Outlook can be important for efficient contact management and streamlined communication. As your contact list evolves, you may need to make changes to your existing contact groups to ensure accurate and up-to-date information.
By mastering the art of editing contact groups, you can easily add or remove contacts, update group names, and modify email addresses. This knowledge empowers you to maintain well-organized and relevant contact groups, allowing you to effortlessly connect with the right people at the right time. Whether you’re a professional managing work contacts or an individual organizing personal connections, understanding how to edit contact groups in Outlook is a valuable skill that enhances productivity and communication effectiveness.
So, these are some good reasons to learn how to edit a contact group in Outlook.
How to Edit a Contact Group in Outlook?
There are various methods to edit a contact group in the Outlook app and web interfaces, I will show you a few of the very commonly used methods in today’s guide. So, let’s get started with the first method.
Edit a Contact Group in Outlook – From Contacts
In this section, we will learn how to edit a contact group in the Outlook desktop app from Contacts. This is a very simple method and can be done with any Outlook version on your desktop. So, let’s see the step-by-step guide below.
Step 1
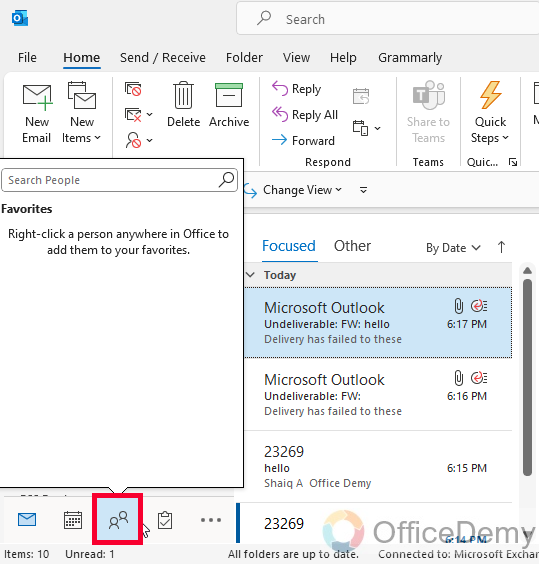
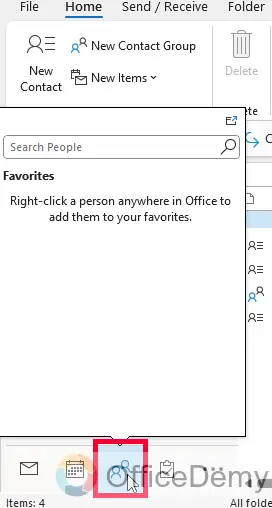
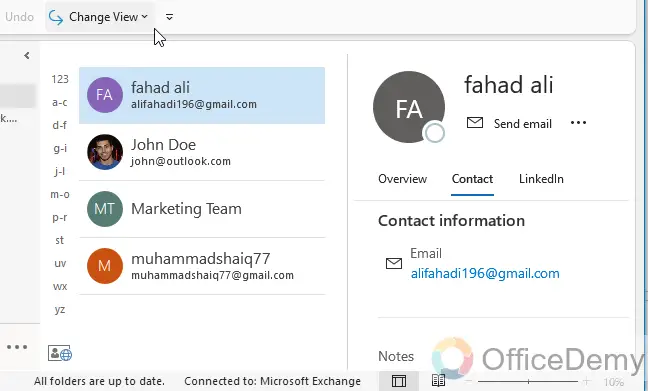
Open Outlook and navigate to the People from the bottom of the screen.
Step 2
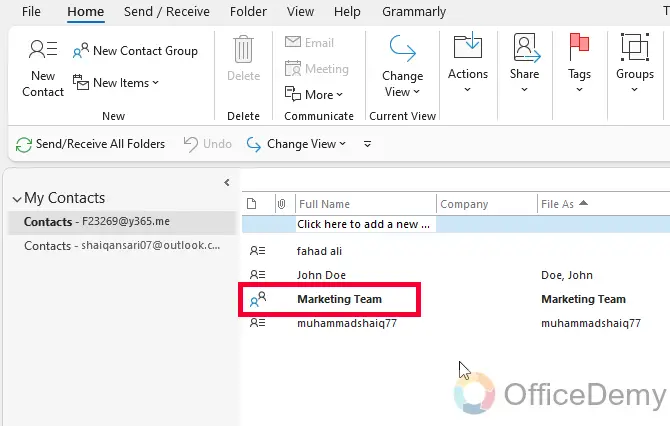
Locate the contact group you want to edit and double-click on it to open its details.
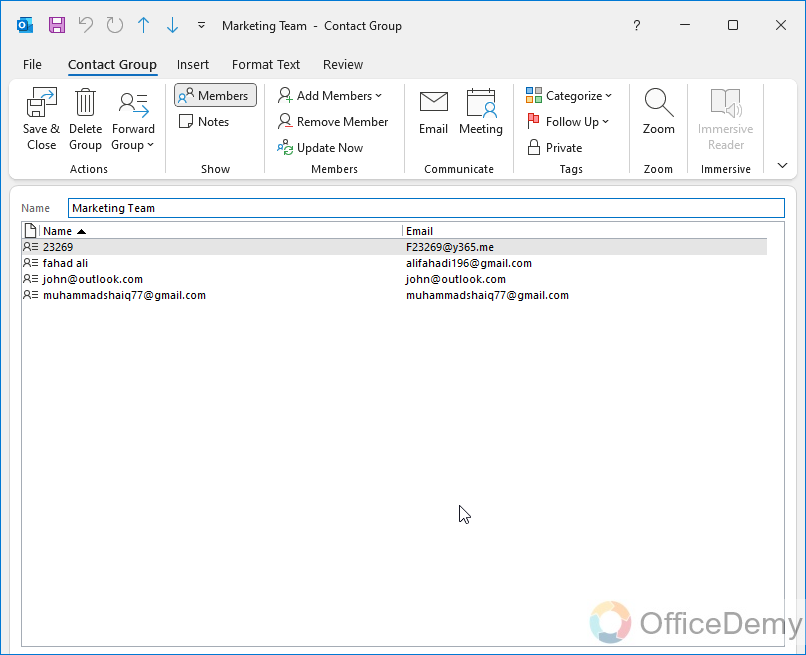
Step 3
In the contact group window, click on the “Edit” button or the pencil icon to enter the edit mode. If you don’t find any edit button, then you are already in the edit mode.
Step 4
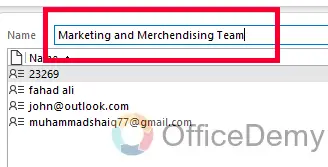
Make the desired changes to the group, such as adding or removing contacts, updating the group name, or modifying email addresses.
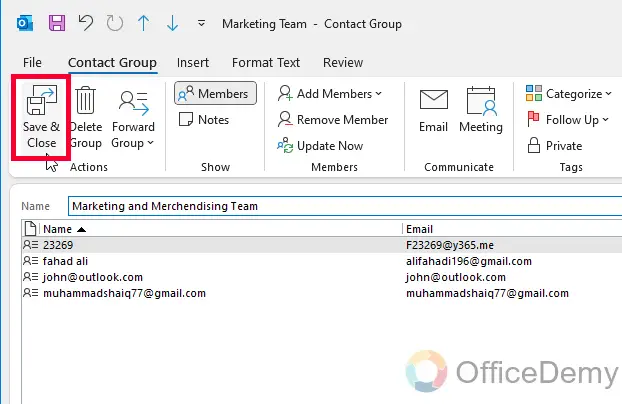
Step 5
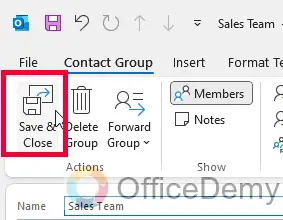
Save the changes by clicking the “Save & Close” button on the top left corner of the window.
This is how easily you can edit a contact group in the Outlook desktop app.
Edit a Contact Group in Outlook – From People’s View
In this section, I will show you another similar method to edit a contact group in Outlook. This method works identically but the way of accessing is a little different. This method uses the People’s view to work. So, let’s see the steps for this method.
Step 1
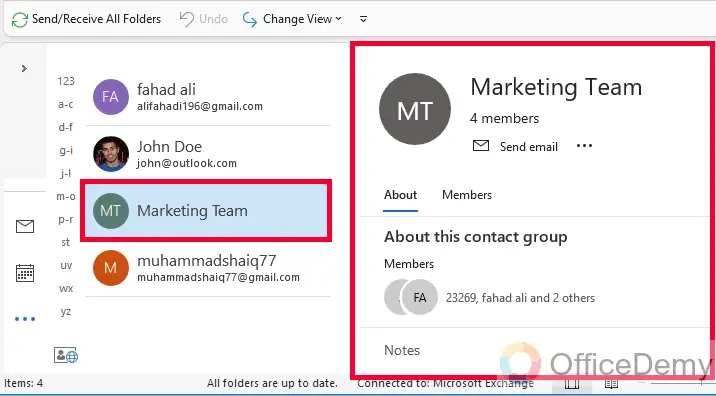
Open the Outlook app and go to the People’s tab in the bottom menu.
Step 2
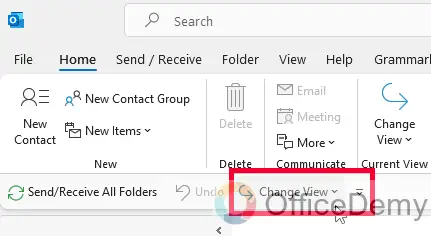
Click on the “Change view” button on the top, just below the main menu
Step 3
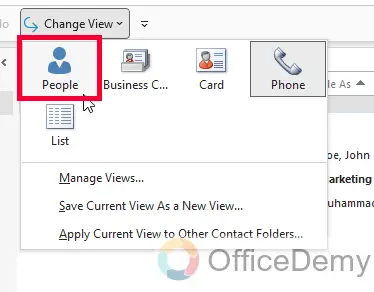
Select “People” from the given options
Step 4
It will change the view, and now you have a new view, you have your contact group here.
Step 5
Click on your contact group and it will be opened in the right-side window.
Step 6
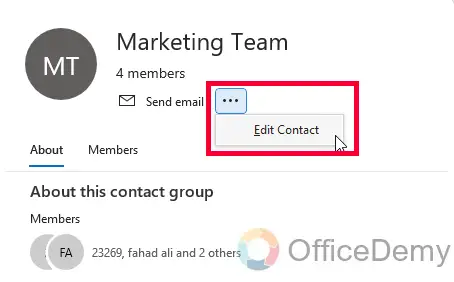
Click on three dots next to the contact group name, and click on the “Edit Contact” button
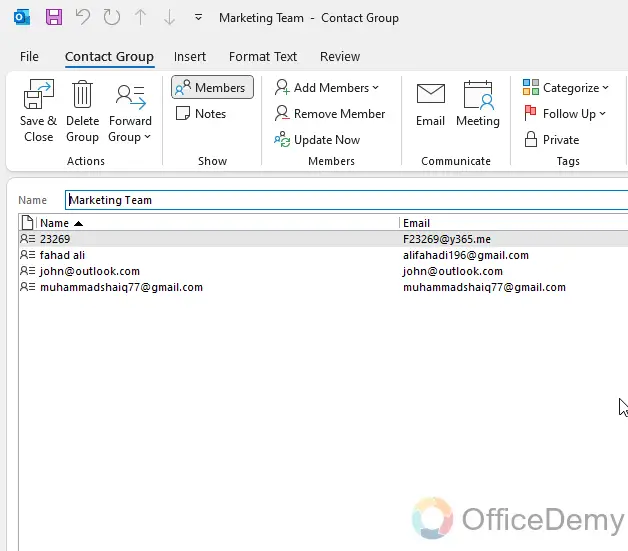
Step 7
It will take you to the same window, where you can make changes to your Contact group.
Step 8
Make the required changes, and then click on the “Save and Close” button to save changes and close this editing window.
So, these were two simple and easy methods to edit a contact group in the Outlook desktop app.
Now, let’s see if we got any way to edit a contact group in Outlook Web.
Edit a Contact Group in Outlook Web
In this section, I will show you how to edit a contact group in Outlook Web. This is another very handy and useful way to edit a contact or contact group. Let’s see how it’s done on the web.
Step 1
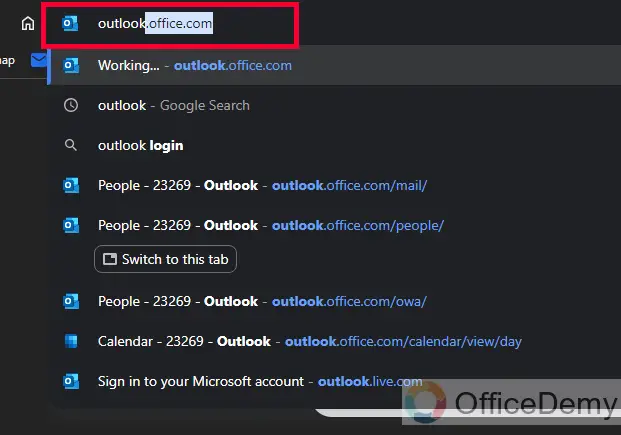
Open Outlook web on your preferred browser and go to outlook.office.com
Step 2
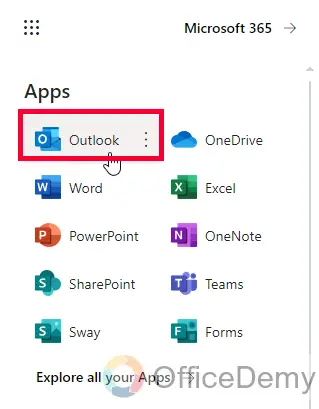
Select Outlook from the apps, and you will get the below screen
Step 3
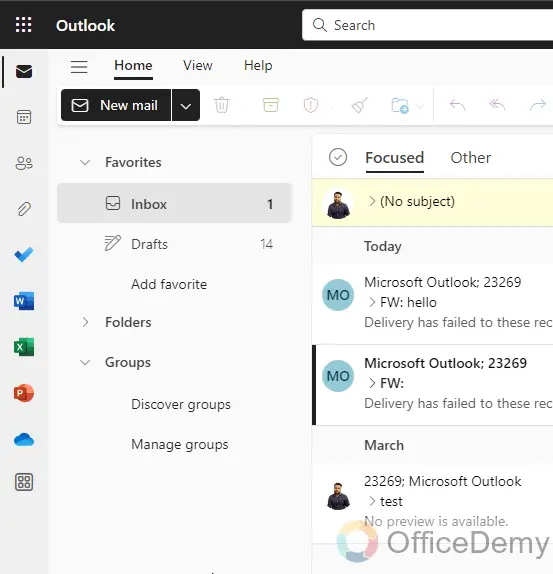
Click on the People’s button from the left sidebar of the main screen of Outlook web

Step 4
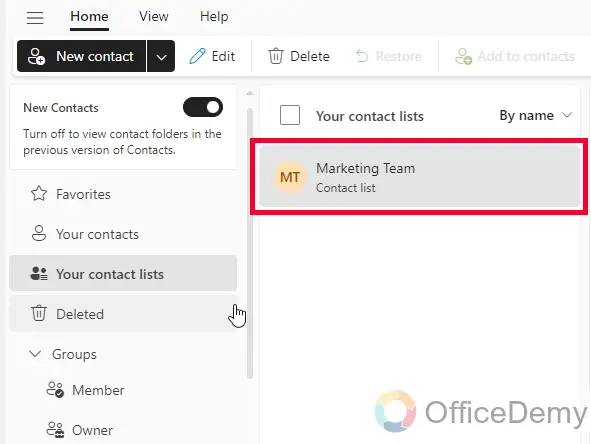
You will get your contacts opened, here you can see a button “Your Contact Lists” This term is the same as the contact groups. Click on it
Step 5
Now you will be seeing all the contact lists/groups of your Outlook account.
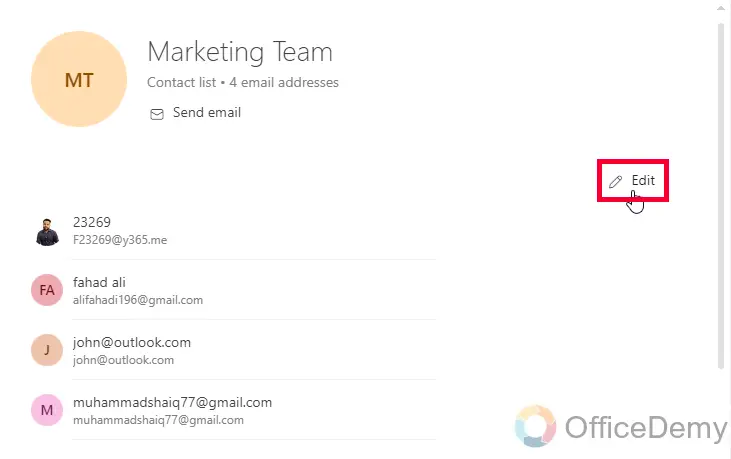
Step 6
On the right side details window, you will a pencil icon along with the Edit button, click on it.
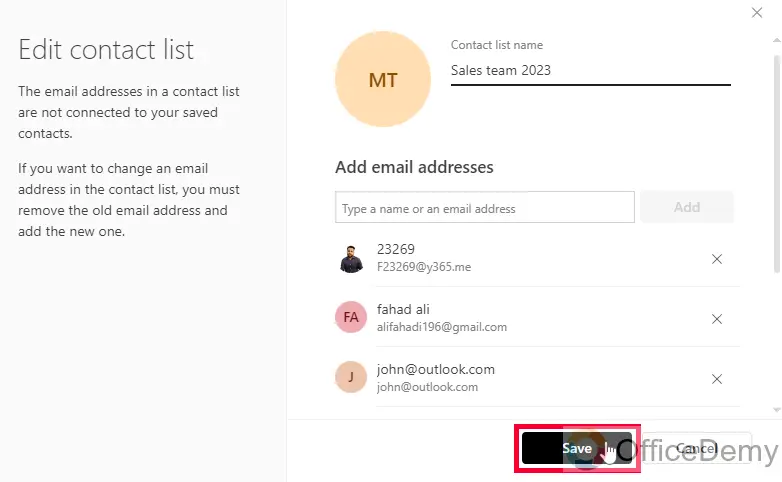
Step 7
Now your contact group is opened in the editing mode, here you can make changes and edit this contact group.

Step 8
Once you are done, click on the “Save” button below this window, and it will save the changes you made.
 ‘
‘
;
This is how to edit a contact group in Outlook Web.
Things To Remember
- Contact Groups, Contact Lists, and Distribution lists are the same terms but different keywords in Outlook.
- Access the People view in Outlook web to view your contact groups.
- Click on the desired contact group to open and view its contacts.
- Scroll through the contacts and review their details within the contact group.
- Use the navigation buttons if the contact group has multiple pages.
- Return to the main People view or Contacts tab when done viewing the contact group.
Frequently Asked Questions
Can Changing the Timezone in Outlook Affect Contact Groups?
Changing the timezone in Outlook can indeed affect contact groups. When you update timezone in outlook, it alters the timestamps on emails and appointments. As a result, contact groups may be impacted, especially if they rely on specific timing for sending messages or scheduling meetings. It’s crucial to adjust the timezone settings carefully to maintain the accuracy and functionality of contact groups.
Can I Rename Contact Groups in Outlook’s Web Version Like I Can in the App?
Yes, you can rename contact groups in Outlook’s web version just like in the app. The process of renaming categories in outlook is relatively simple and allows for easy organization and customization of your contacts. So go ahead and personalize your contact groups effortlessly using the option for renaming categories in Outlook’s web version.
Q1: How to view my contact group in Outlook web?
Open Outlook web, go to the People view, and click on the desired contact group to view its contacts and details.
Q2: How can I see the members of a contact group in Outlook web?
By clicking on the contact group in the People view, you can see the list of members or contacts within the group.
Q3: Can I view the details of individual contacts within a contact group in Outlook Web?
Yes, when you open a contact group in Outlook Web, you can scroll through and view the details of each contact within the group.
Q4: How do I navigate between pages if the contact group has multiple pages in Outlook Web?
Use the navigation buttons at the bottom of the contact group window to move between pages and view additional contacts.
Q5: How do I go back to the main People view in Outlook web after viewing a contact group?
Simply click on the “Back” button or navigate to the Contacts tab to return to the main People view in Outlook web.
Conclusion
So today we learned an interesting topic. How to Edit a contact group in Outlook. That’s all from today’s guide. I hope you find this tutorial helpful. Thanks a lot for reading, keep learning with Office Demy.


