
To Make Bubble Letters in Google Docs
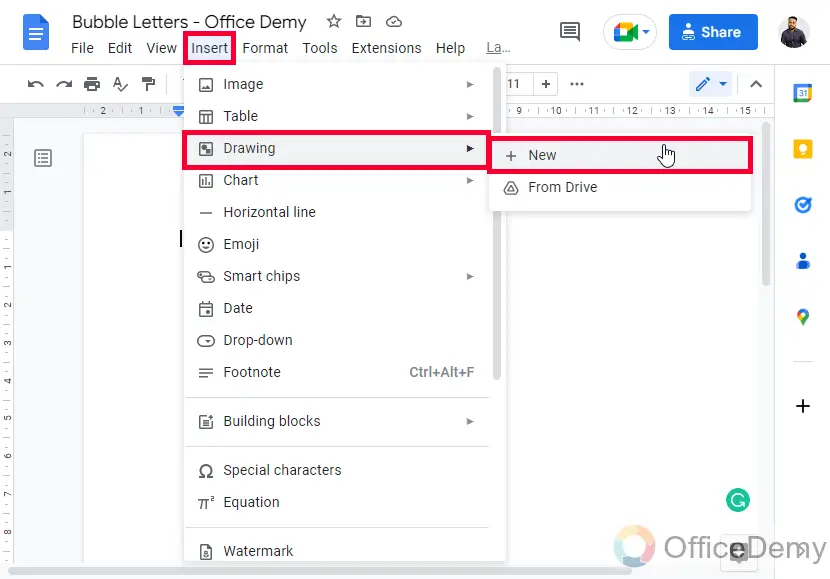
- Go to Insert > Drawing > New.
- Select “WordArt” from the Actions drop-down.
- Type your text and press Enter.
- Select the “Impact” font and customize the fill and border color.
- Adjust the size, height, and width.
- Click “Save and Close” to add it to your document.
OR
- Select the text you want to apply bubble font to.
- Click on the Font Family drop-down and choose “More Fonts“.
- Search for the bubble font, pick one, and click “OK“.
OR
- Go to Google Fonts.
- Browse and select a bubble font.
- Click “Download Family” to save it.
- Install the font by opening the .ttf file.
- Open an application like Microsoft Word and use the installed bubble font.
Hi. In this article of the Google Docs series, we will learn how to make bubble letters in Google Docs. Bubble letters are great fun, especially for drawing, and specifically for kids. Sometimes, the term bubble letter is used to refer to any 3-D letterform but to me, the ‘bubble’ in the name means that the letters/alphabets really should look like bubbles or helium balloons: rounded, bulging, colorful, and shiny. So, today we will learn how to make bubble letters in Google Docs, or any Google document, including Sheets, and Slides.
We will use the drawing and WordArt to make titles, headers, headings, or subheadings, of bubble letters, for the paragraphs, I have some other methods for you to make bubble letters for the paragraph texts, we will see and learn both methods, and I will take you till the end with the bubble letters. So, let’s begin today’s lesson.
Why need Bubble Letters in Google Docs?
The kind of bubble letters and overall bubble writing/script are playful and friendly-looking. It mostly attracts kids, and females, and also when the purpose of writing is not very serious, but for fun and entertainment. So, it’s usually most appropriate to use for cartoons and humorous titles, funny posters, memes, kid’s product logos, graffiti designs, and celebratory party-style texts.
The basic principle of the bubble letters/alphabet is to draw each letter to fill a circle as nearly as it can. Then, we need to turn each letter design into a step-by-step method that you can use for making titles, headers, and so on. Hopefully, you will be able to make your bubble letters using Google Docs, or any other text editor tool. This article is only intended to teach you how to make bubble letters in Google Docs, using Google Docs’ native features and functionalities. Ok, so we will not use any external add-on or application, we will create within Docs, and we can use them as any header text. Further, we will learn another simple method to use bubble letters as paragraphs and not as a title or subtitles. So, these are the reasons you need to learn how to make bubble letters in Google Docs.
How to Make Bubble Letters in Google Docs
In this section, we will learn all the methods, and sections to learn how to make bubble letters in Google Docs. We have the first method which is a built-in drawing method, and secondly, we will learn to get a bubble font from Google Fonts. Let’s get started with the first method.
Make Bubble Letters in Google Docs – Using Drawing
In this section, we will learn how to make bubble letters in Google Docs using the drawing feature. Now we all know that the drawing feature is built-in with Google documents such as Docs, Sheets, and Slides. We can use it with an internet connection and can make beautiful sketches, drawings, posters, and canvas, and similarly, we can make custom bubble texts using it. So, let’s get into it.
Step 1
Open a Google docs file

Step 2
Go to Insert > Drawing > New
Step 3
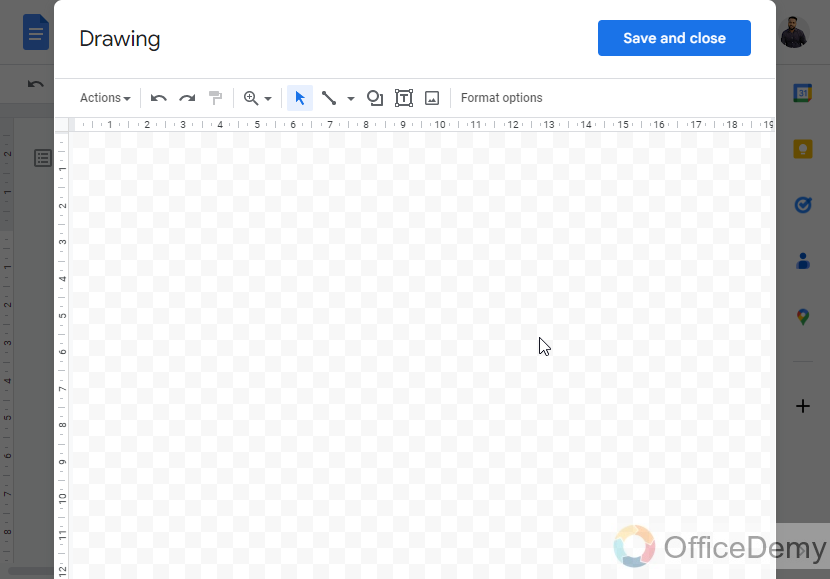
Here is your empty canvas for drawing
Step 4
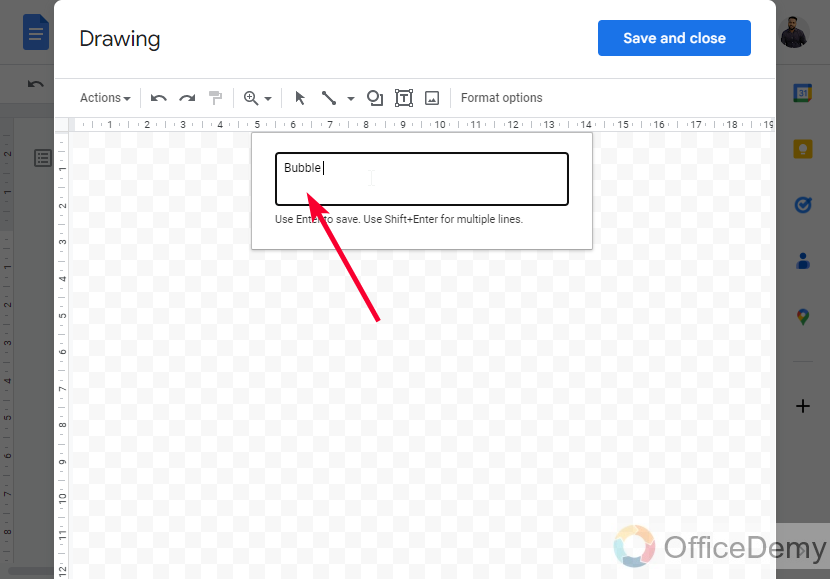
Click on the Actions drop-down on the left side of the toolbar, and select WordArt from the list

Step 5
Now type your text in the textbox that appeared, and press Enter key.
Step 6
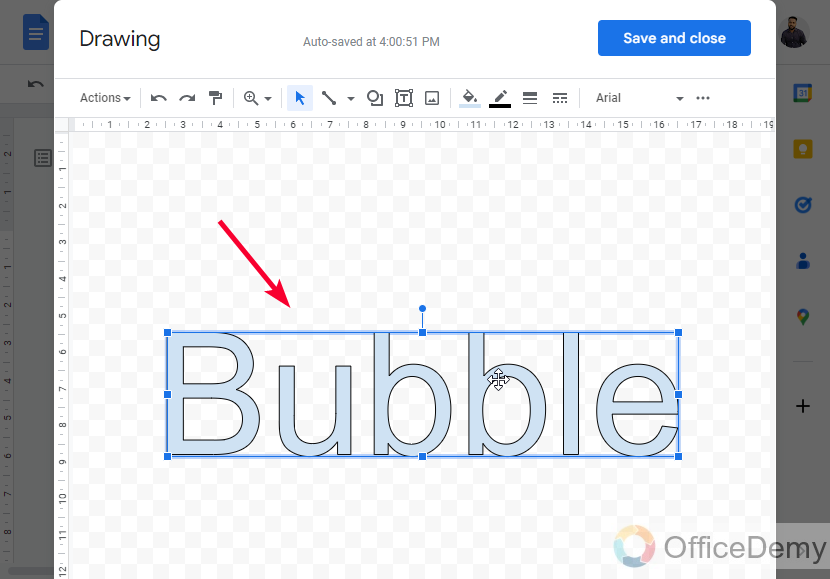
Now you can see the WordArt is appearing on the canvas, keep it selected.
Step 7
Go to the font family and change it to Impact

Step 8
Change the fill color to pink (not compulsory)
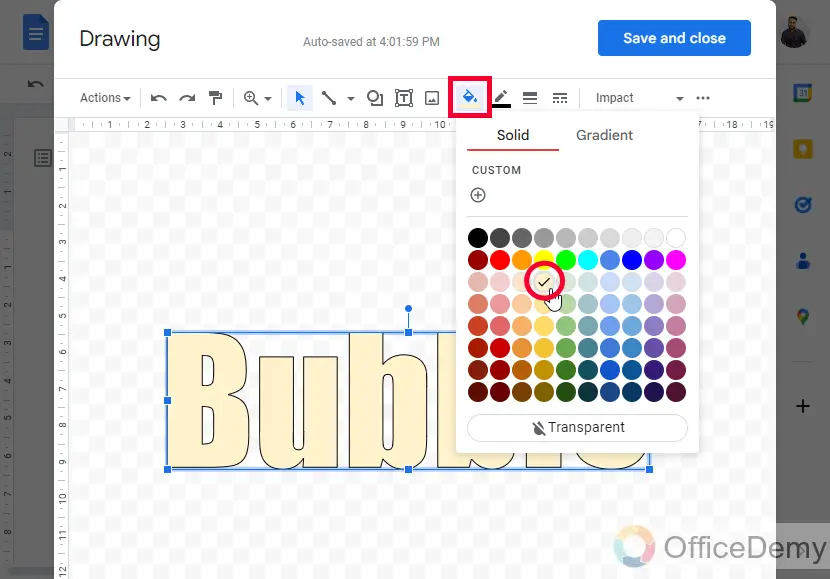
Step 9
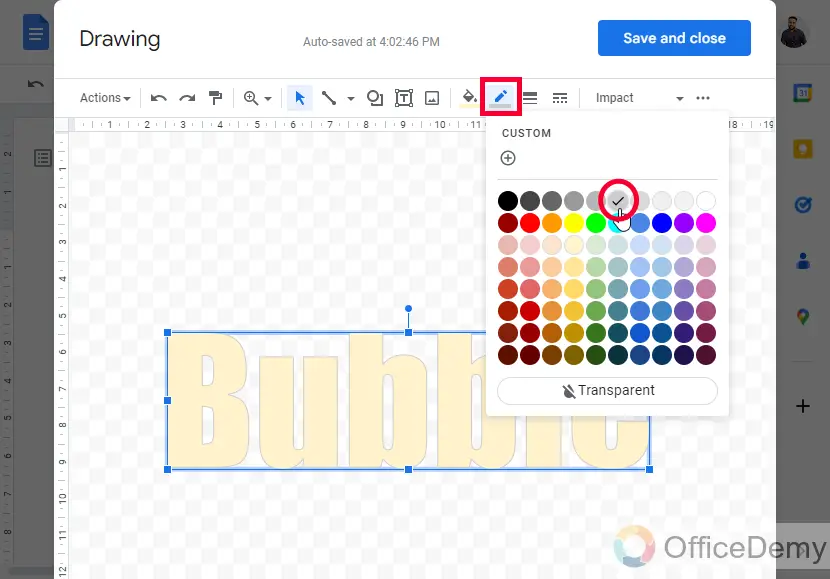
Change the border color to yellow (not compulsory)
Step 10
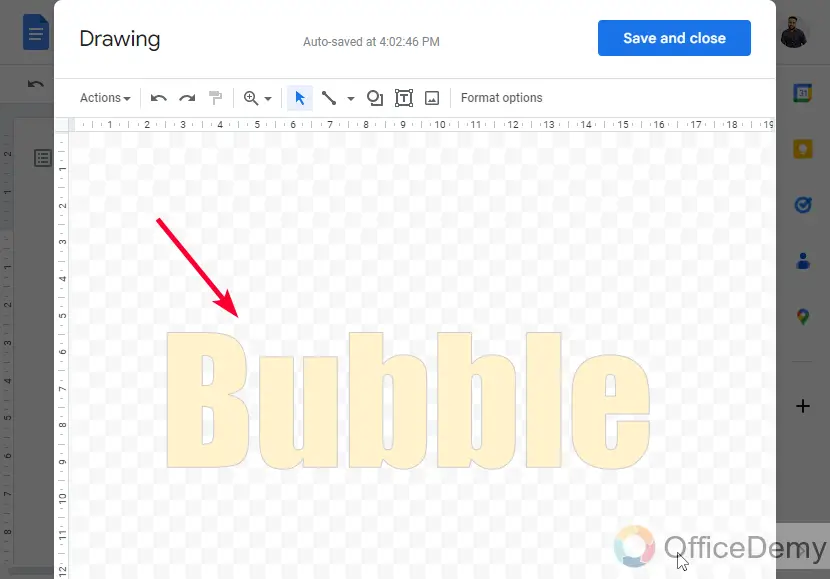
You can see your text has converted into bubble letters, you can increase size, height, and width, as you required.
Step 11
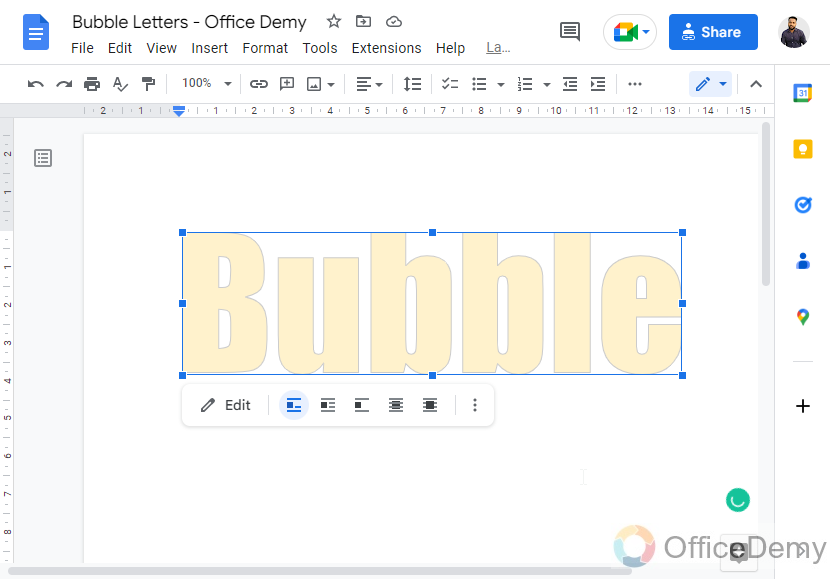
Once you’re done, now click on the Save and Close button to back to your document.

Step 12
You can place and move it freely over the document with your mouse
This is how to make bubble letters in Google Docs using a drawing tool. You can further use the Bold style if you want more thickness in your bubble letters.
Make Bubble Letters in Google Docs – Using Bubble Fonts
In this section, we will learn how to make bubble letters in Google Docs by using bubble fonts. Now in Google Docs, Sheets, or Slides, we don’t have any bubble fonts by default, we need to export them or we can download them from the Google Fonts store to use in other applications as well such as Microsoft Word. So, in this section, we will see both of these methods.
First, let’s see how to directly use bubble fonts from the more fonts options inside the font tab
Step 1
Select the text on which you want to apply bubble font

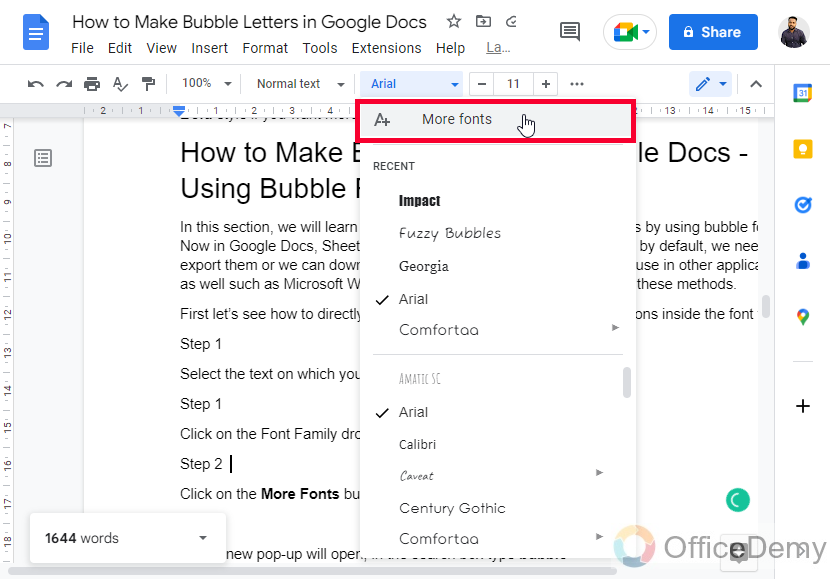
Step 2
Click on the Font Family drop-down and, click on the More Fonts button at the top of the list
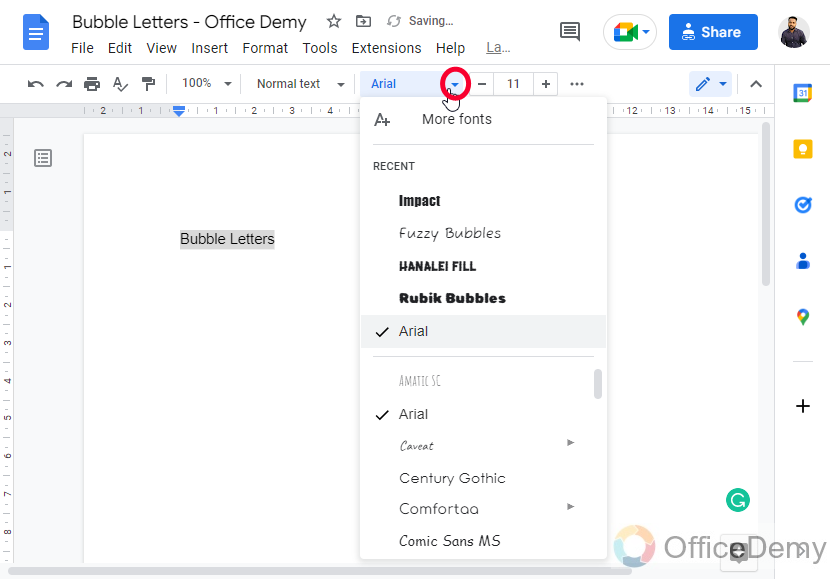
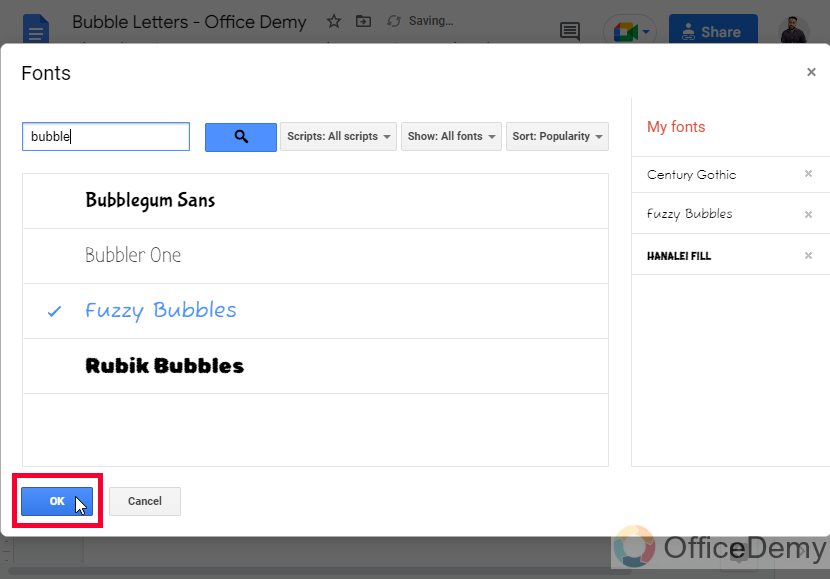
Step 3
Now a new pop-up will open, in the search box type bubble
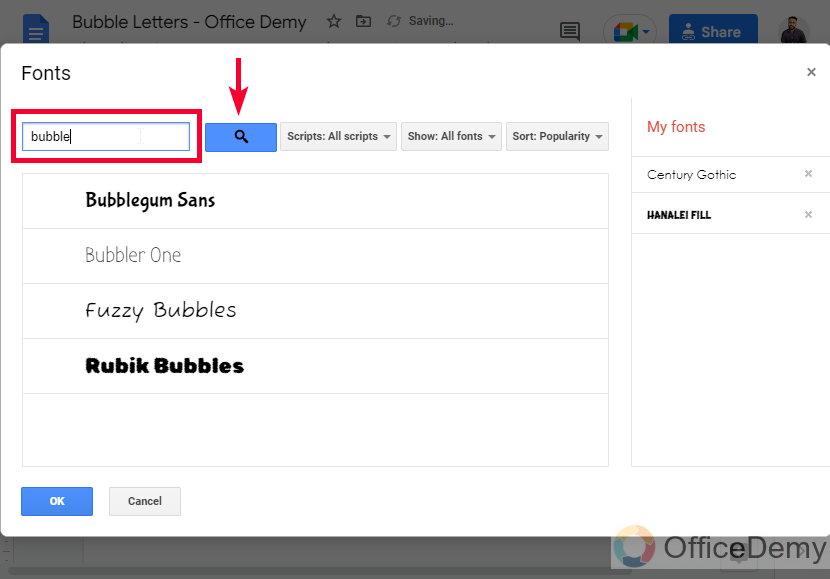
Step 4
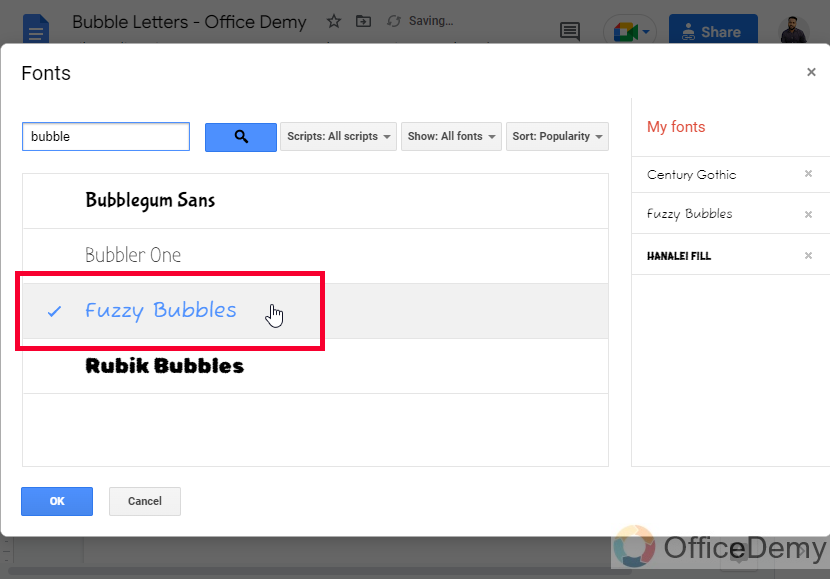
Now pick any variant of the bubble font from the result list (click on it and a checkmark will be added to it)
Step 5
Close the window, by clicking on the Ok button, and get back to the document
Step 6
Now from the default fonts list, select the newly added font
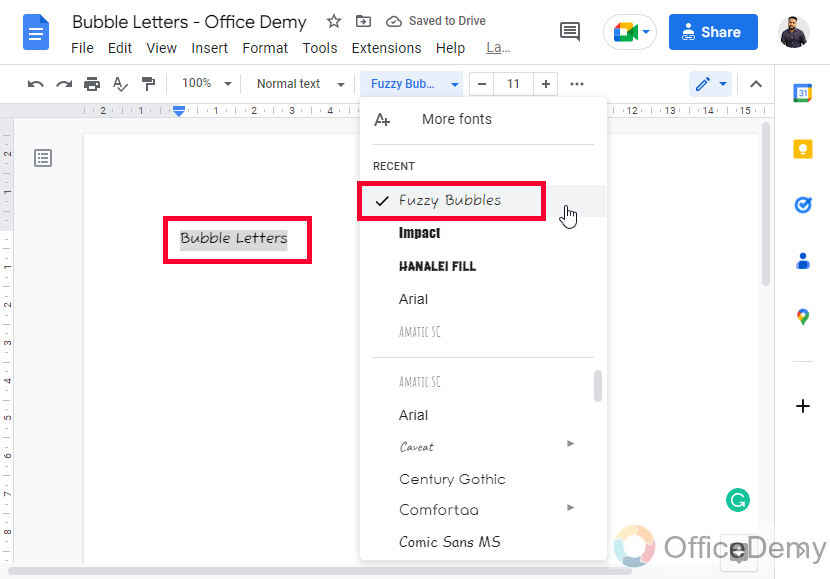
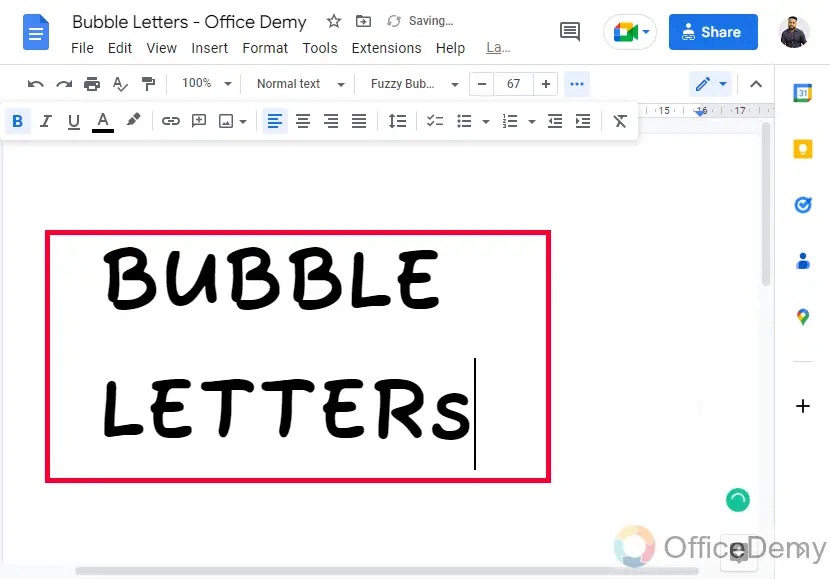
Tip: You can increase its size and make it Bold style to make look like a title, heading, or header.
So this is how you can get a bubble font from the More fonts in Google Docs.
Now let’s say you need to use this font in Microsoft word, Excel, or PowerPoint. Now, this method does not work in Microsoft applications, instead, you need to download and install a font family from Google Fonts to use with these Microsoft applications or any other applications on your computer. So, let’s see how to download Fonts from Google Fonts.
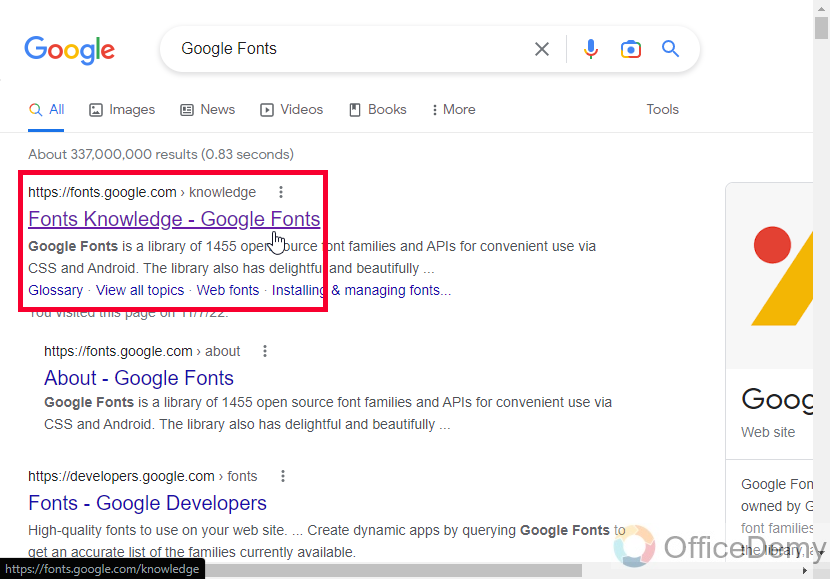
Step 1
Search Google Fonts in your browser
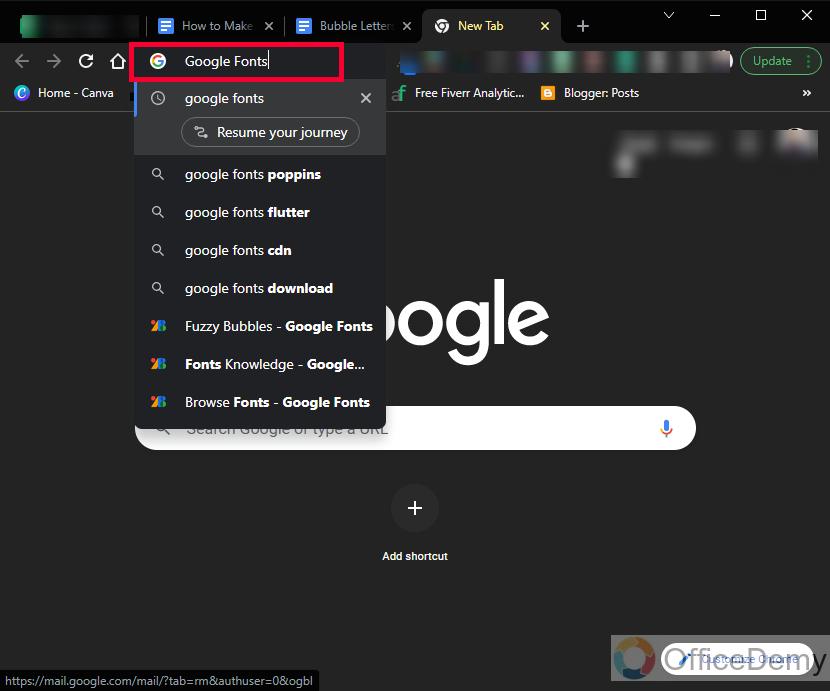
Step 2
Go to the first link
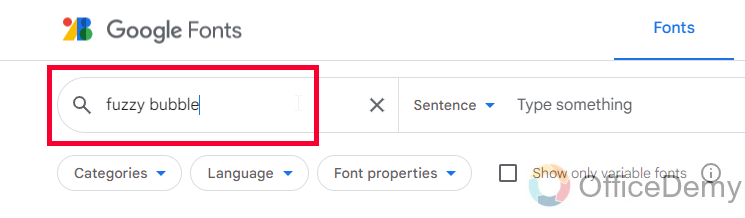
Step 3
Click on the Fonts tab

Step 4
Search for a font in the search bar (such as; bubble, or fuzzy bubble)
Step 5
Click on the font you like from the results list (Select Fuzzy bubble)
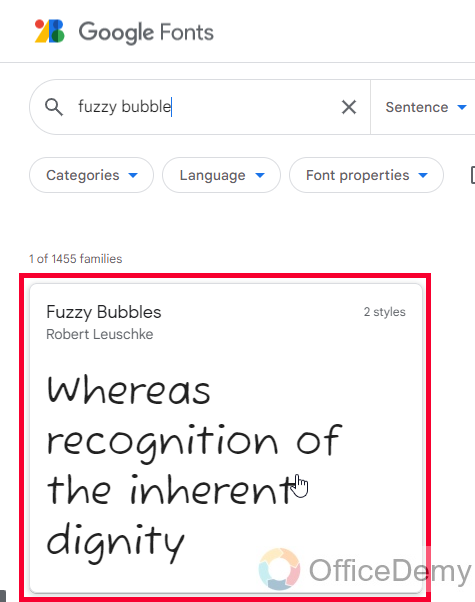
Tip: You can use the above sizing meter to zoom in and zoom out the font sample for testing. And, you can also use the available filters to search for a font such as categories, Language, and font properties.
Step 6
You can test your custom text with this font by using the middle textbox with a placeholder “Type something…”

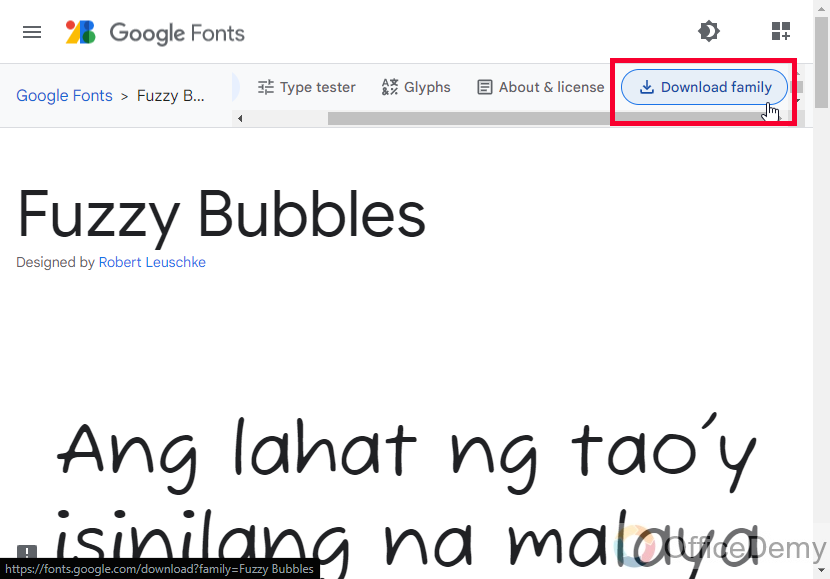
Step 7
On the new page, click on the Download Family button to download all the variants of this font on your computer
Step 8
Now go to the downloads folder and look for a RAR file
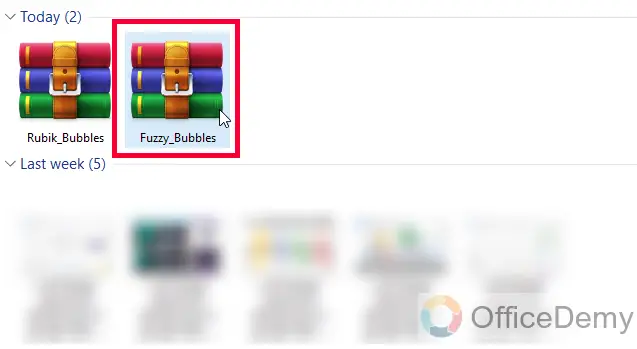
Step 9
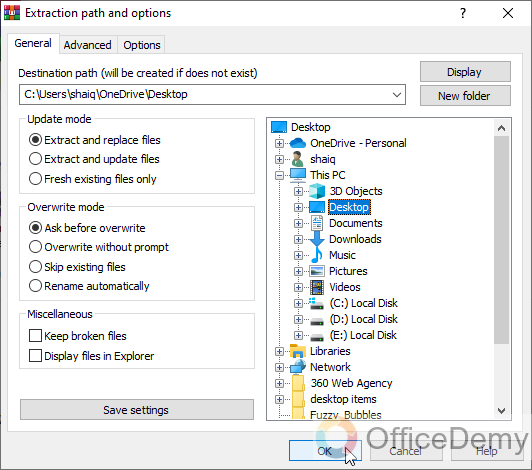
Extract the file to any directory
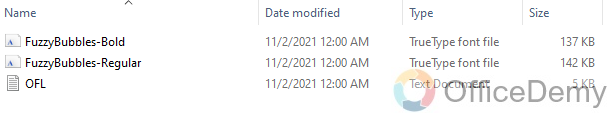
Step 10
Now open the extracted folder and double-click on the font file with a .ttf extension
Step 11
Click on the Install button
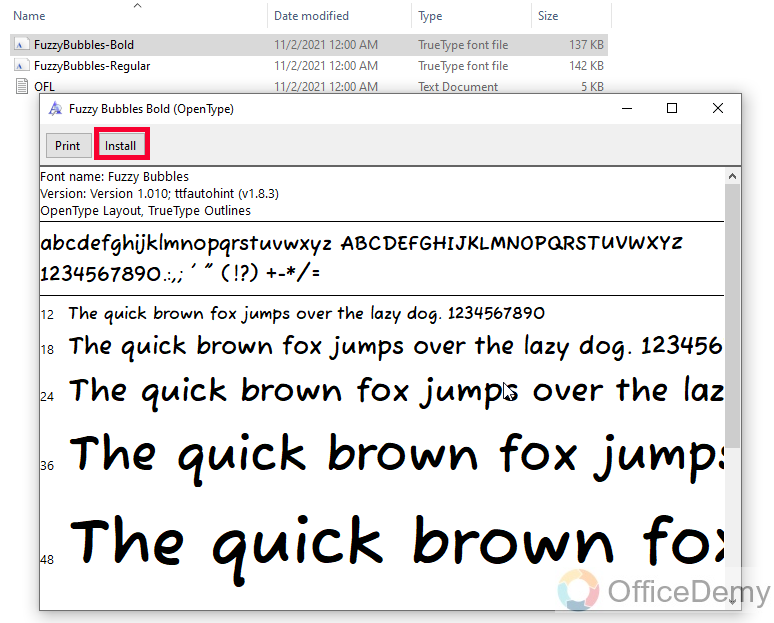
Note: Repeat the above steps for all the variants you want to install on your computer
Step 12
Now open any application on your computer such as Microsoft Word.
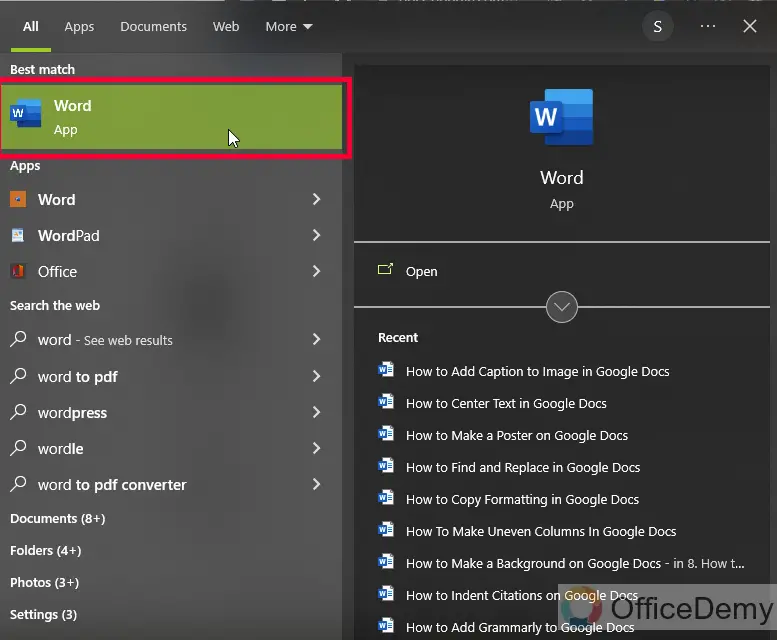
Step 13
Type something and select the text
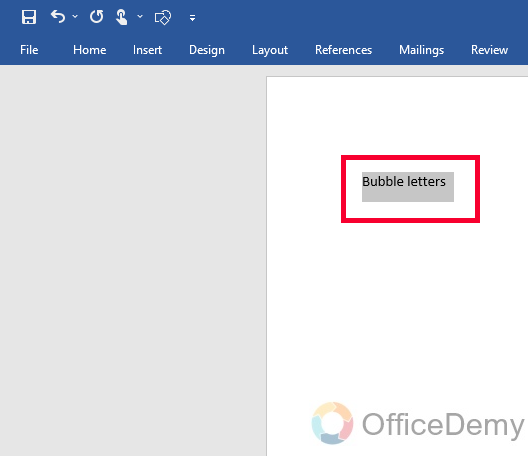
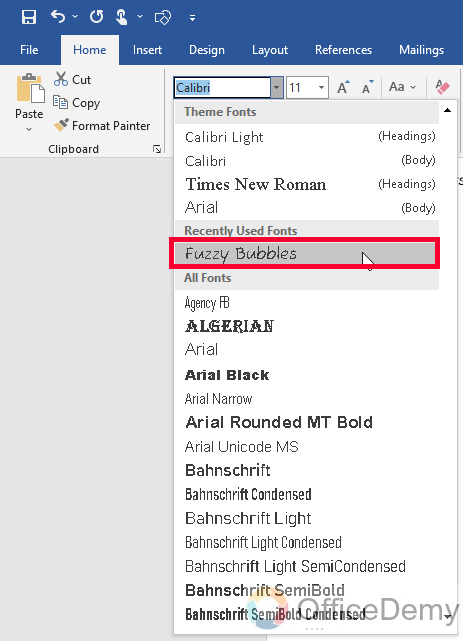
Step 14
Go to the Font family tab and look for the font you have just installed
Click on it to use the selected text
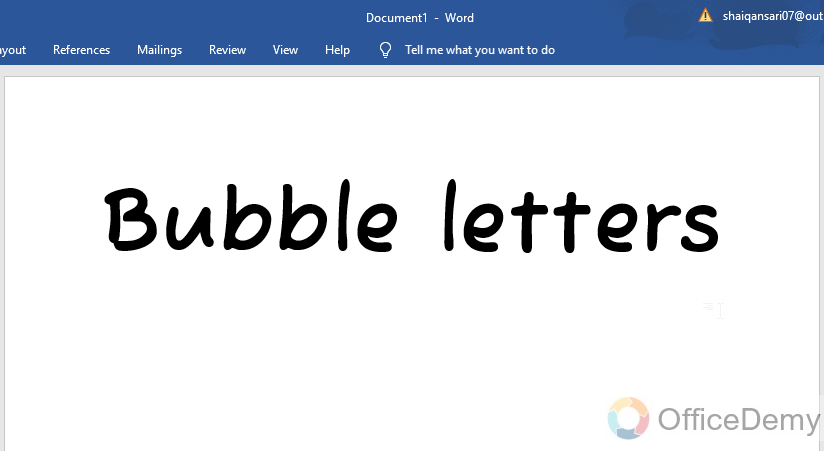
Step 15
You can see the text is converted into bubble fonts.
So, this is how to make bubble letters in Google Docs by using 2 methods. The second method is also applied to other desktop applications such as Word, Excel, etc.
I hope you find this tutorial helpful.
Get a free Bubble Letters template here
Frequently Asked Questions
How to use colors with Bubble letters?
You can pick any color from the fill-color button from the drop-down if you are making bubble letters using the drawing method.
Can I Use the Same Methods to Circle Something in Word?
Yes, you can circle in microsoft word using the same methods. Utilize the Shapes menu to select the circle shape, and then click and drag to draw it around the desired element. Customize the circle’s size, color, and transparency to enhance your document’s visual appeal.
How to make transparent bubble letters for printing purposes?
You can pick a transparent instead of any color from the fill-color dropdown, but the transparent will not appear on the screen with any background color, so you need to keep a colored border color to make your bubble letters appear on the screen also after printing. For this you can select the transparent option for the fill color, and then any solid color for the border color.
How to make Bubble letters Gradient?
When you use the drawing method, you have the options to use any solid colors, transparent, or even gradient for your bubble letters, in the next tab to the solid colors, you have so many pre-sets of gradients you can use any of them, or you can use the custom button to combine some colors to make your custom gradient.
Conclusion
This was all about how to make bubble letters in Google Docs. I tried to cover two possible methods to make bubble letters in Google Docs. We first saw the drawing method in which we designed a title using colors, font family, and borders to add to our document as an object that can be moved or resized freely. Then, we learned how to use the Google Docs More Fonts option to quickly get more fonts from Google without downloading them. Then, to use these fonts other than Google Apps, we saw another method in which we learned to download and install font family from Google Fonts Store.
I hope you like today’s lesson and learned something new from it. For more learning guides and interactive lessons, keep learning with Office Demy.


