
To Resize Rows & Columns in Google Sheets
- Select the border between rows or columns.
- Drag the border left or right for column resizing, or up and down for row resizing.
OR
- Select multiple contiguous rows or columns.
- Drag the border of any selected row or column.
- This resizes the entire selection consistently.
OR
- Select the cell or cells containing text.
- Go to Toolbar.
- Text wrapping > Select “Wrap“.
- Text will wrap within the cell without increasing column width or row height.
OR
- Hover over the row or column border until a two-sided arrow appears.
- Double-click to trigger autofit.
- The row or column size adjusts automatically to fit the text.
OR
- Right-click on the column or row header.
- Choose “Resize column” for columns or “Resize row” for rows.
- Set the width/height in pixels or use “Fit to data“
OR
- Select multiple contiguous rows or columns.
- Right-click and choose “Resize column” or “Resize row“.
- Adjust width/height in pixels or use “Fit to data“
In this article, will learn how to resize rows and columns in google sheets. When we work with data in google sheets, you must have seen that we need to have different widths of the column due to the content of the cell, and similarly the height of rows to adjust the content of the cell, in today’s article we will learn how to properly resize rows and columns using various methods in google sheets.
We can resize rows in a column in many ways in different scenarios, unlike excel we have 100px columns in google sheets by default, and a drawback is we don’t see the size of the column width or row height at the time of adjusting their size. But, don’t worry we can have similar width columns, and similar height rows by resizing all of them. Today we will cover some methods to understand every how to resize rows and columns in google sheets.
Why Resize Rows and Columns is Important in Google Sheets
As you know, we work with so many data types on google sheets. We may have small content inside cells, or we may have extensive content even like a paragraph. So, to achieve good readability and enhance user experience, we need to know some useful things about rows and column resizing, normally we resize by simple dragging.
But, we have even more better and precise ways to do this and keep the content clean and consistent with the same width columns and exact rows height. Therefore, we need to learn how to resize columns in google sheets.
How to Resize Rows and Columns in Google Sheets
As I have told you above, we will see various methods. From now let’s start with some basics about rows and columns size adjustment. Firstly, let’s see some simple ways to resize rows and columns.
Resize rows and Columns in Google Sheets – using Select and Drag
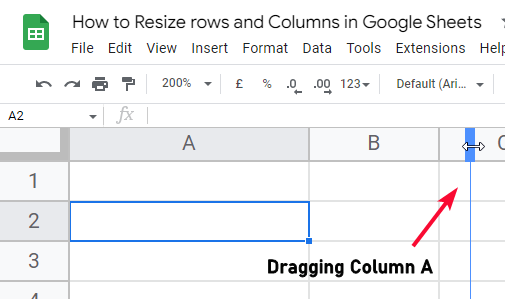
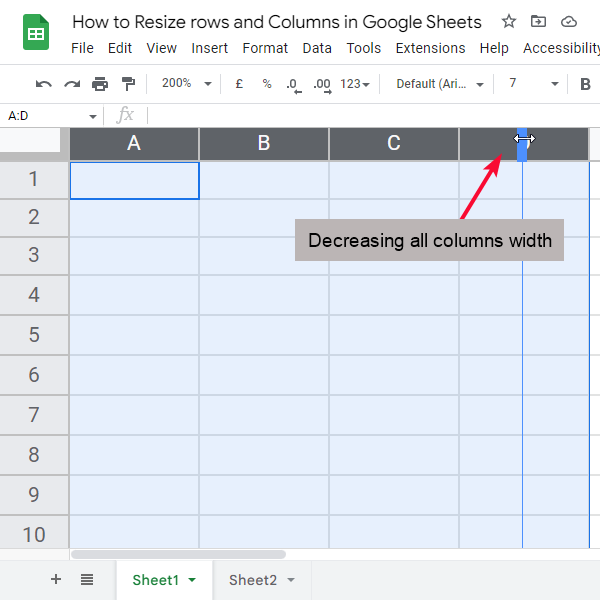
The simplest and most frequently used method to resize rows and columns in google sheets is select and drag, you can columns and rows divided into cells, you have a line after each row or column, you simply need to select it and drag left or right for column resizing, and up and down for row resizing.
This is a very easy method you can learn from the simple steps below,
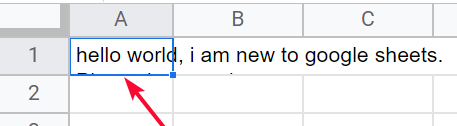
Step 1
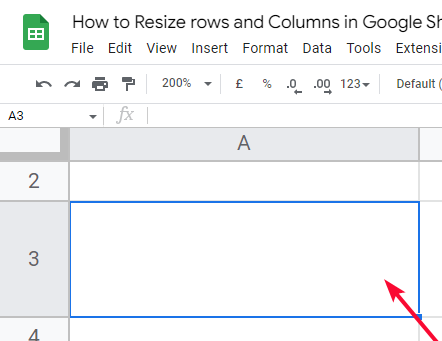
Place your cursor between the column or row line until your cursor changes into a two-sided arrow.
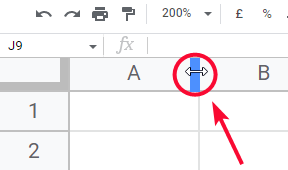
Step 2
Click on it, and a thin blue line will generate that will show you from where you are dragging or resizing this row or column

Step 3
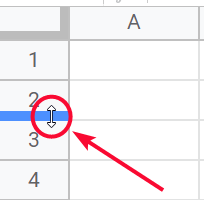
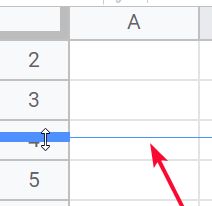
Keep the left click on and start dragging
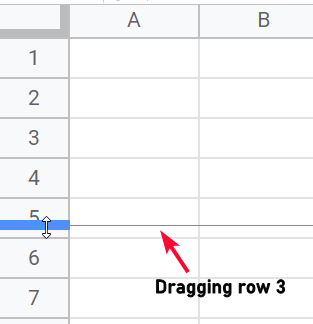
Step 4
You can see rows or columns are resized.
Resize rows and Columns in Google Sheets – Multiple Row or Columns
In this section, we will learn how to resize rows and columns in google sheets for multiple rows or columns. We use this method to keep the rows and columns’ sizes consistent and precise. We will see how to have the exactly same height for all your rows, and the same width for all the columns.
Step 1
Select the columns or rows from headers to resize
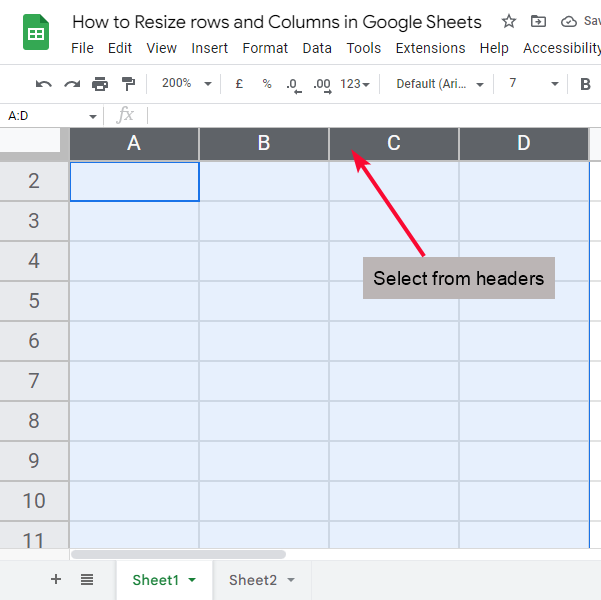
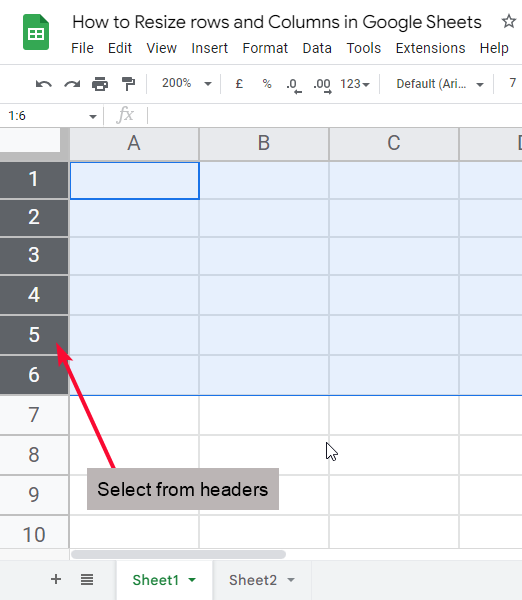
Note: Headers will turn black after proper selection
Step 2
Now from the selection hold any of the rows or columns and drag

Step 3
Doing this for a single row or column will affect the entire selection.
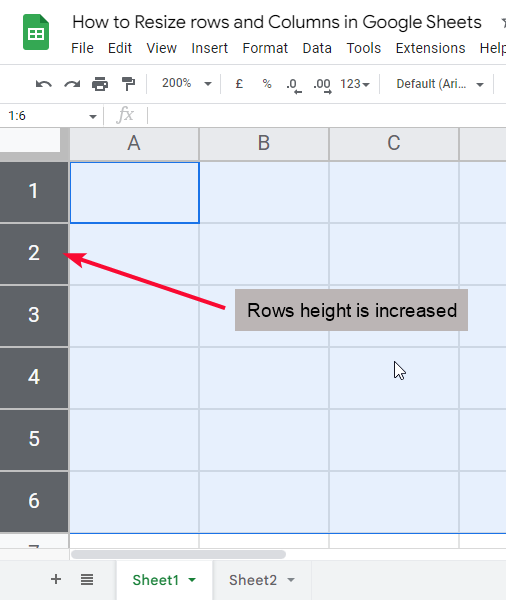
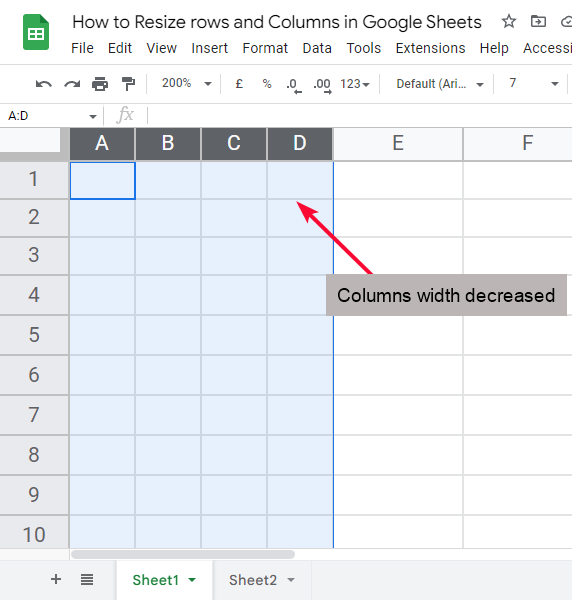
This is how you can do this for multiple rows or columns.
Note: The selection of rows and columns must be contiguous. You cannot select distant rows or columns.
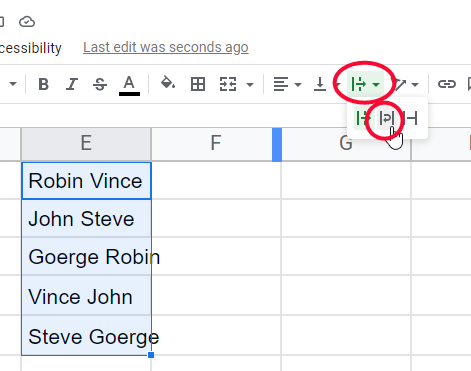
Resize rows and Columns in Google Sheets – using Wrap Text
Wrap text is a method to wrap down the content of the cell and move to next time, this is useful when you don’t want to increase the entire column size so you turn on wrap text for longer texts only. This is a good option to consider when you don’t want to enhance the row height or column width.
It is very easy to wrap your text in a cell or multiple cells.
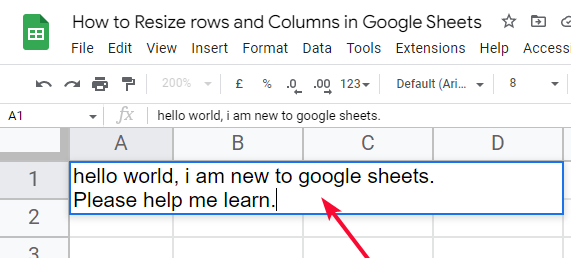
Step 1
Select the cell or cells you want to wrap text
Step 2
Go to Toolbar and click on Text wrapping > then select Wrap
OR
Step 3
You can go to Format menu > Wrapping > Wrap
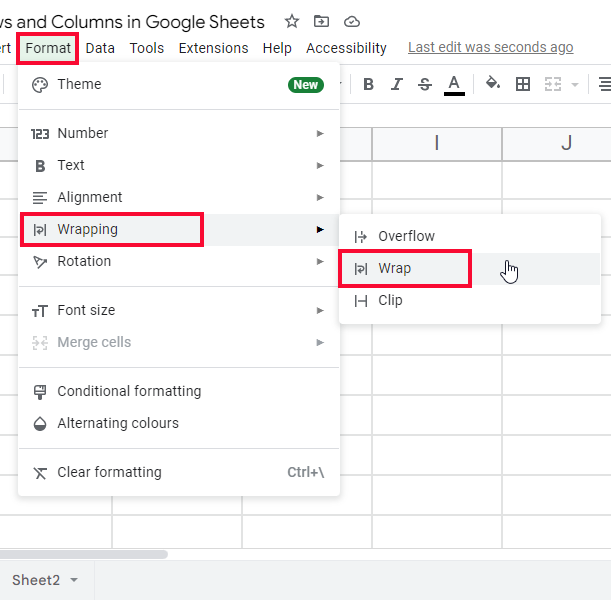
This way you can implicate your text into the same column and it will auto-fit when the width increases the text will spread and when the width is decreased the text will wrap and will not overflow into the next column either it will clip.
Resize rows and Columns in Google Sheets – using AutoFit
Sometimes, we need to have absolute sizes of the column as our content size we may have small and larger headings or text in the same data and to match the content size with the cell padding we can use autofit feature. This feature will automatically detect your content extension and will increase the size exactly as the content is, you don’t need to drag the column width to match the content size, it will do it automatically.
Note: Autofit is a built-in method in google sheets, and it does not work with the wrap text feature.
Wrap text shifts the text into a new line, so the autofit will not entertain the wrapped content because it’s now in the next line so autofit will only adjust the column width or row height based on the span of the first line of the content, if you want to rely on the autofit feature then do not use wrap text.
To autofit your rows and columns you can follow the simple steps below.
Step 1
Mouse over on the column or row border and note that a two-sided arrow will appear
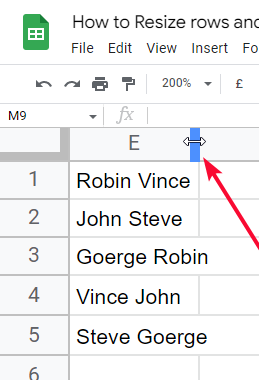
Step 2
You don’t need to do anything, simply double click
Step 3
You can see your column with or row height is automatically adjusted and fit your text’s span.
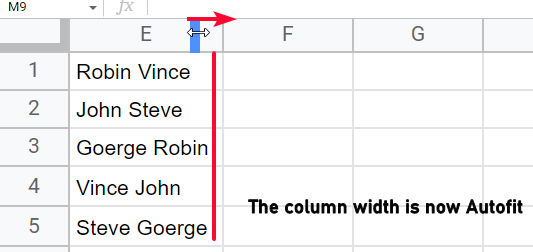
This is how autofit works.
Resize rows and Columns in Google Sheets – Resize Rows or Columns
In this section, we will learn how to resize rows and columns in google sheets using the resize button in for rows or columns, this method is similar to autofit, but you have some more options to consider. Here we can select any row and column and can define their width or height in pixels, or we can also use a radio button to autofit the data as per the content’s span.
Step 1
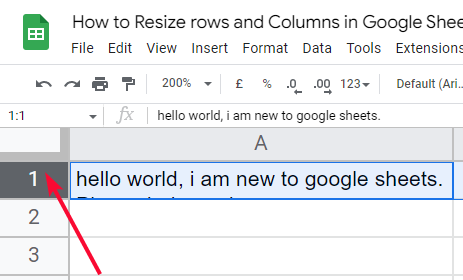
Sample data are written in a cell
Step 2
See in edit mood, the data is overflowing horizontally and vertically
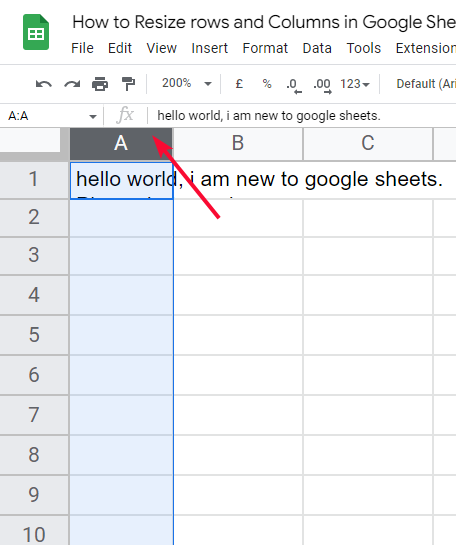
Step 3
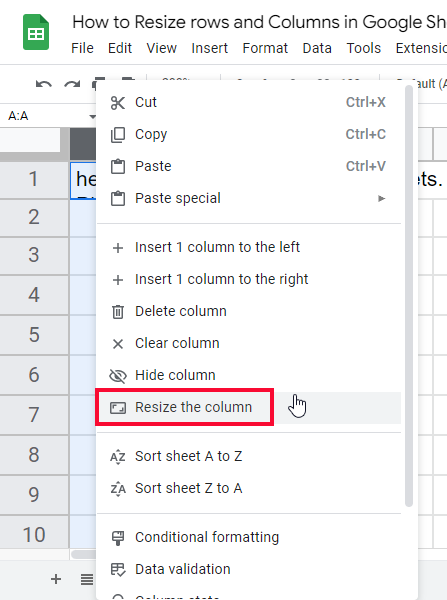
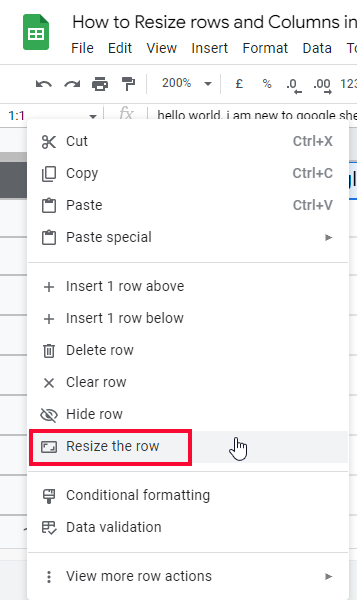
Select the column header
Step 4
Right-click to explore options
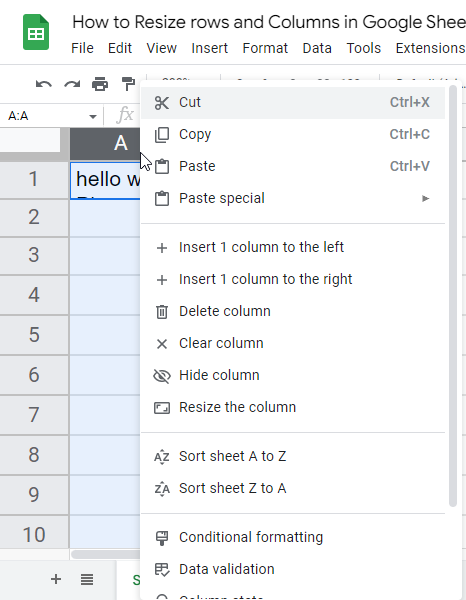
Step 5
Click on Resize column (as you have selected a column)
Step 6
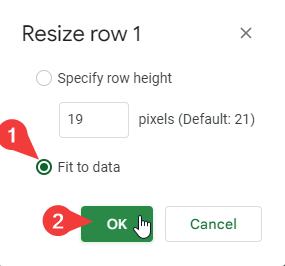
Now you can pass here a number in pixels to define the width of the column
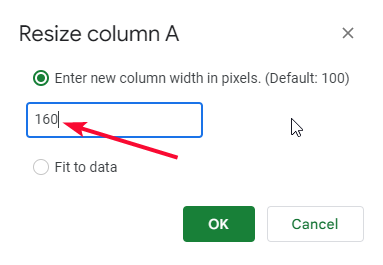
Step 7
Or you can click on the below button which is Fit to data
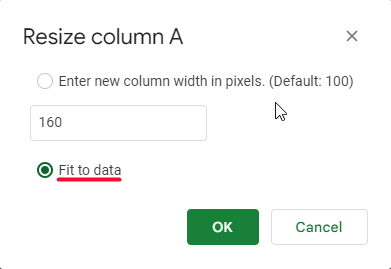
Step 8
I am using Fit to data, click on Ok to save changes
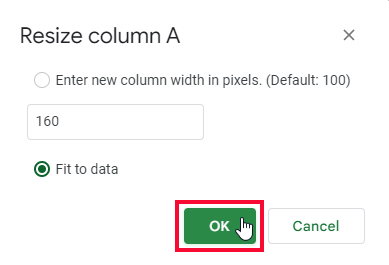
Step 9
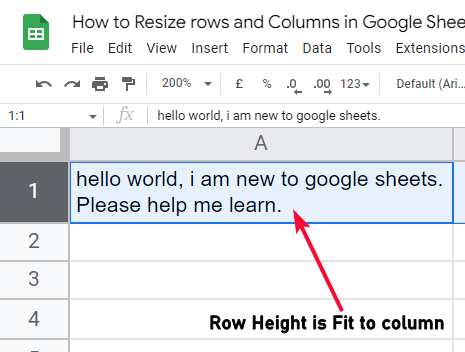
You can see your column width is autofitted and extended as per the text

Note: The data is also overflowing vertically, so lets the same for the row as well
Step 10
Select the row header
Step 11
Right click and then select Resize row (as now you have selected a row)
Step 12
Check on Fit to data and click on Ok
Step 13
The width and height of column and row are adjusted and now fit data this is how you can use Resize column method to resize rows and columns in google sheets
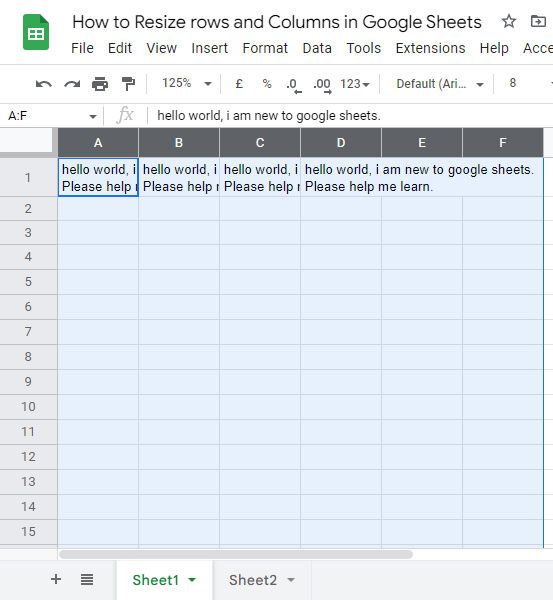
Resize rows and Columns in Google Sheets – Resize Multiple Rows or Columns
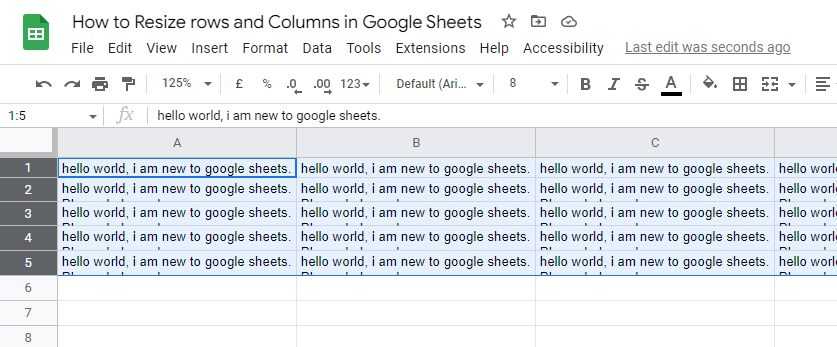
To Resize multiple contiguous columns or rows you need to simply select them from the headers (rows or columns), once you selected you can go to options and click on Resize, now you can give width in pixels or you can use Fit to data for columns to have them unique height according to their data, you can do similar for rows as well.
I am using here the pixels method to resize rows and columns
Step 1
Select some columns
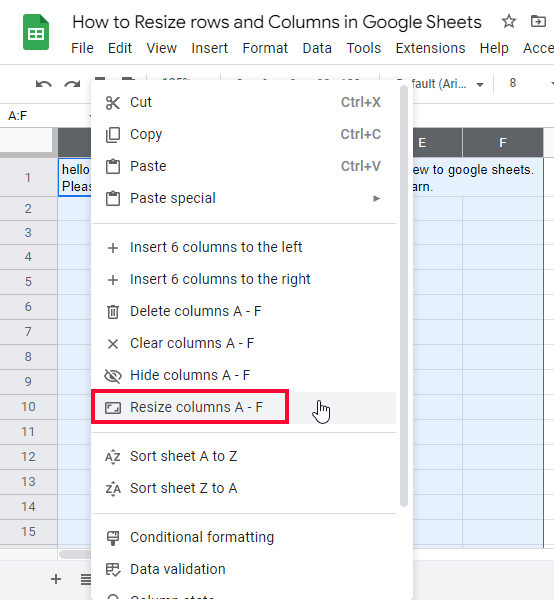
Step 2
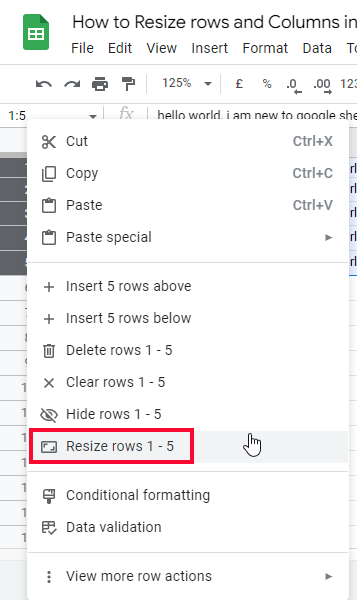
Right click and go to Resize column A-F
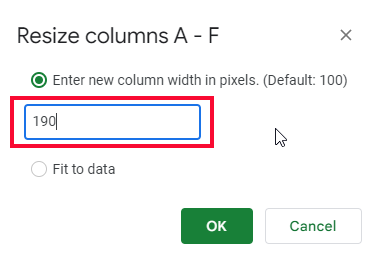
Step 3
Pass a width in pixels
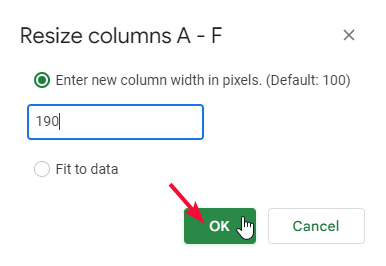
Step 4
Click on the Ok button
Step 5
Select some rows > right click and go to Resize rows 1-5
Step 6
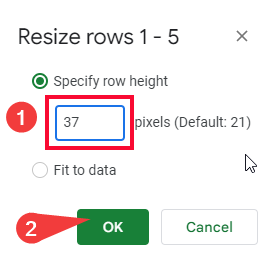
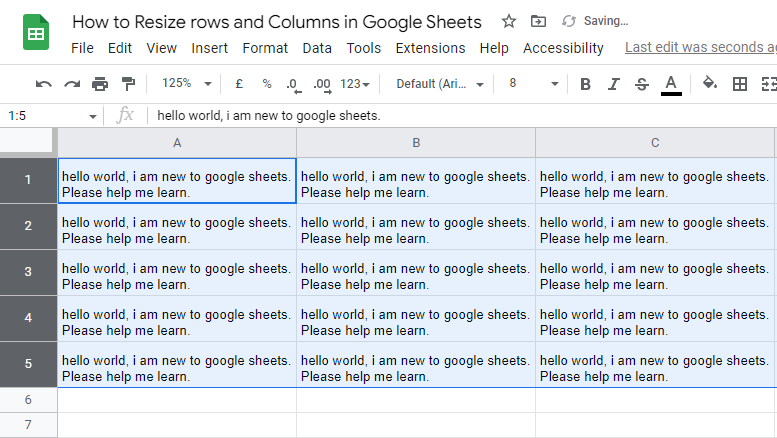
Pass the height for rows in pixels and click on the OK button.
This is how to resize rows and columns in google sheets. I hope you have got an understanding of all the methods and that now you easily resize your rows and columns individually or together using any of the above methods.
Useful Notes
- When you pass height in pixels for a row or width for a column, to give you some idea about the normal dimensions the default values in already written above.
- Autofit method, either by clicking the cell border or from the Resize button does not work on the wrapped content as I have discussed for the reasons above
- All the methods can be applied on a single row and column, or on multiple rows and columns
Frequently Asked Questions
Can the same methods be used to move rows and columns in Google Sheets?
Yes, the same methods can be used for changing the order of rows and columns in Google Sheets. By selecting and dragging the desired rows or columns to a new position, users can easily rearrange the data in their spreadsheet. This flexibility in organizing and customizing the layout makes data management efficient and user-friendly.
Are the methods for changing cell size in Google Sheets applicable for resizing rows and columns as well?
Yes, the methods for modifying cell size on google sheets are applicable for resizing rows and columns as well. With a simple right-click on a row or column header, you can easily adjust their size by selecting the Resize row or Resize column option. This feature allows for precision and customization in organizing data within Google Sheets.
Is Cell Padding Required When Resizing Rows and Columns in Google Sheets?
When resizing rows and columns in Google Sheets, it is worth considering improving cell padding in google sheets. This helps maintain a clean and organized appearance, preventing the content from getting too clustered or cramped together. By allowing sufficient space around the data in each cell, readability and overall aesthetics are enhanced, providing a more pleasing user experience.
Conclusion
Concluding how to resize rows and columns in google sheets. We have discussed various methods to resize rows and columns, and we saw some useful features like wrap text and autofit that help you while adjusting your rows and columns. All the screenshots are attached above with an explanation and I hope you have got a great learning outcome from this tutorial.
I hope you find this article helpful. I will see you soon with another helping tutorial, till then take care. Don’t forget to subscribe to our blog, keep in touch and keep learning with Office Demy.


