
To Set Default Font in Outlook
- Open Outlook.
- Go to “File” > “Options” > “Mail” > “Stationery and Fonts.”
- Under “Personal Stationery,” click “Font” next to “New mail messages.”
- Customize your font preferences and save changes.
OR
- While composing a new email, Go to “Format Text” > “Styles“.
- Choose or create a style.
- Select “Fonts” from “Change Styles.”
- Customize fonts and save them as default for all new email messages.
Hello, and welcome to another tutorial of our Microsoft Outlook series. In this tutorial, we will teach you how to set the default font in Outlook.
In the bustling world of modern communication, email has become an indispensable tool. Whether crafting a formal business message or exchanging thoughts with friends, the appearance of our emails carries significant weight in conveying our intended message. Amidst the various factors that contribute to email aesthetics, one often underestimated element is the default font. Microsoft Outlook, a popular email client utilized by millions, empowers users to personalize their email encounters by customizing the default font settings.
This article will guide you through the process, enabling you to effortlessly configure the default font in Outlook and elevate your email communication to new heights.
Importance of Setup Default Font in Outlook
Understanding the significance of the font and setting the default font in Outlook is crucial in today’s digital landscape. Email communication has become an integral part of our personal and professional lives, and it is essential to make a lasting impression with every message we send.
The default font in Outlook plays a pivotal role in shaping the visual appeal and readability of our emails. By learning how to configure the default font, you gain the power to create a consistent and polished email experience that aligns with your personal style and professional brand. From selecting an appropriate font style to ensuring optimal legibility, this skill empowers you to leave a positive impact on your recipients and enhances the overall effectiveness of your email communication.
In this article, we will explore the reasons why learning how to set the default font in Outlook is an essential skill worth acquiring, and how it can elevate your email communication to a whole new level of professionalism and sophistication.
How to Set Default Font in Outlook?
To set the default font in Outlook. We have two ways, the first method allows us to change set the default font for new email messages, and for a reply, or forward, and other method works on everything, and we still customize it and change the entire theme, and also save it as default. So, let’s dive deep into this interesting learning.
Set Default Font in Outlook – Using Stationery and Fonts
In this section, we will learn how to set default font in Outlook using the stationery and fonts feature in the Outlook settings. This method is very commonly used to set default font in Outlook. So, let’s see the steps below to do it.
Step 1
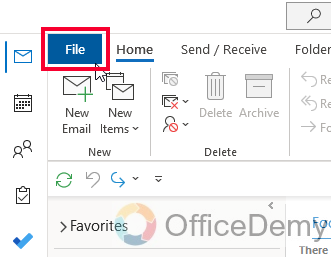
Open the Outlook app and go to the “File” tab located in the top-left corner of the window.
Step 2
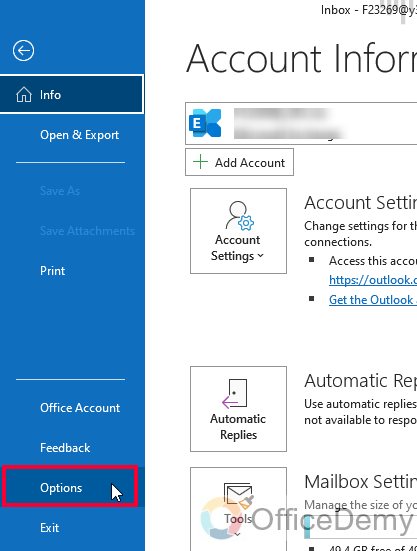
In the “File” tab, click on the “Options” button in the left-hand sidebar. This will open the Outlook Options window.
Step 3
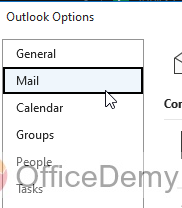
In the Outlook Options window, select the “Mail” category from the left-hand sidebar.
Step 4
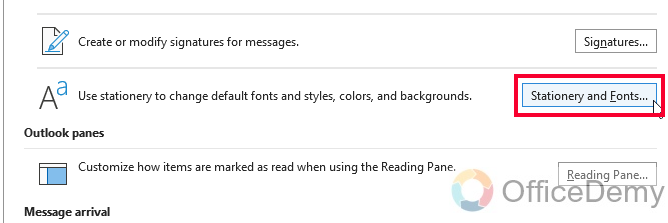
Scroll down until you find the “Stationery and Fonts” section. Click on the “Stationery and Fonts” button.
Step 5
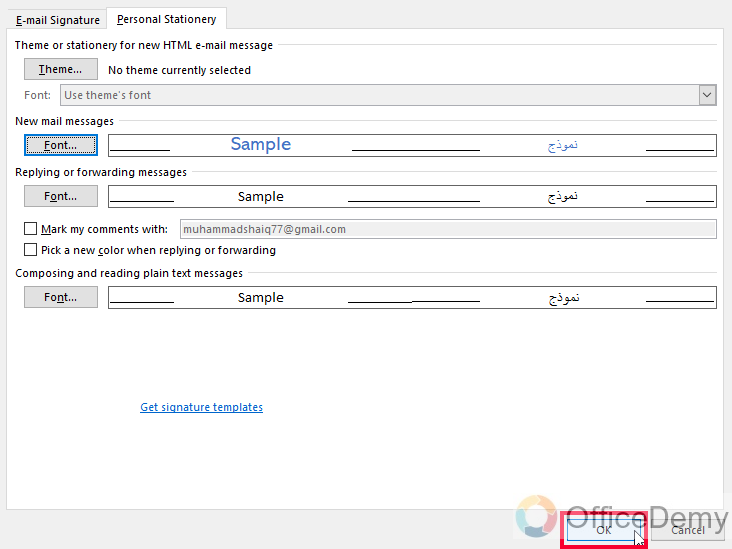
A new window named “Signatures and Stationery” will appear.
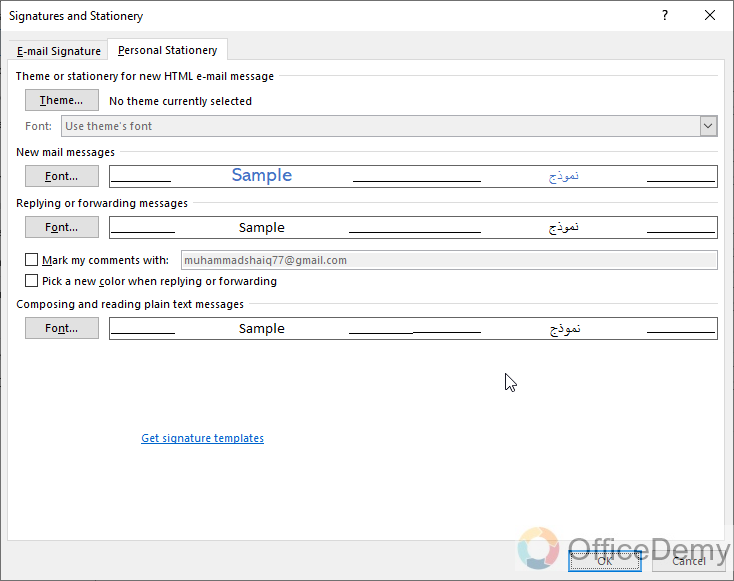
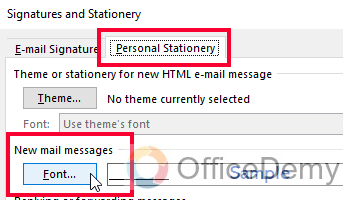
Step 6
In the “Personal Stationery” tab, click on the “Font.” button under the “New mail messages” section.
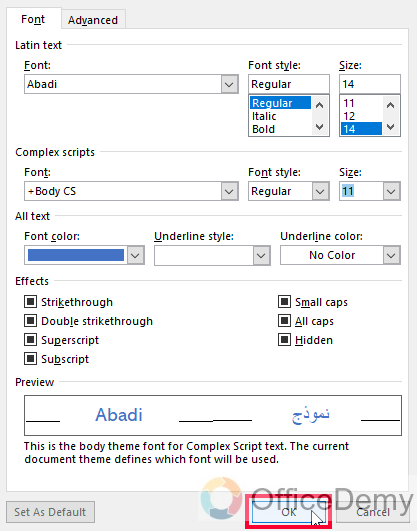
Step 7
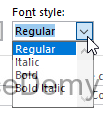
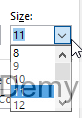
In the “Font” window that opens, you can choose the desired font style, size, color, and other formatting options for your new mail messages. Make the necessary selections based on your preferences.
Step 8
Click “OK” to save the changes and close the “Font” window.
Step 9
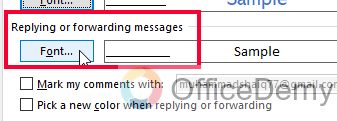
Or, if you also want to customize the font for replying and forwarding emails, click on the “Font” button under the “Replying or forwarding messages” section in the “Signatures and Stationery” window. Repeat step 7 for this section as well.
Step 10
After customizing the fonts for both new mail messages and replies/forwards, click “OK” in the “Signatures and Stationery” window to save all the changes.
That’s it. You have now successfully set the default font for your new mail messages and replies/forwards in the Outlook app. Now, whenever you compose new emails or respond to messages, Outlook will apply your chosen font settings, ensuring a consistent and personalized email experience.
Set Default Font in Outlook – From Mail Composing Window
In this section, we will learn how to set default font in Outlook from the mail composing window. When we are composing a new mail, we have several options which are different from the normal main menu. We have some themes, and font options here, from where we cannot only change the font, but also can change styles, and can use several pe-sets for our messages. Here, we can also save the customized theme as default, and then we will get the same font and styles whenever we compose a new message. So, let’s learn about this exciting topic.
Step 1
Launch the Outlook app and open a new email message.
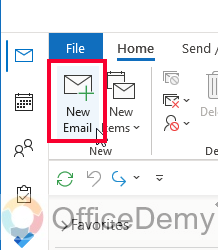
Step 2
In the email composition window, click on the “Format Text” tab.
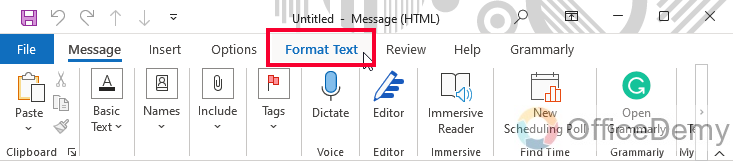
Step 3
Within the “Format Text” tab, look for the “Styles” section, you can click on the small arrow icon to expand the style box.
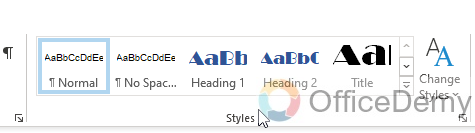
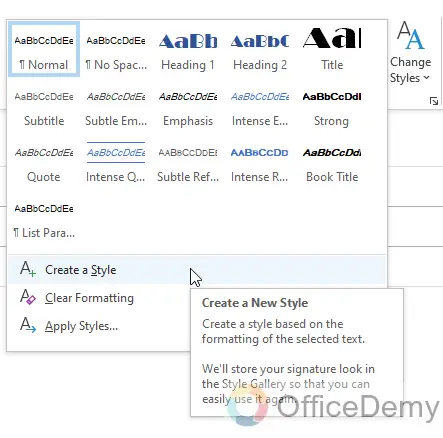
Step 4
From the styles box, select a style you like, if you don’t like any, click on the Create a style button to create a new style.
Step 5
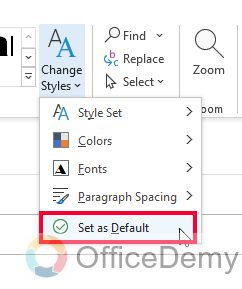
Next, you can see a “Change Styles” drop-down, click on it and select Fonts
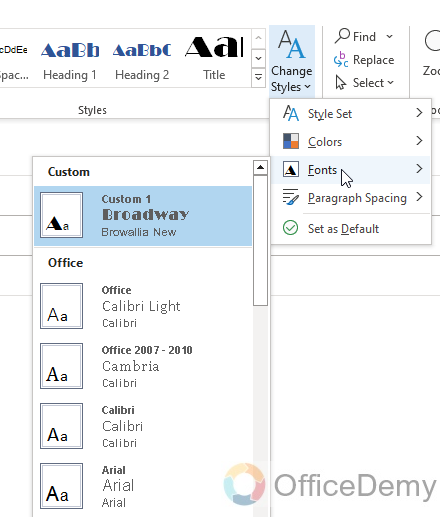
Step 6
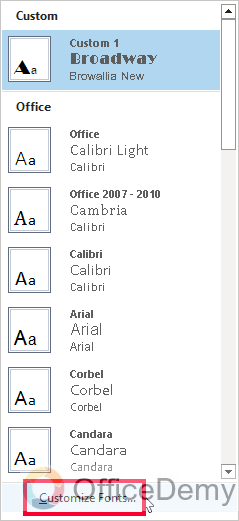
Select a font from the list, or click on “Customize Fonts”
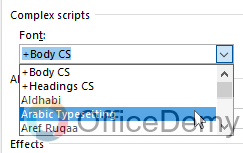
Step 7
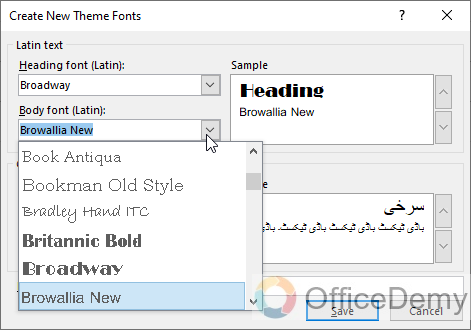
In the “Create New Theme Fonts” window, select the fonts to be added to your theme style
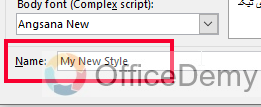
Step 8
Assign a meaningful name to this style and click on the Save button to save it.
Step 9
Now, again click on the “Change Styles” dropdown, and click on the “Save as Default” button.
Congratulations! You have successfully set the default font in the Outlook app using the email composition method. The changes you made to the “Normal” style will now be applied as the default font for your new email messages. Whenever you compose a new email, Outlook will automatically use the customized font settings, providing a consistent and personalized email experience.
Things To Remember
- Consistent font choices in your email communication convey professionalism and attention to detail.
- Choose a font that enhances readability and legibility to ensure your recipients can easily understand your messages.
- Consider the context and purpose of your emails when selecting the default font for different writing situations.
- Customizing the default font reflects your style and can help reinforce your professional brand.
- Pay attention to font size, color, and other formatting options to create visually appealing emails.
- The default font settings impact the first impression you make with your recipients, so choose wisely.
- Regularly review and update your default font settings to align with your evolving preferences and communication needs.
Frequently Asked Questions
Q: How to set the default font in Outlook?
A: To set the default font in Outlook, go to the “File” tab, select “Options,” choose the “Mail” category, and click on “Stationery and Fonts” From there, you can customize the font settings for new mail messages and replies/forwards.
Q: Can I choose different default fonts for different writing situations in Outlook?
A: Yes, you can. Outlook allows you to customize the default font separately for new mail messages, replies, and plain text messages. This way, you can ensure consistency and adapt the font to different email contexts.
Can I Set the Default Font in Outlook When It’s Set as My Default Mail Client?
Yes, you can set the default font in Outlook when it’s set as your default mail client. Outlook provides several font choices, allowing you to customize the appearance of your emails. By accessing the settings or options menu, you can easily modify the default font to suit your preferences and ensure consistency in your emails.
Q: What should I consider when selecting the default font in Outlook?
A: When choosing the default font, consider factors such as readability, legibility, and the impression you want to create. Select a font that aligns with your personal style and professional branding while being easy to read for your recipients.
Conclusion
That’s all from how to set Default font in Outlook. I hope you find this guide helpful. Thanks, and keep learning with Office Demy.


