
To Set Working Hours in Outlook
- Click on the “File“.
- Choose “Options“.
- Select “Calendar” from the left sidebar.
- In the “Work time” section, adjust your work hours by changing the start and end times.
- Click “OK” to save.
Hello and welcome to another article of our Outlook series of tutorials. Microsoft Outlook has become the standard email and calendar platform for millions of users. It has been designed to help users manage their work time more effectively. If you are working in collaboration with other users, then you should keep your coworkers in the know about your availability and working hours.
By default, In Microsoft Outlook there are 9 hours of working 8:00 am to 5:00 pm. If you are a night owl or love to work late afternoon, then you can make changes to your working hours.
Read the following article on how to set working hours in which we will discuss step-by-step all the procedures to set your working hours.
Importance of setting Working Hours in Outlook
Getting a meeting notification at your rest time is worse and can ruin your comfort. While setting up working hours can give a comfortable routine, plan, discipline, and mindset.
If you are not familiar with the default working hours of Microsoft Outlook, then it is mandatory to make in the knowledge of other colleagues and team members about your working hours. If you are unaware of how to set working hours in Outlook, then you should learn this article on how to set working hours in Outlook.
How to Set Working Hours in Outlook
Microsoft Outlook has a calendar in it from where you can easily set working hours from calendar options. Let me show you practically in the following steps, how to set working hours in Outlook.
Step 1
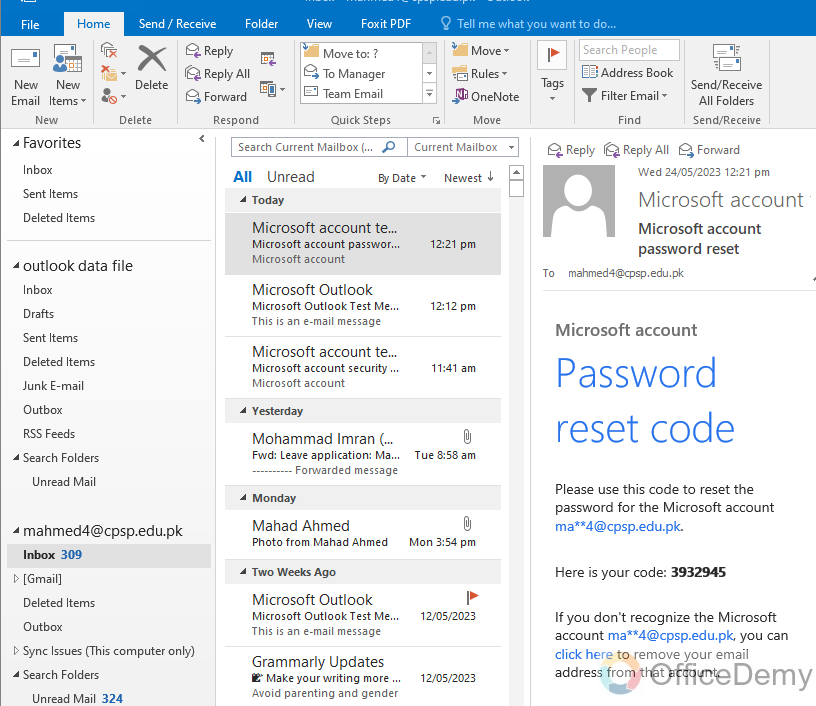
If you want to set working hours in Microsoft Outlook, when you open the application by default a home screen will launch at the screen as shown below in the following picture.
Step 2
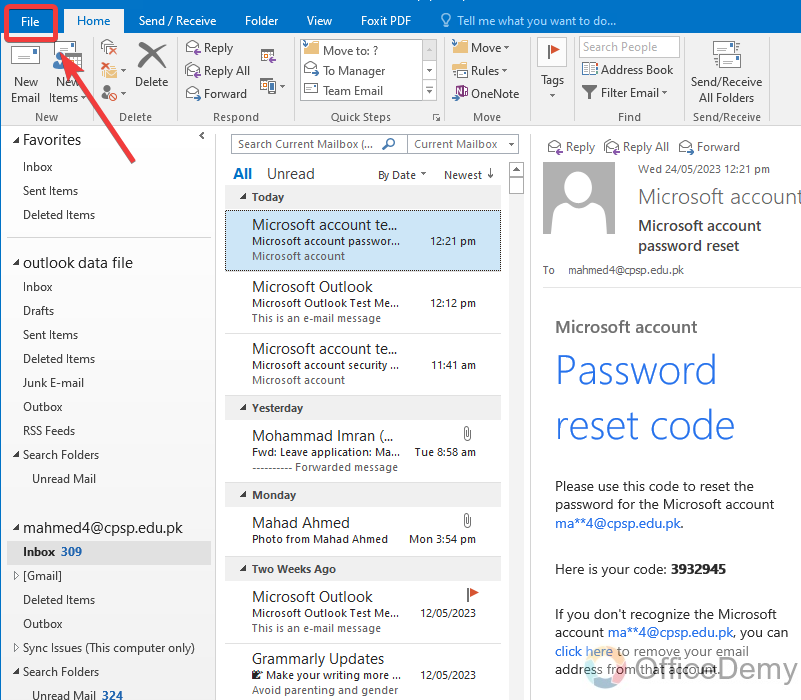
When you have entered Microsoft Outlook, go into the “File” tab of the menu bar of Outlook located at the left top corner of the window as marked in the following picture. Click on it to open it.
Step 3
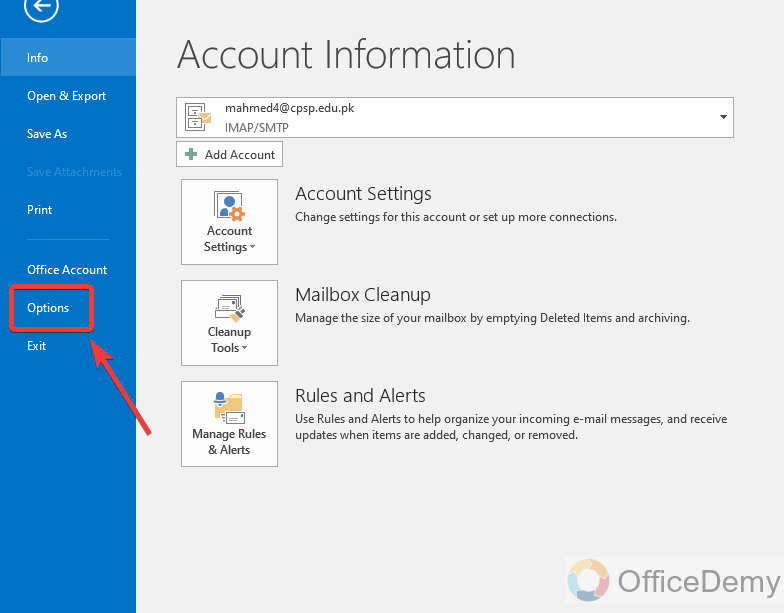
Microsoft Outlook’s screen will slightly change the following when you click on the file tab. On this window go into the “Options” present at the left-listed menus to open more customization options.
Step 4
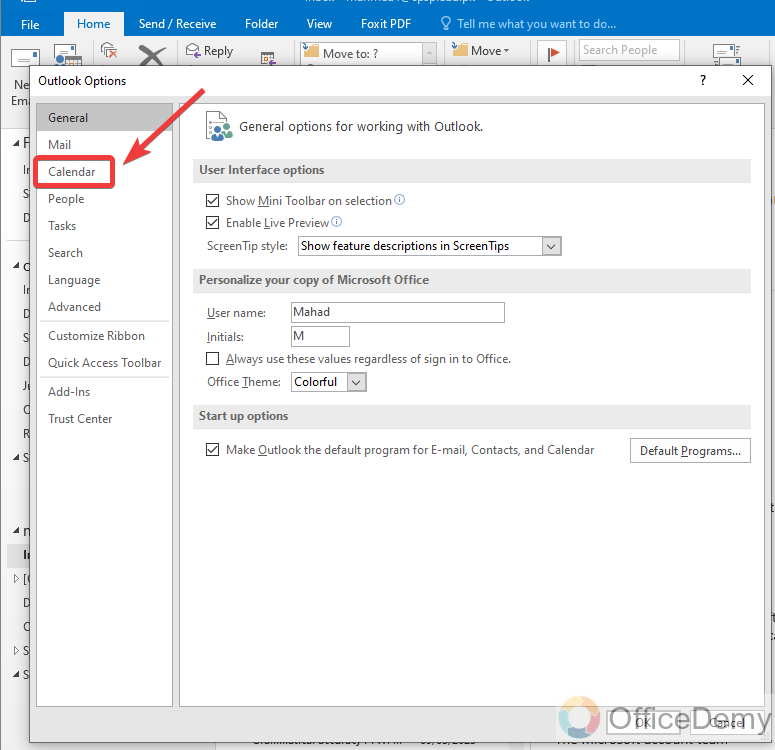
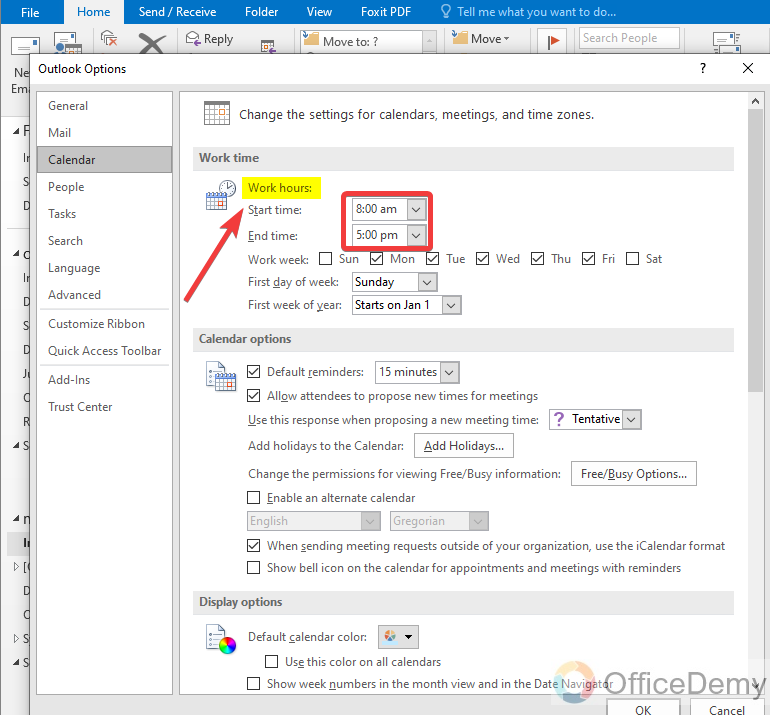
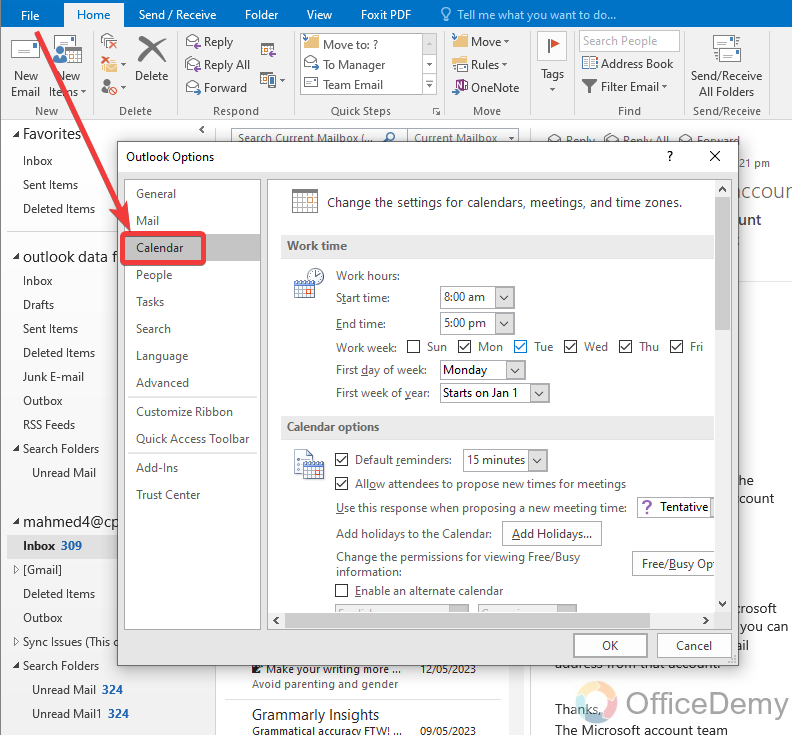
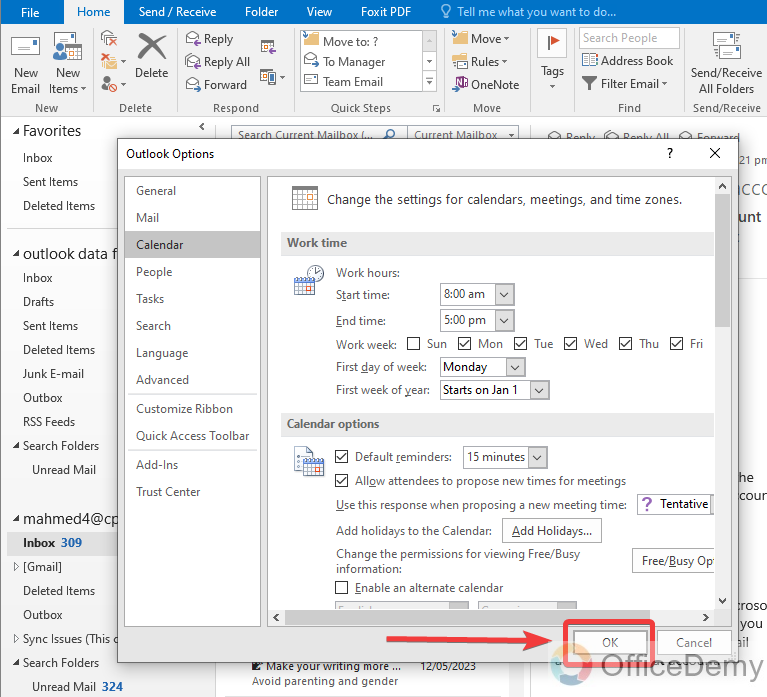
Now you will see another pop-up window with detailed options regarding Microsoft Outlook. On this dialogue box, there is a list of several options at the left side of the window in which you must go into the “Calendar” present at number second.
Step 5
When you click on the calendar option, you will find so many detailed options in front of you. On these options first, you will see the customizations for work hours as highlighted in the following picture. You can also see the start and end time through which you can change this time and can set the working hours.
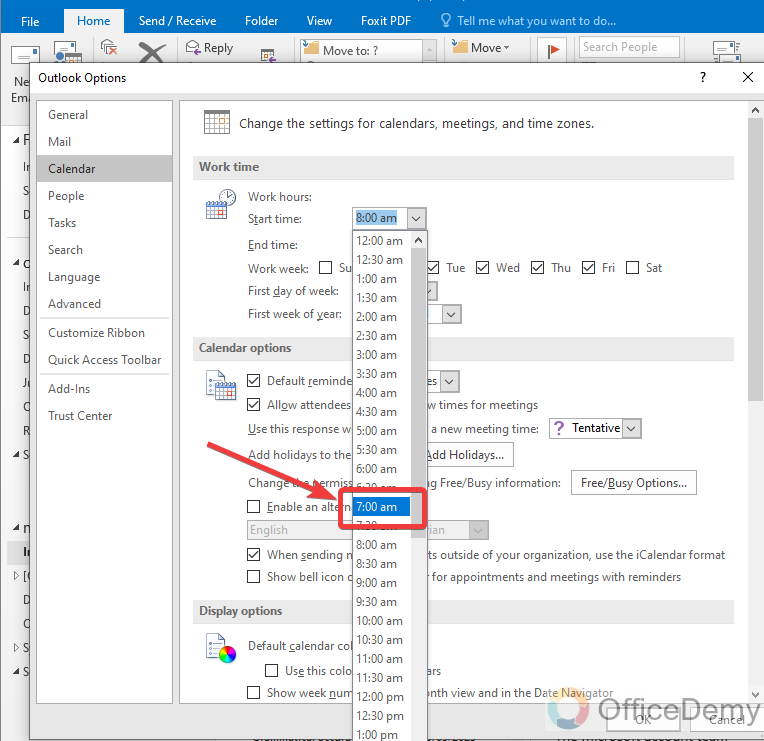
Step 6
Click on the small arrow herewith the start time and select the time at which you want to start your work. As I have selected 7:00 am for starting time in the following example.
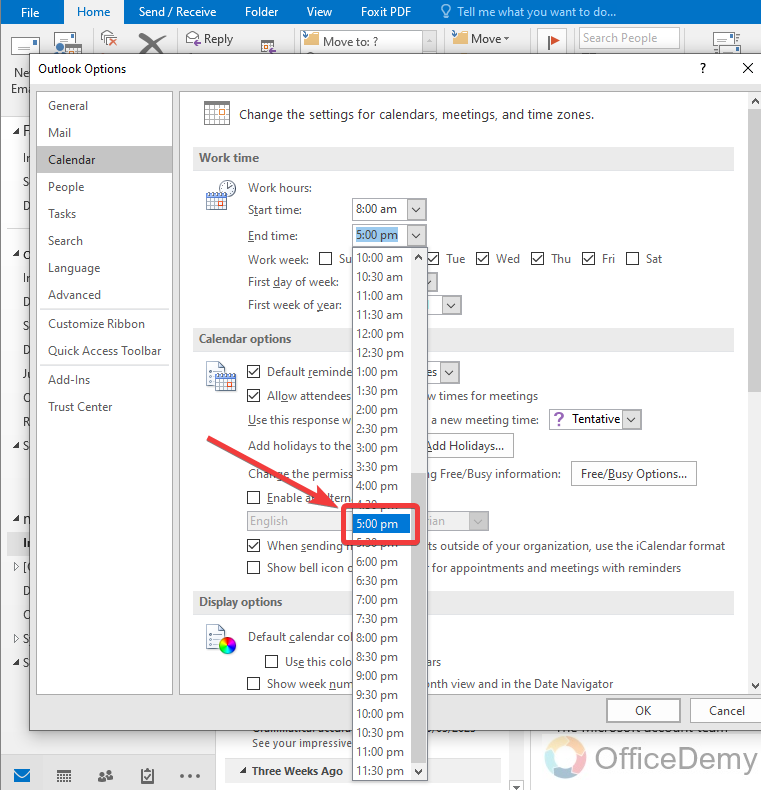
Step 7
In the same way, you can select the end time to set the end time of your work. As I have selected 5:00 pm in the following example to set the end time of your work.
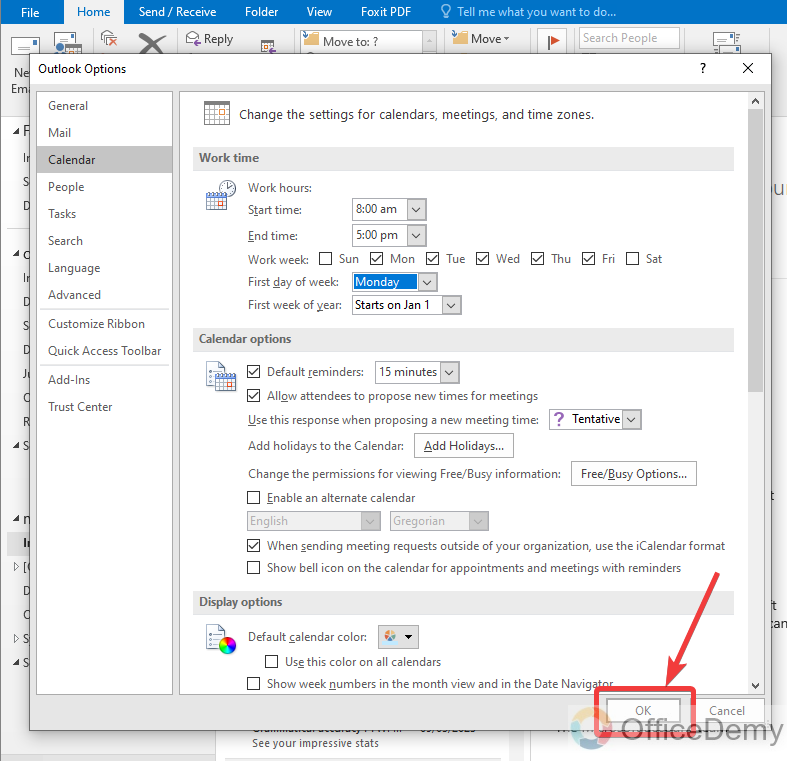
Step 8
As per requirements, we have almost done it. As we had to set working hours which had been set by setting up start and end times. Now just click on the “Ok” button to finish the procedure.
In this way, you can set working hours in Outlook, now you can check the calendar to view your working hours.
Frequently Asked Questions
Can I Check Calendar Availability in Outlook when setting my working hours?
When setting your working hours in Outlook, it’s essential to check the calendar availability in outlook. By doing so, you can avoid scheduling conflicts and efficiently manage your time. With the help of this feature, you can allocate your working hours effectively and ensure that you are available when needed. Make sure to utilize the convenience of checking calendar availability in Outlook for seamless scheduling.
Can I Set Out of Office in Microsoft Teams If I’ve Already Set My Working Hours in Outlook?
Yes, you can set out of office in Teams even if you have already set your working hours in Outlook. By using the Set out of office feature in Teams, you can communicate your unavailability to colleagues and external contacts. This ensures that everyone is aware of your absence, regardless of your established working hours in Outlook.
How to view working hours in Outlook?
A: As we discussed above, when multiple users are working on any project then how do they know who is free at what time? In this scenario, working hours are very helpful to make sure that an opponent is available or not. But if you don’t know how to view working hours in Outlook then there is nothing to worry here are the steps below.
Step 1
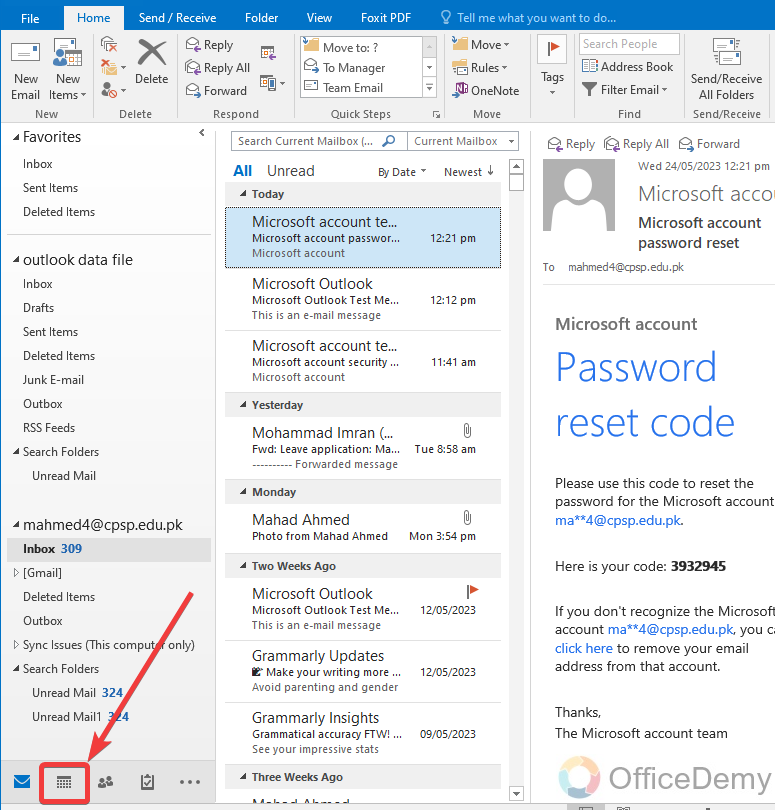
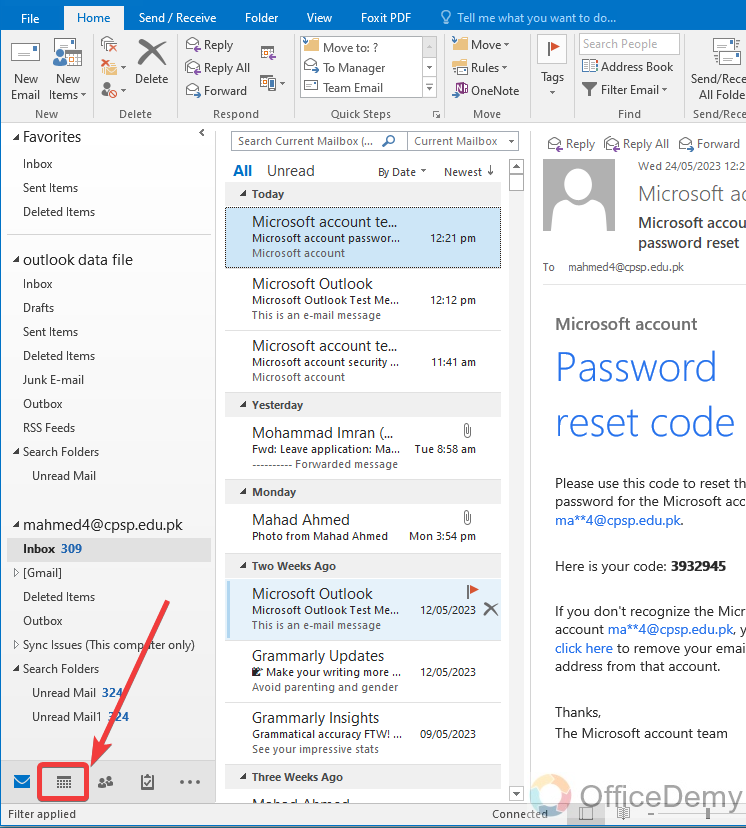
Microsoft Outlook calendar displays all meeting schedules and working hours. To view working hours in Outlook, you will have to access the calendar in it. Although you can also access the calendar from the file menu of the menu bar, there is also a shortcut to access the calendar in Outlook. As you can see in the following picture there is an icon present at the left bottom of the window where you can access the calendar in Outlook with just one click.
Step 2
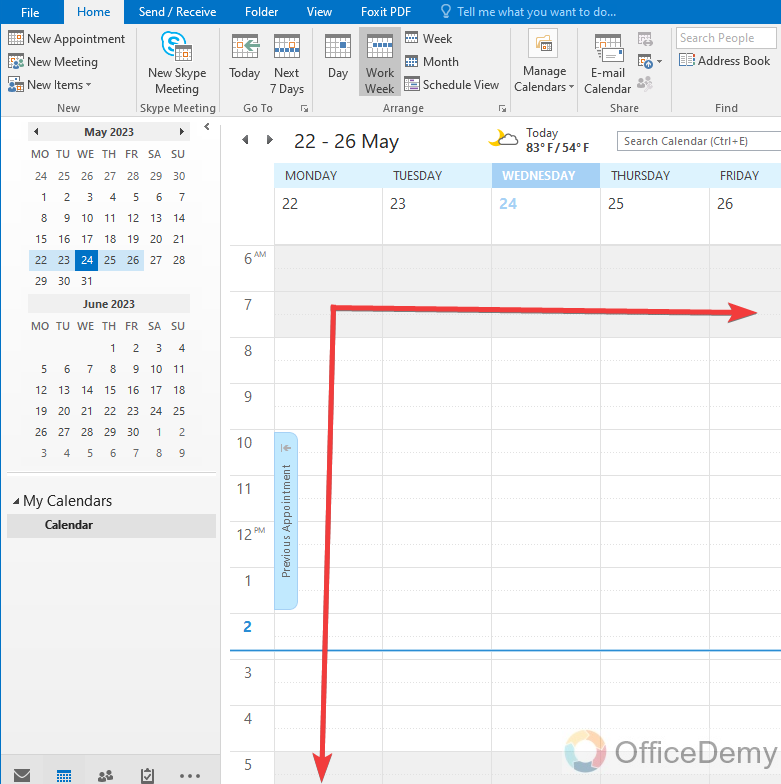
As you can see in the following example, there is a Outlook calendar in front of you on which you can see not only the working days but also you can see working hours as can be seen in the following picture highlighted vertically.
How to set working days in Microsoft Outlook?
A: You may not only need to change working hours but also you may need to change working days. As most users work on Sunday as well or most users take the holiday of other days instead of Sunday. By default, in Microsoft Outlook Sunday is the first day of the week and also the off day, so maybe you may need to make changes in this pattern. The procedure of setting up working days in Microsoft Outlook is the same as setting up working hours. If you have learned how to set working hours, then there is nothing hard to set working days in Microsoft Outlook. But if you are unable to do so, then the following steps will be helpful to you.
Step 1
First go into the options of Outlook from the File tab of the menu bar, which will give you a new window containing so many customization options in which you must open options for “Calendar” by clicking on it.
Step 2
Where did you set the time for working hours, you can find working days just below the time section as can be seen in the following screenshot. If you observe there is a check box every weekday which is used to set up working days.
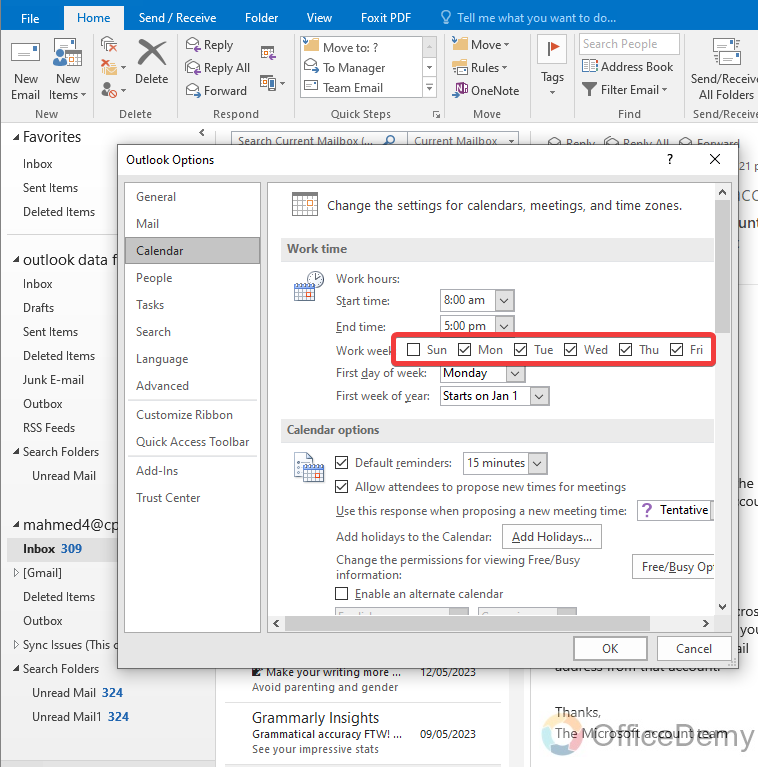
For example: If you want to work on Sunday then check the box for Sunday or if you want to get a holiday on Friday just uncheck the checkbox along the Friday.
Step 3
On this calendar’s dialogue box, if you make any changes you will have to press the OK button to save these changes. Similarly, hereafter making changes within working days press the “OK” button to save these changes.
How to set out of the office in Microsoft Outlook?
A: If you are unavailable for work then Microsoft Outlook provides you with the feature of setting up the schedule for out-of-office or work with the help of the following examples.
Step 1
Open the calendar in Outlook by clicking on the calendar icon located at the left bottom of the window.
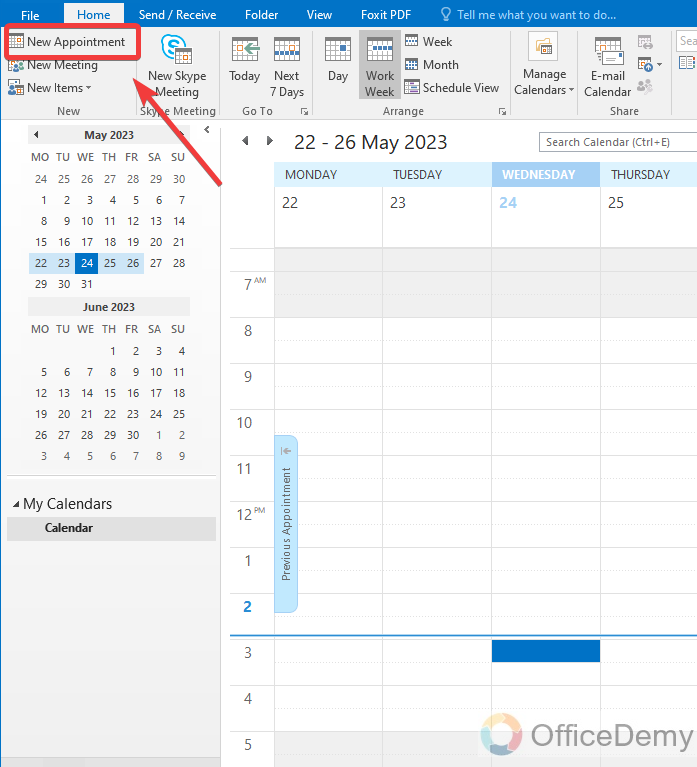
Step 2
When the calendar is open, go into the “New appointment” option highlighted at the left top corner of the window in the following picture.
Step 3
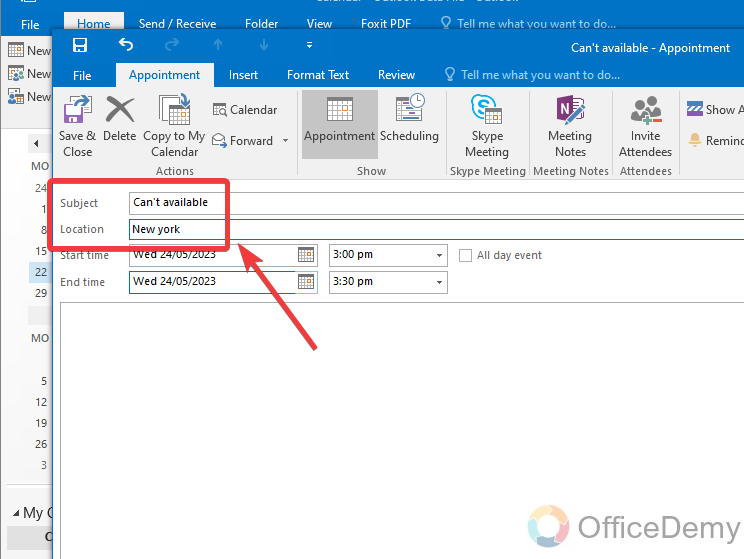
A new pop-up window will appear which will ask for some information regarding the appointment, here you can mention unavailability and the place of engagement so the other participants would know where you are busy now.
Step 4
In the next step, tell the dates to Microsoft Outlook for which you are going to be busy.
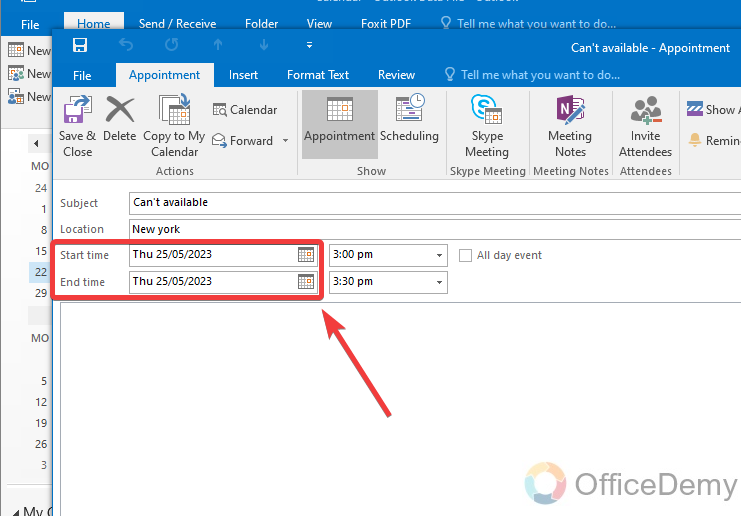
Step 5
Similarly, after the dates mentioned time for which you are not available for work.
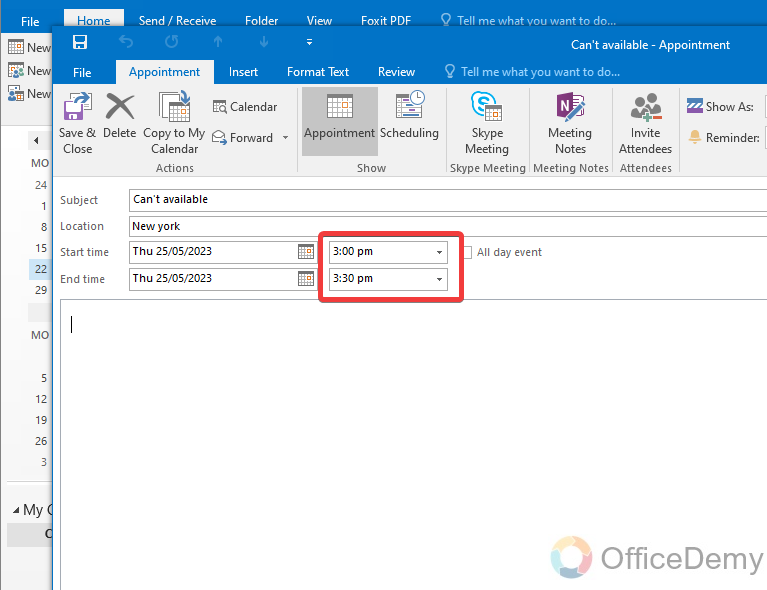
Step 6
You are almost done, now to save this appointment, click on the “Save and close” button.

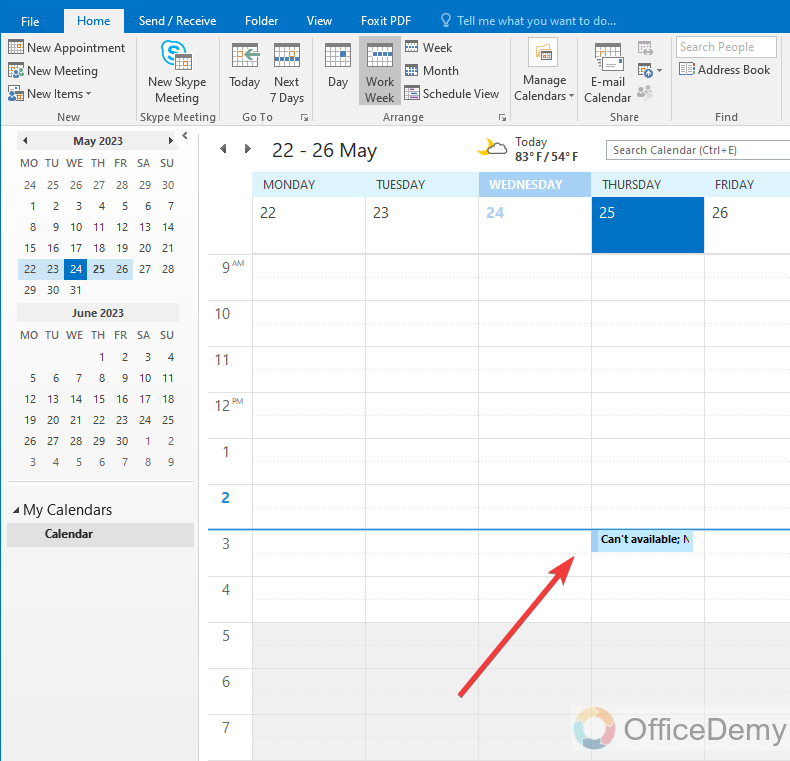
Step 7
Now, you can check your calendar, there will be a red signal to out of the office, so the person shall know about your unavailability before he schedules a meeting.
Conclusion
That’s all about how to set working hours in Outlook. Keeping everyone in the loop can give you a peaceful environment so make sure that your team members are aware of whether you are available or if a different time is better that is only possible with setting up your working hours. Hope the above tutorial on how to set working hours in Outlook will be the source of your peaceful mind.


