
To Zoom In & Zoom Out in Google Slides
- Click “View” in the toolbar.
- Select “Zoom” from the menu.
- Choose your desired zoom percentage.
OR
- Locate the zoom function in the toolbar (represented by a magnifying glass with a “+” sign).
- Click the small arrow next to the magnifying glass icon.
- Choose to zoom in or out from the drop-down menu.
OR
- Click the magnifying glass icon in the top right corner of the screen.
- Click anywhere on your slide to zoom in on that location.
OR
Keyboard Shortcuts:
- For Windows: Ctrl+Alt+”+” (Zoom In) and Ctrl+Alt+”-” (Zoom Out).
- For Mac: Command+Option+”+” (Zoom In) and Command+Option+”-” (Zoom Out).
Figuring out how to zoom in on Google slides and zoom out on Google Slides can be troublesome. In Google Slides you won’t find any zoom slider to change the zooming. Moreover, the typical keyboard shortcuts for zooming in Google Slides do not work. So, how can you zoom in or zoom out on a Google Slide?
Good news – while there are no zoom sliders and none of the normal keyboard shortcuts work, zooming in and out on Google Slides is still very easy. It’s just not where you would expect! It’s in the View menu at the top of your screen. The View menu has a Zoom option that lets you zoom in or out of your document by a specified percentage!
If you are interested to learn about how to add fonts in google slides, please follow the link How to Add & Change Font on All Slides in Google Slides.
Unlike some of the other popular presentation software, in Google Slides, zooming in and out is done in a different way. Let’s see how it works.
How to Zoom In & Zoom Out in Google Slides
Zoom Function in Google Slides is an excellent feature that allows a user to resize their presentation slides and adjust the settings according to their requirements. With the use of Zoom Function, users can adjust their slides to be bigger or smaller, depending on how they want their audience to perceive them.
Today, we are going to learn about some of the very useful features in Google Slides. We’ll be looking at 3 different ways of zooming in or out on Google Slides.
Method 1: Zoom In & Zoom Out from Google Slides Menu Bar
Step 1:
Go to google drive and open your google slide presentation which you want to zoom in.
Step 2:
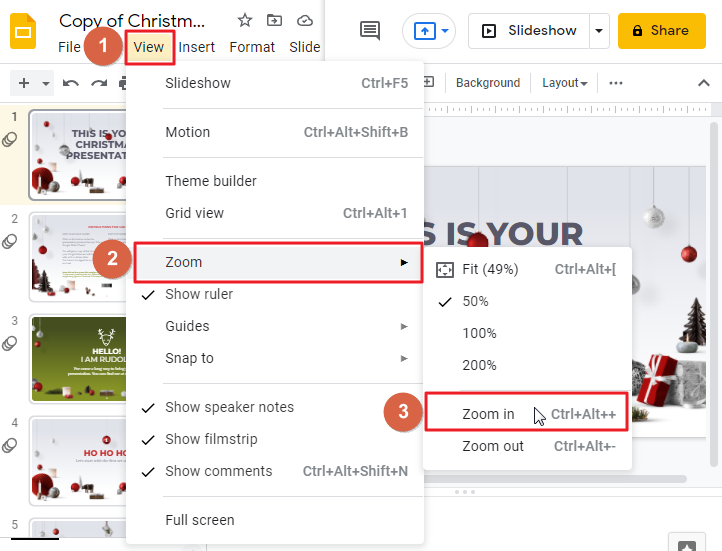
Click on View located at the top in the toolbar. A drop-down menu will appear. click on ZOOM > Click on Zoom in.
Or keyboard shortcut to zoom in google slide is, Ctrl+Alt++
Tutorial: Zoom In & Zoom Out from Google Slides Menu Bar
Method 2: Zoom In & Zoom Out using Google Slides Toolbar Zoom Function
When you need to zoom in or zoom out multiple times in your slideshow presentation, using the above-mentioned mouse method can be a bit time consuming since you will have to repeat all the steps again!
Google Slides provides a convenient way to zoom in or zoom out your slides. And you can do it directly from the Toolbar. So, let’s see how it works,
Step 1:
Go to google drive and open your google slide presentation which you want to zoom in.
Step 2:
In order to zoom in on the google slide, you will need to use the Zoom function. This can be found in the toolbar and is represented by a magnifying glass with a “+” sign inside it.
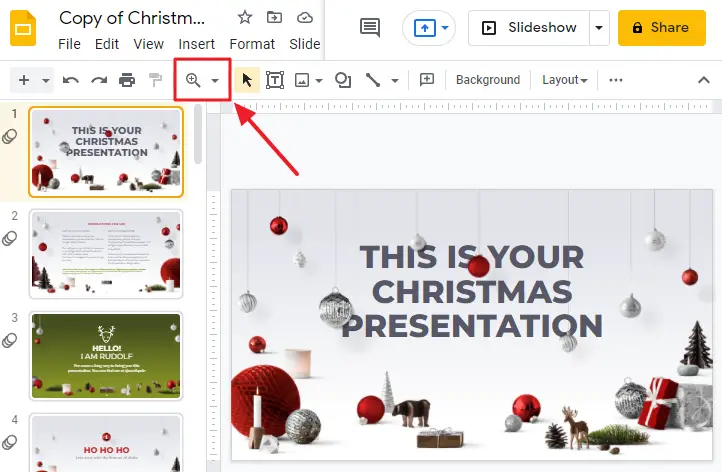
Step 3:
Now click on the small arrow which is just next to the magnifying glass icon. As soon as you click on it, a drop-down menu will appear.
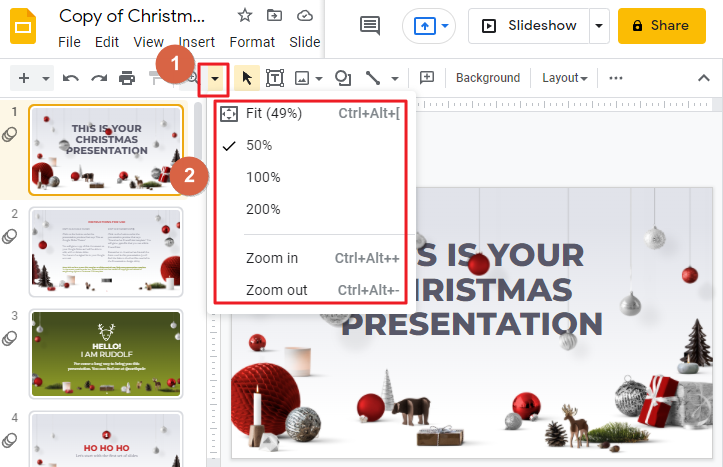
Step 4:
Once the drop-down menu appears on your screen, you can select an option from here depending on your requirement. You can choose to zoom in or zoom out. You can repeat these steps as many times as you want.
Tutorial: Zoom In & Zoom Out using Google Slides Toolbar Zoom Function
Method 3: Zoom In & Zoom Out by Clicking Magnifying Icon
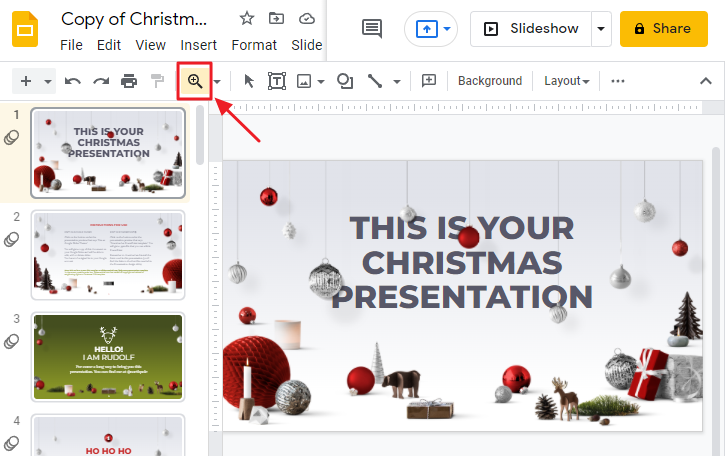
You can quickly zoom in multiple times by selecting the magnifying glass. Click on it instead of the downward arrow. if you want to zoom in on something, such as an image or text, you can do so using the ‘zoom’ function. To use it, click on the magnifying glass icon at the top right of the screen and then click anywhere on your slide. Once you release, your slide should zoom in at that specific location.
Tutorial: Zoom In & Zoom Out by Clicking Magnifying Icon
The cursor on your screen might be changed to a magnifying glass, which could make it difficult to select text. If your mouse cursor is displayed as a magnifying glass, then you must press the “Esc” key on the keyboard or select the “Mouse Arrow” icon in the toolbar next to the zoom function to exit this mode.
Keyboard Shortcut to Zoom in and Zoom Out in Google Slides
If you do a lot of zooming in and out on your Google Slides presentation, then you might prefer to use the software keyboard shortcuts.
For Windows user:
The Ctrl+Alt+”+” keys can be used for Zooming In or enlarging the text size on Google Slides. Execute this command by pressing Ctrl, Alt & + keys together (It is the same as Ctrl++). Similarly, the Ctrl+Alt+”-” command can be used for Zooming Out or reducing text size on Google Slides. Execute this by pressing the Ctrl, Alt & – keys together (It is the same as Ctrl+-).
For Mac user:
You can zoom in and out on Google Slides to make the text bigger or smaller on your screen. To do so, you will press three keys on your keyboard: Command, Option, and + or –. This tip works with all keyboard shortcuts that have three keys; however, it will only work on keyboards made for Mac computers.
Zooming in and zooming out in Google Slides using the keyboard shortcut keys is the most effective method. This is because you are able to alter your zoom level in the least amount of time.
How to Set a Fixed Zoom Level on Google Slides
If you do a Slide Show in Google Slides, then you can zoom in and out on the content of that slide. But unlike PowerPoint, you don’t have many options for controlling the zooming process.
Google Slides does have a few preset levels for zooming. The zoom to 50% allows you to see 4 slides at once. The 100% level is what is shown by default when you open a new presentation. The 200% zoom level makes your screen feel as if you are writing on paper.
The option to create fixed presets is highly useful. When you set a fixed zoom level, your slides will open to that exact zoom level every time.
Nevertheless, we can set a fixed zoom level in Google Slides through:
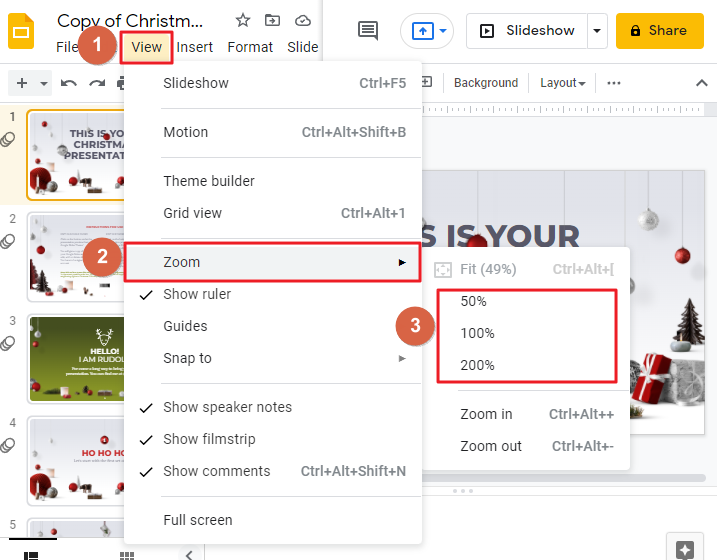
Once you arrive at the “View” menu, a drop-down list will appear. In that list, find the subheading called “Zoom” and click on it. A smaller drop-down list should appear next to the larger one. In this list, there are three options. These options let you zoom in and out.
These three presets allow you to instantly increase your slide size by 1 of the 3 preset percentages (50%, 100% or 200%). So, if you want to get up close and personal with your audience, this is the perfect tool!
Zoom in and out of any slide with the click of a button. The 100% Zoom Level gives you more space to work, while the 200% Zoom Level allows for detailed, pixel-level design work. And don’t forget, you can effortlessly go back to 50%, 100%, and 200% with just one click of the mouse.
Or you can Fix zoom levels for a slide using the Zoom Function in the Toolbar. You can control when your audience sees different parts of your slide. (As mentioned in method 2).
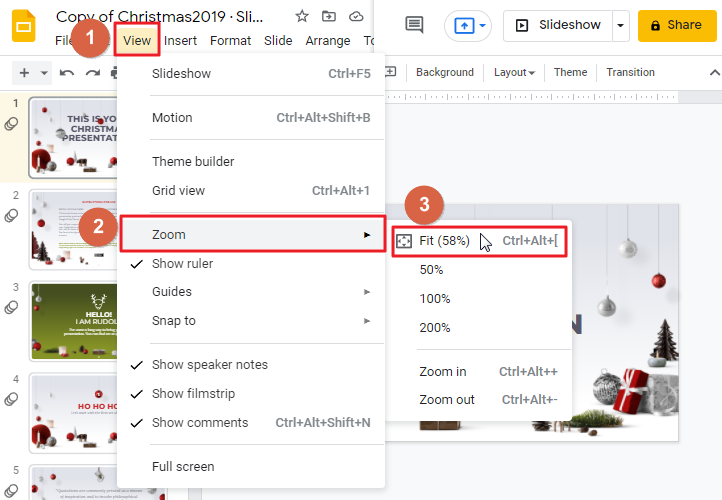
How to Reset Zoom Levels of a Slide on Google Slides
Sometimes when you’re working on Google Slides, the zoom options can be a little tough to understand. If the zoom level of your slide gets messed up, then it’s hard to get it back to normal. In this part of the article, I’ll explain how to reset the zoom level of a single slide in Google Slides.
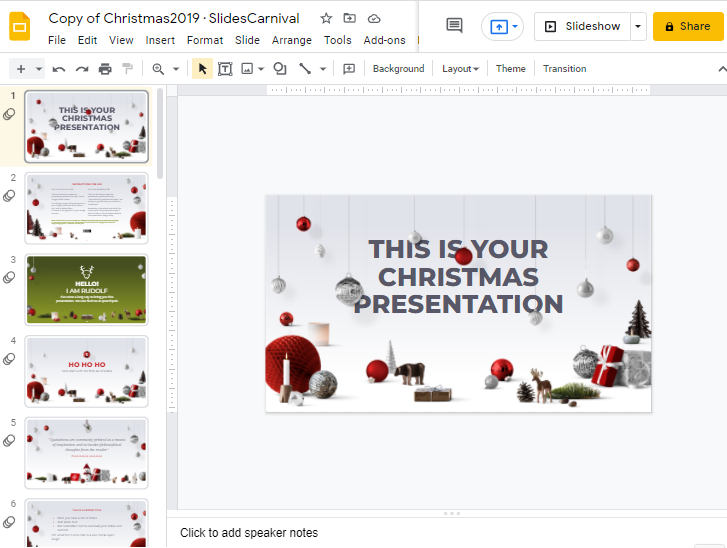
Resetting the zoom level of a slide in Google Slides is easy! Reset your slide zoom to fit exactly into the viewing window. The first step is to click on View, then Zoom, and finally Fit (58%). It’s wise for you to keep the keyboard shortcut Ctrl+Alt+[ on Windows and Cmd+Option+[ on Mac handy in case you ever get stuck again.
Tutorial: How to Reset Zoom Levels of a Slide on Google Slides
Note that, you can also use a downward arrow to zoom in and fit as mentioned in the method 2 described above.
Frequently Asked Questions
Can I Use the Same Methods to Zoom In on Outlook as I Do on Google Slides?
Yes, you can use the same methods for zooming in on Outlook as you do on Google Slides. In Outlook, you can use the zoom feature to enlarge the text and overall display, making it easier to read or navigate through your emails. Whether it’s increasing the font size or zooming in on attachments, Outlook provides similar capabilities to help improve visibility and accessibility.
Conclusion
Changing Zoom Levels in Google Slides is quite easy, especially for those who are familiar with the process. Although, for a new user and even for some users who do not know about this option, it can be a bit cumbersome to adjust the zoom level. Hopefully, with the method described in this article above, you will now be able to change the zoom levels in Google Slides quite easily.


