
To Add, Remove, Edit & Show/Hide Guides in Google Slides
Add Guides
- Select the slide on which you want to add guides.
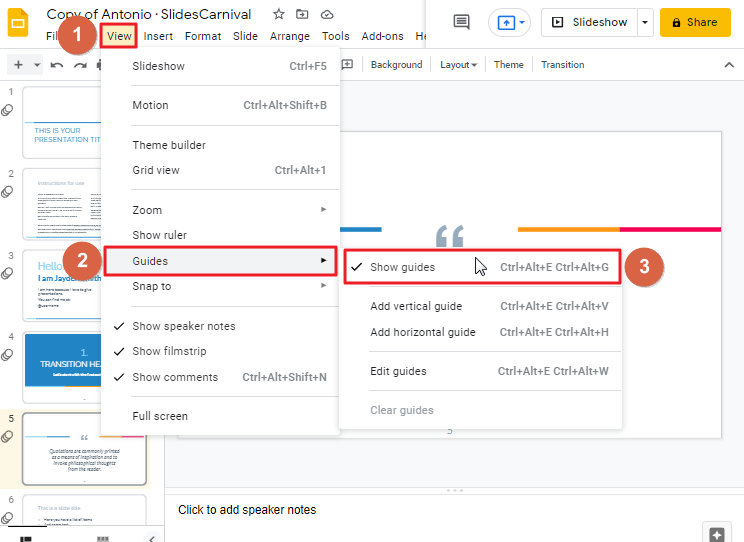
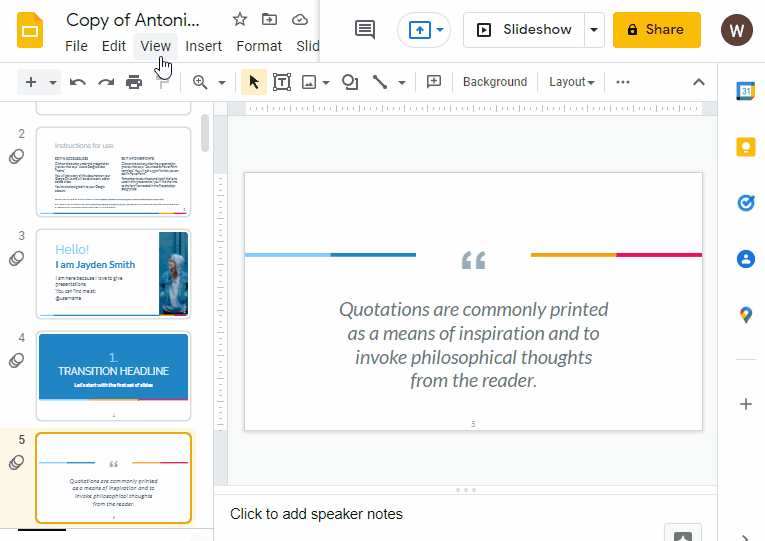
- Click on “View“.
- Select “Guides” and then select “Show guides“
Add More Guides
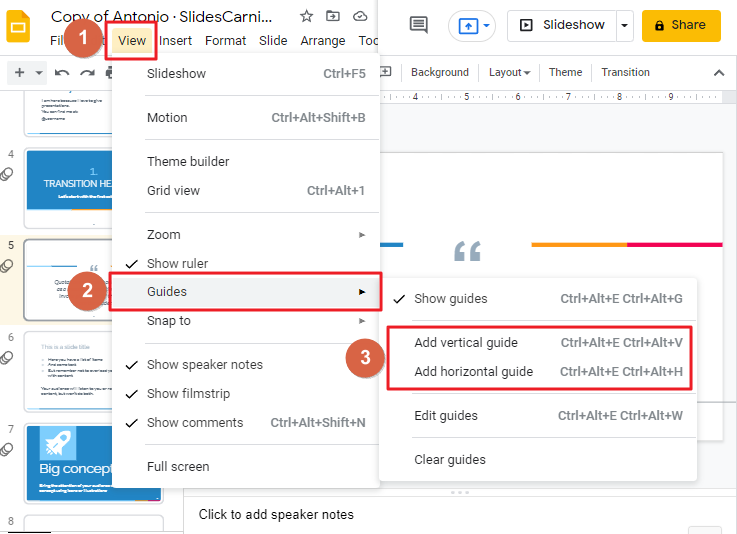
- Click on “View“.
- Select “Guides” > Choose either “Add Vertical guide” or “Add Horizontal guide” as needed.
Show/Hide Guides
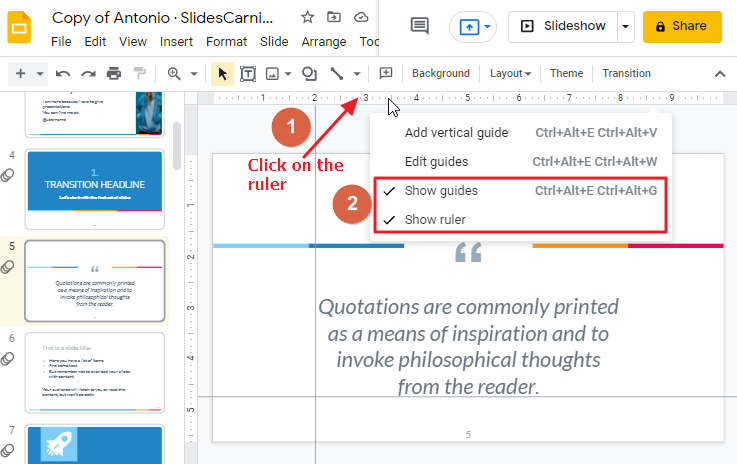
- Click on the horizontal or vertical ruler and select “Show/Hide Guides“.
Remove Guides
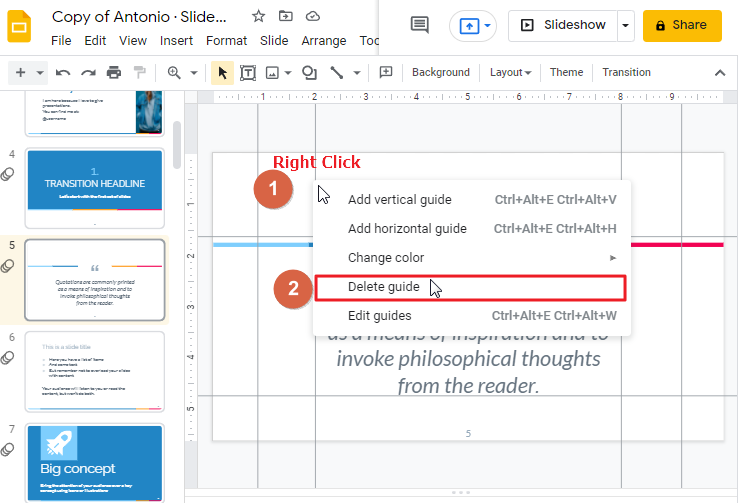
- Place your mouse cursor over the guide you want to remove.
- Right-click on the guide.
- In the pop-up menu, click on “Delete Guide“.
Edit Guides
- Right-click the guide you want to edit.
- Select “Change Color” from the context menu.
- Choose a different color for the guide.
If, like me, you find it difficult to get started on creating content for your slide, try starting with a design in mind. Both Google Slides and Microsoft PowerPoint have a Guides feature that lets you align text, pictures, or shapes. This way, you never need to worry about whether the picture is further to the left or if the text stays aligned with the edge of your slide.
Google Slides gives you the ability to create exact alignments for all objects within your presentation. It’s very easy to do and it makes for a great presentation that looks neat, put together and completely professional. Anyone would be impressed with your work once they see how perfect it looked thanks to aligning guides!
If you are interested to learn about how we can change bullet point color in google slides, please follow the link How to Change Bullet Color in Google Slides (Best Practice).
What is a Guide in Google Slides?
A guide is a visible line, space, or path along which you can align objects with one another. Adding guides ensures that your visual content is well-aligned and ultimately appears attractive to the viewer. When adding guides, it is best to use even intervals, as this allows for pleasing balance between all elements within your design composition. Add guides by selecting the ruler tool, then click and drag to place the guide on your document. Most of our team members use guides when developing eBooks and slide decks for our clients.
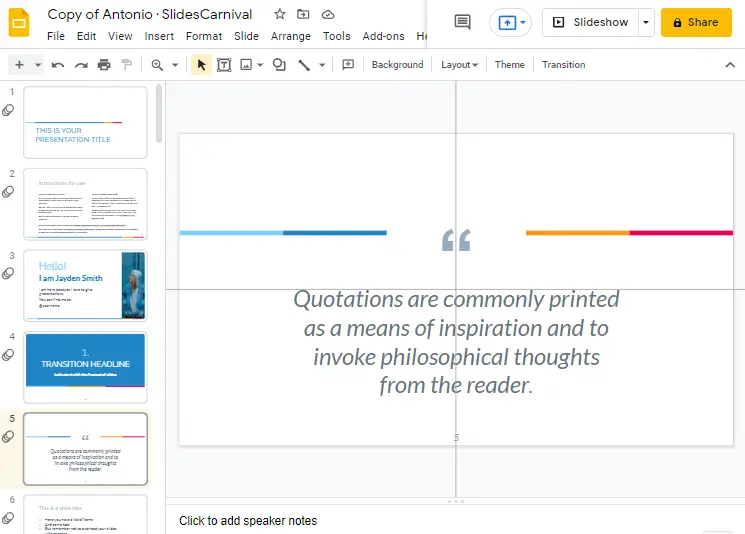
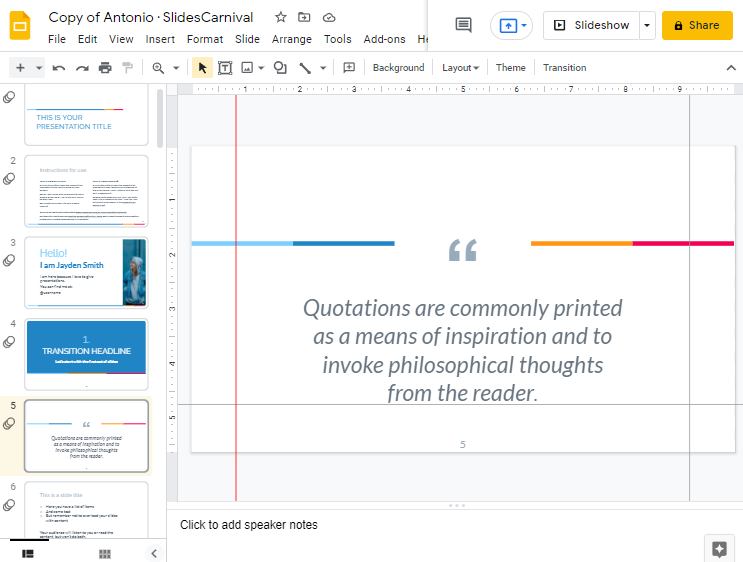
When you insert a guide into your presentation, it will appear as a line on your screen.
In the example above, a guide is placed from one edge of the slide to another – which allows my image and text to be perfectly aligned!
What are the benefits of guides lines in Google Slides?
Guides are used in Google Slides to assist you in creating a well-organized slide deck. Guides allow you to align text, shapes, images and more so that your slide deck appears consistent and professional. This tool will enable you to create visually appealing slide decks for any presentation need. Not only does using guides to align things make for a neat-looking slide deck, but it also serves another important purpose—a well-designed slide deck is more cohesive and easier to read than one that’s not aligned correctly.
Guides are a great way to keep your design visually consistent, and you can even lock guides to make sure your team members stick to the same formats in their presentations.
How to Add Guides in Google Slides
So, lets learn how to add Guides to google slides,
Step 1:
Open your google slide presentation. Select the slide on which you would like to add ruler.
Step 2:
Now click on View located at the top of the window in the menu bar. A drop-down menu will appear here. Click on Guides > Click on Show guides.
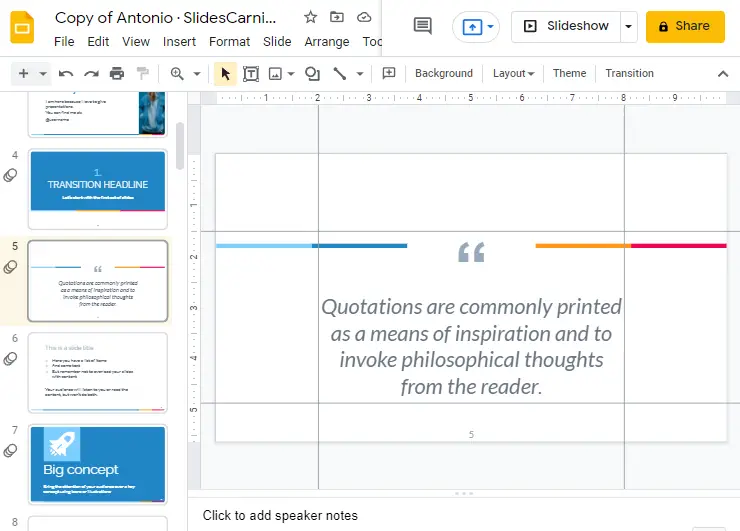
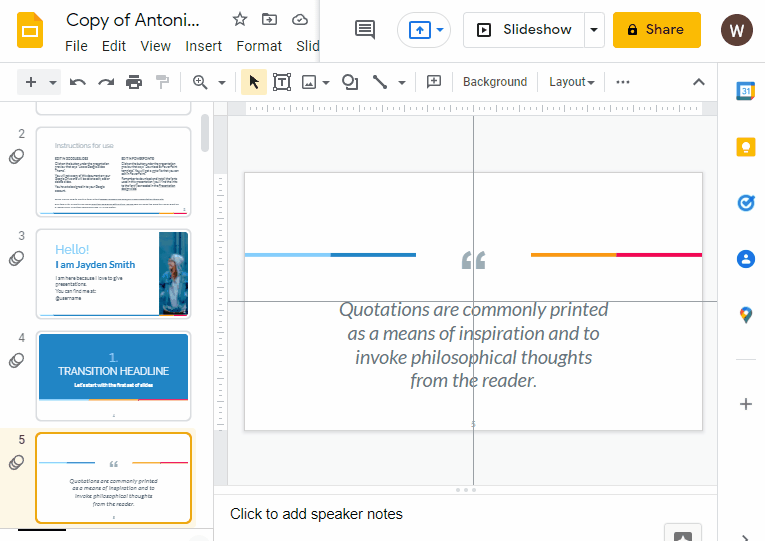
By enabling Custom Guides, you will have one black vertical line, and one black horizontal line.
You can hover over the lines with your cursor and click and drag the double-sided arrow to move the lines along either a horizontal or vertical axis. You can also adjust their position by positioning your cursor on the end of either line.
How to Add More Guides in Google Slides
If you need more guides, you can add them to your google slides anytime. Open your google slide presentation. Click on view so that a drop-down menu will appear. click on add Vertical guide or add Horizontal guide.
As soon as you click on add guides. Horizontal or vertical guide will be added to your slide.
Well, you can add as many guides as you want in your google slides.
How to Show/Hide Guides in Google Slides
Add guides to your Google Slides by clicking on the horizontal or vertical ruler and dragging that guide to where you need it. Your guides will not be visible in presentation mode. If you no longer need your guides, you can show or hide them by clicking on the ruler and selecting, Show/Hide Guides.
How to Remove Guides from Google Slides
Or if you have several guides and you want to remove one or two, simply place your mouse cursor over the line and press right click so that a pop-up menu will appear. click Delete Guide.
How to Edit Guides in Google Slides
How to Change the Color of a Guide in Google Slides
Google Slides, like every other application in Google Drive, allows you to customize and change just about everything you see. Since you can move, delete, and create guides, it makes sense that you can also change their color. This allows you to create a set of guidelines that help showcase different areas of the page.
By default, the guides you create in Google Slides will be black. However, changing your guide color from black to another color can help them stand out against whatever is on your slide. This option is available in the context menu and lets you have much more control over your guides.
You can change the color of guides by right-clicking them and selecting Change Color. Different colors can help you remember what you are using each guide for, or help you mark off a safe zone for important graphic elements on your slide.
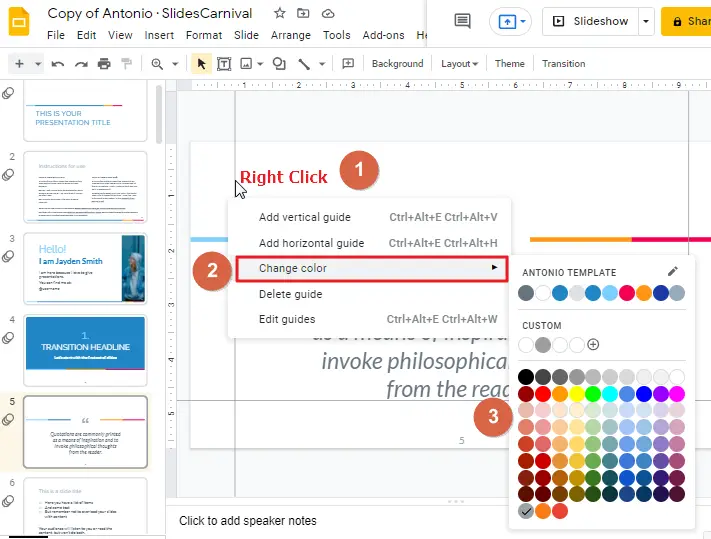
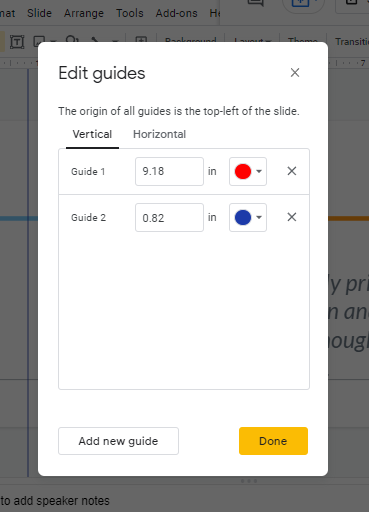
As soon as you select a specific color, the color will be applied to your guide. For example, I have chosen red.

When editing your guides, it’s important to understand precisely where they are positioned. You can do this by using the exact distance in inches from the top left-hand corner of the slide that your guide is positioned at. Entering a new measurement in the box will allow you to adjust the position of any guide, or lock in its position by clicking on a guide at a point of your choosing and typing its precise location into the box. If you have multiple guides that need to line up with each other, this can be a helpful quick tool to do so. Finally, if you need to choose another color or add another guide, this can be done here as well.
How to Change the Measurement of a Guide in Google Slides
When editing your guides, it’s important to understand precisely where they are positioned. You can do this by using the exact distance in inches from the top left-hand corner of the slide that your guide is positioned at. Entering a new measurement in the box will allow you to adjust the position of any guide, or lock in its position by clicking on a guide at a point of your choosing and typing its precise location into the box. If you have multiple guides that need to line up with each other, this can be a helpful quick tool to do so. Finally, if you need to choose another color or add another guide, this can be done here as well.
Frequently Asked Questions
Can I easily Remove Guides in Google Slides?
Yes, removing guides in google slides is a straightforward process. To do this, you can go to the View menu and click on Guides. Once the guides appear on your slide, simply click and drag them back to the ruler area on the left or top of the slide to remove them.
Conclusion
A clearly defined work area and an organized approach to design will help you create presentations that meet your high standards. By adding guides to your process, you’ll have a faster way to get those beautiful slide grids on-screen.
Remember, a presentation isn’t just about the words you speak and the images you show. It’s also about how these things are organized on each slide so that the audience can understand and follow along. The words help tell the story, but guides help organize it.


