
To make Word Art in Google Docs
- Go to “Insert” > “Drawing” > “New“.
- In the Drawing tool, select “Actions” > “Word art“.
- Enter your text > Format it.
- Resize and Position the text.
- Rotate or Curve the text (optional).
- Click “Save and Close” to add WordArt to your Document.
In this article we will learn about what is word art in Google Docs, how to do word art and some daily basis operations like rotating word art, changing border style, changing color, curved style word art etc.
Google Docs must be a game-changer amidst the conventional word processors. Unlike the grueling and obscuring features of other processors, the tools of Google Docs are feasible and easily accessible. It does not broadcast all its features at once by confusing the users. The aesthetics of Google docs is the simple interface with ease of access.
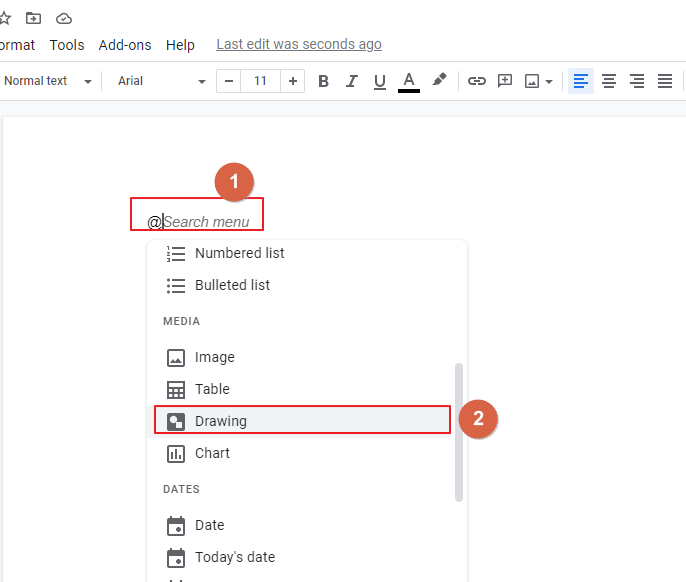
Even more, Google docs display the shortcut keys for the task with the menu options. The @menu option helps navigate the required feature directly rather than the menu options. Rather than bombarding the document using all the available features, google doc provides simple formatting options below the menu options. Not just text formatting, it also offers image, chart, and table formatting to help to create more creative documents.
If you are interested to learn about how to use word art in Google Slides, please follow the below link.
How to Use Word Art in Google Slides (Best Practice)
Advantages of using Word Art in Google Docs
A picture is worth a thousand words. But word art is neither text nor image but a combination of both. Word art feature is used in logos, newspapers headlines, headings, and even t-shirts. A picture with a bigger size of words incites a feeling and power to the message.
- Visual appeal
- Promotes legibility
- Helps to communicate the messaging tone
Google docs have a built-in word art option in the drawing tool. Also, you can format the text in any online word art tool and insert the image in Google Docs.
How to Do Word Art in Google Docs
Google docs allows you to change the formatting setting of the word art to incite the visual appeal of the text.
Here is step by step guide to insert word art in google docs.
Step 1:
Open Google Docs. Go to Insert -> Drawing -> New. Also, enter @ and select Drawing -> New.
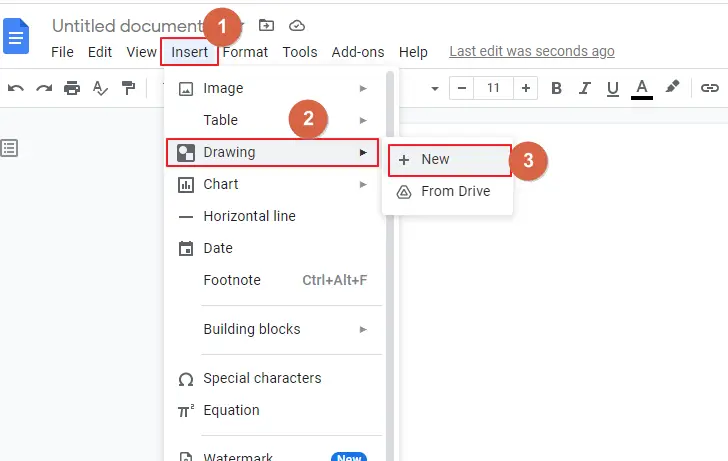
Step 2:
The Drawing tool window opens. Go to Actions- > Word art.
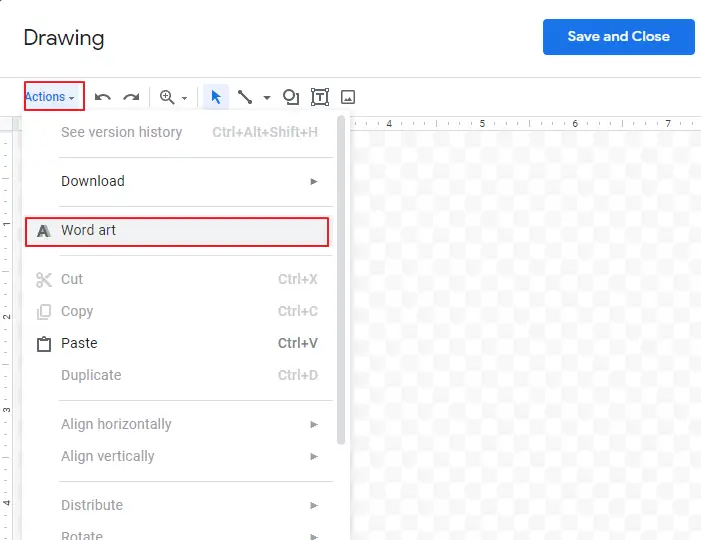
Step 3:
The word art text box appears. Enter the text in the text box and press Enter.

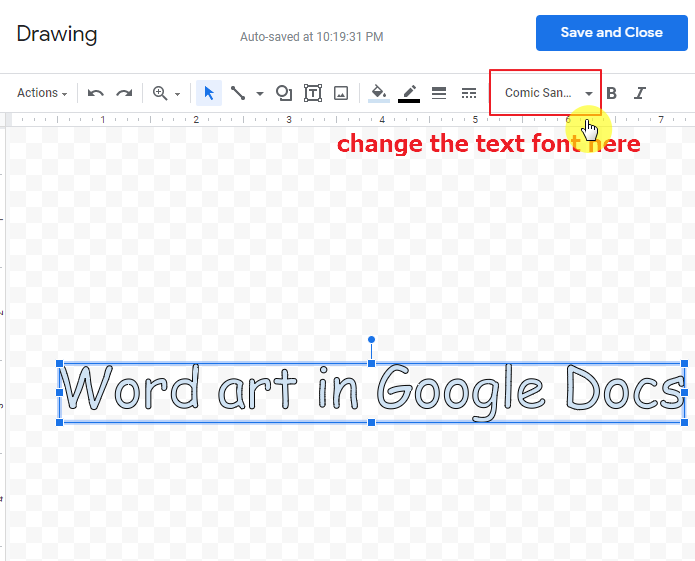
Step 5:
The word art is displayed in the Drawing window. Click the text box and go to the font drop-down to change the text font.
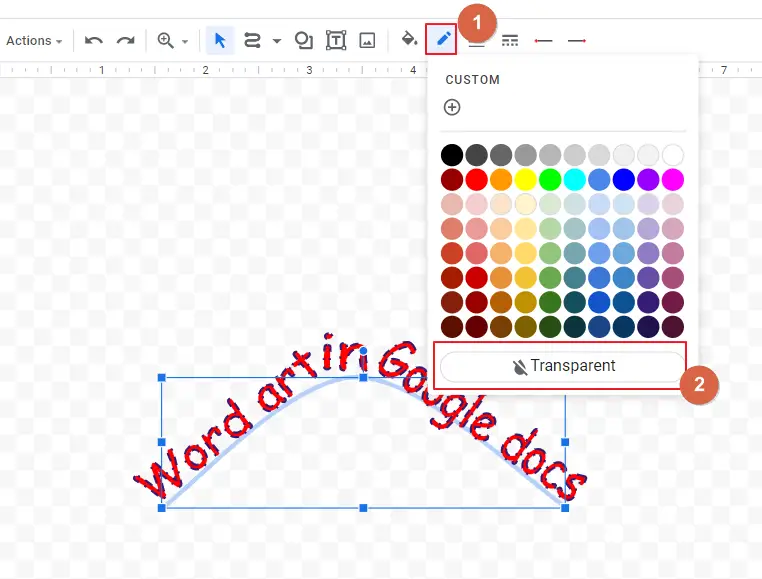
How to Add Border & Color to Word Art in Google Docs
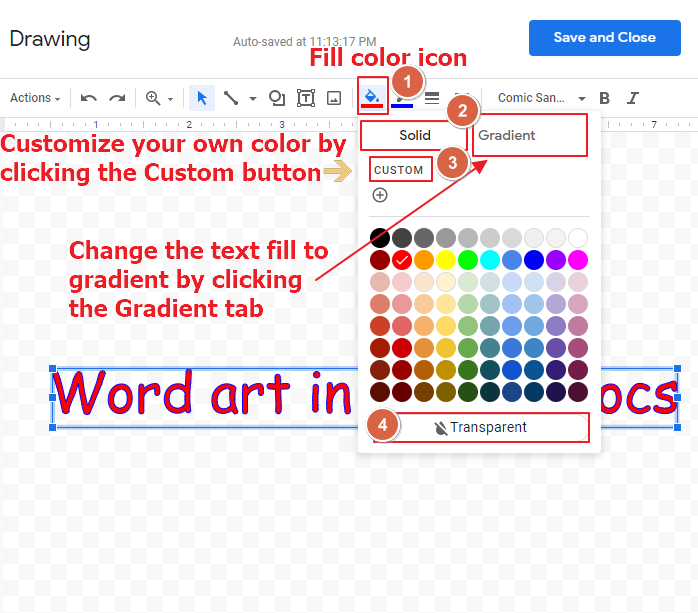
Step 1:
To change the fill color, click Fill color icon in the format options menu. Select the colors from Solid tab or the Gradient tab. You can customize the text fill with your desired color. You can also change the fill to transparent.
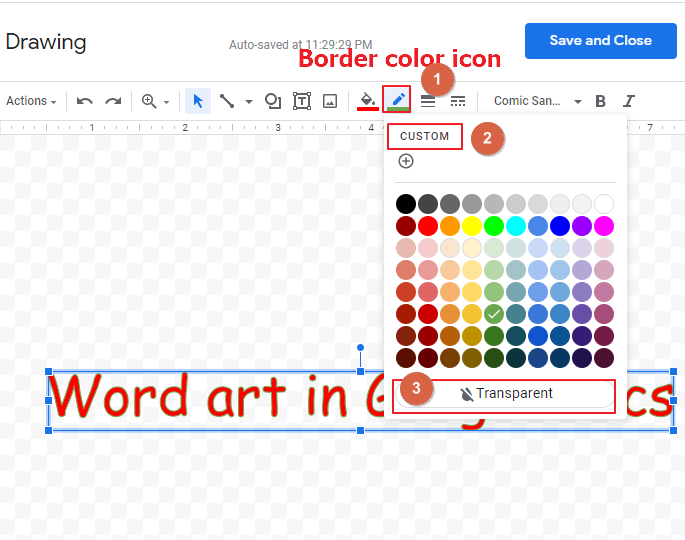
Step 2:
To change the border color of the text, click the Border color icon in the format options menu. You can customize the border color and even change to transparent.
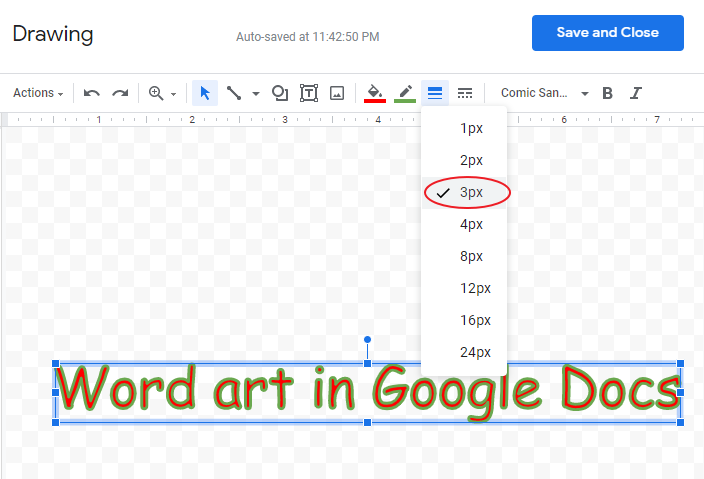
Step 3:
To alter the thickness of the border, click Border weight icon in the format options menu.
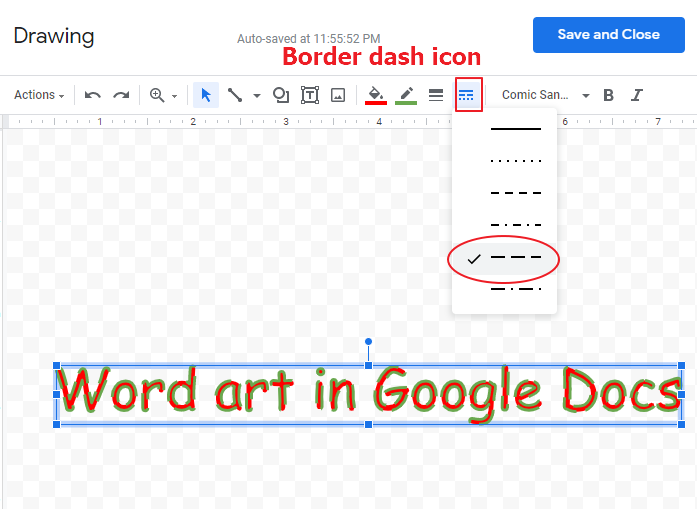
Step 4:
To change the border dash, click the Border dash icon. Select the line from the list of options from the drop-down.
How to Do Text Formatting of Word Art in Google Docs
Step 1:
To change the text formatting to bold and italic, select B and I icons in the format options menu.
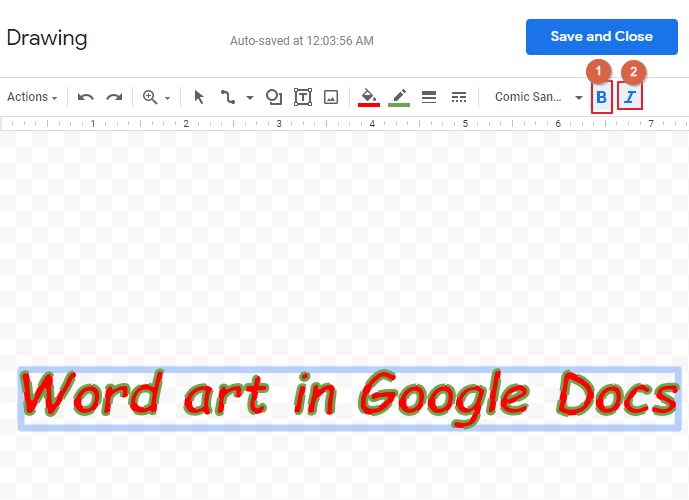
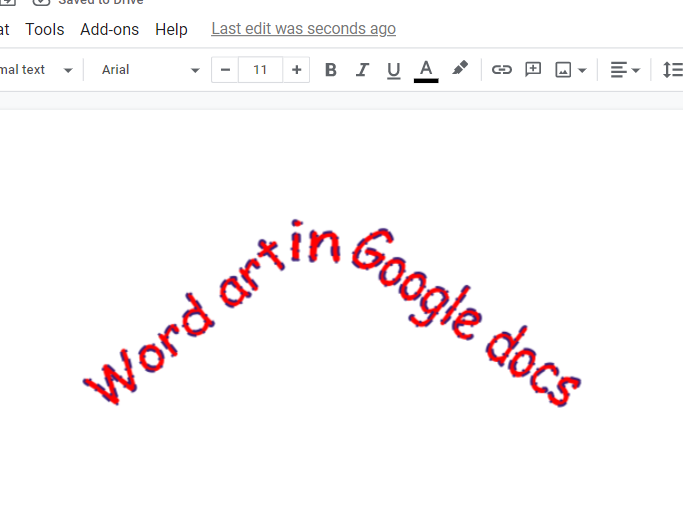
Step 2:
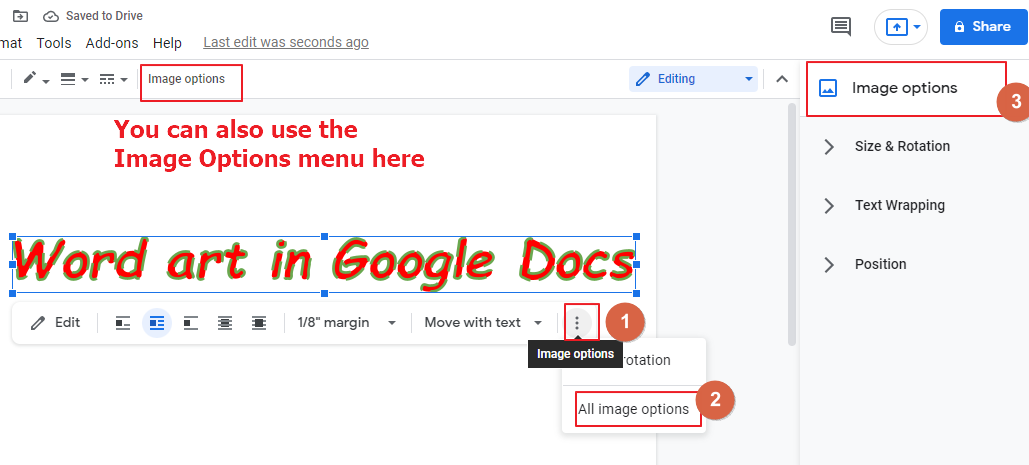
Click Save and Close. The word art appears in the Google Doc screen. Click the image and select Image options (indicated as a vertical dotted line) in the Edit menu displayed below the image. The Image Options toolbar appears in the right side corner of the screen.
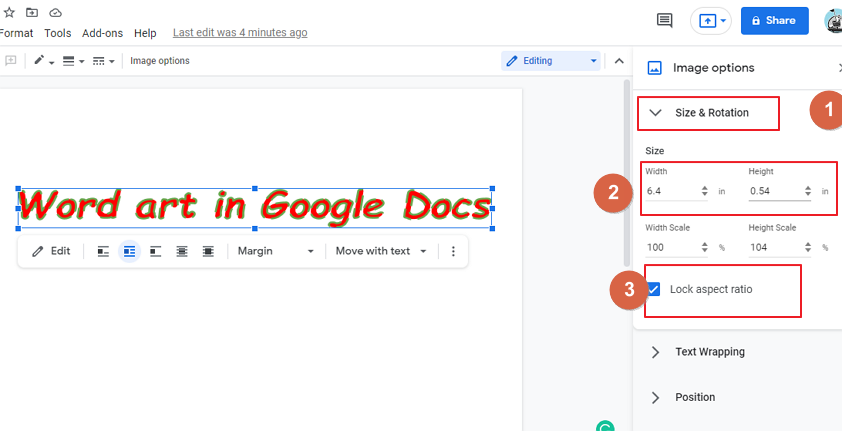
Step 3:
To alter the width and height of the textbox, select the Size & Rotation tab in the Image Options toolbar. Adjust to your required size in the Width and Height labels. The Lock Aspect ratio checkbox enables the ratio between width and height to remain constant.
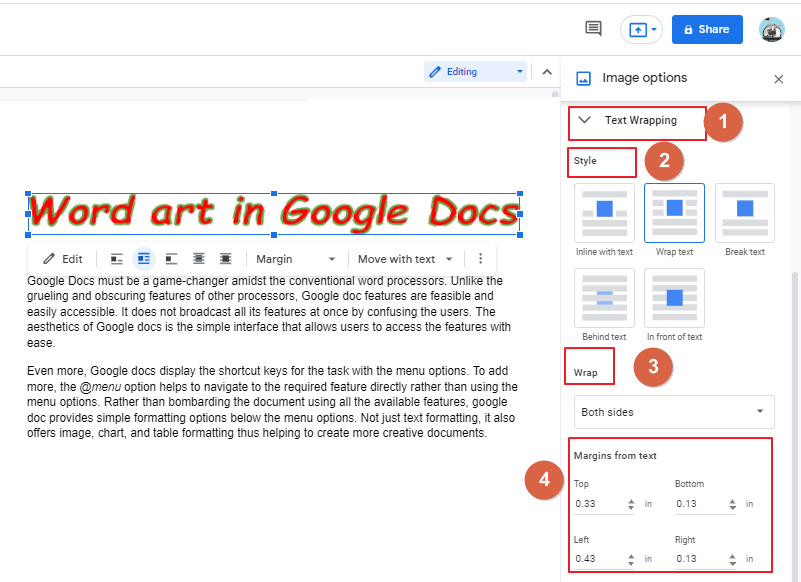
How to Wrap Word Art Around the Text in Google Docs
To wrap the word art image around the text, click the text wrapping tab and select the required style.
To wrap the image around the text on both sides or left or right, select the Wrap drop-down and to adjust the margin size of the image from the text, change the top, bottom , left and right margin labels.
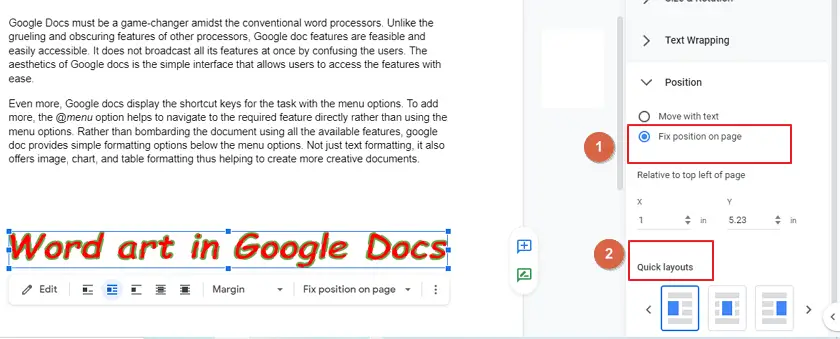
How to Move Word Art Image in Google Docs
The image can be moved with the text or can be fixed on the same position. In the Position tab, select Move with text to change the position of the image by altering the x-axis and y-axis labels.
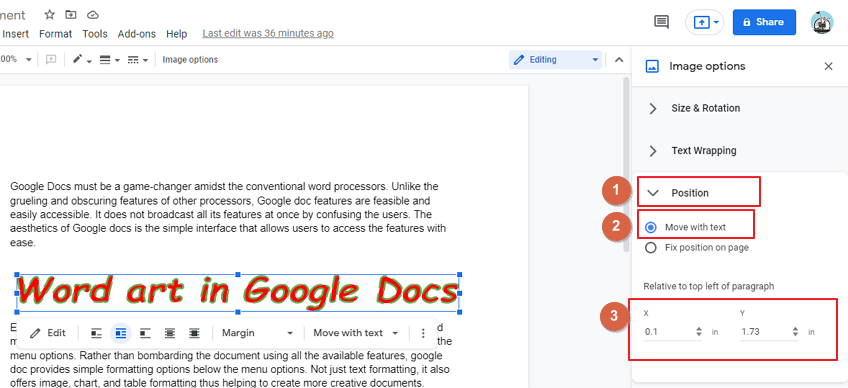
Select Fix position on page and the required layout to fix the image on an exact position.
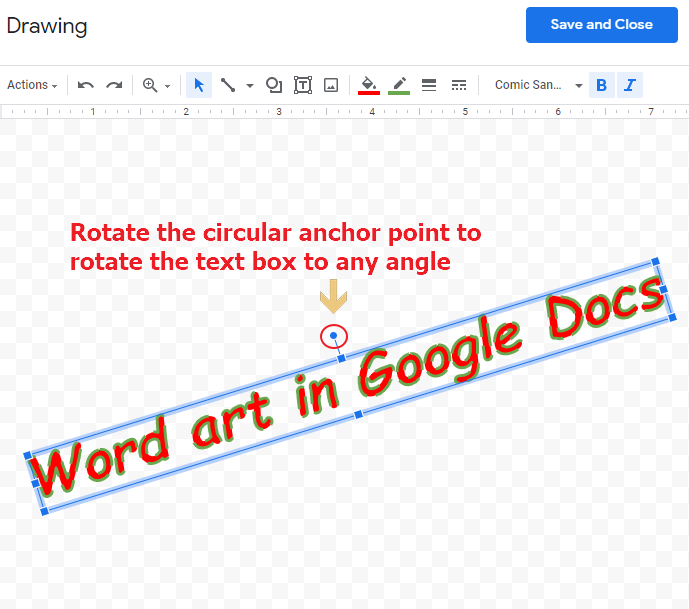
How to Rotate Word Art in Google Docs
To rotate the word art, click the image and select Edit in the menu below the image.
The Drawing window appears. Select the circular anchor point of the textbox and rotate it to any required angle using your mouse movement.
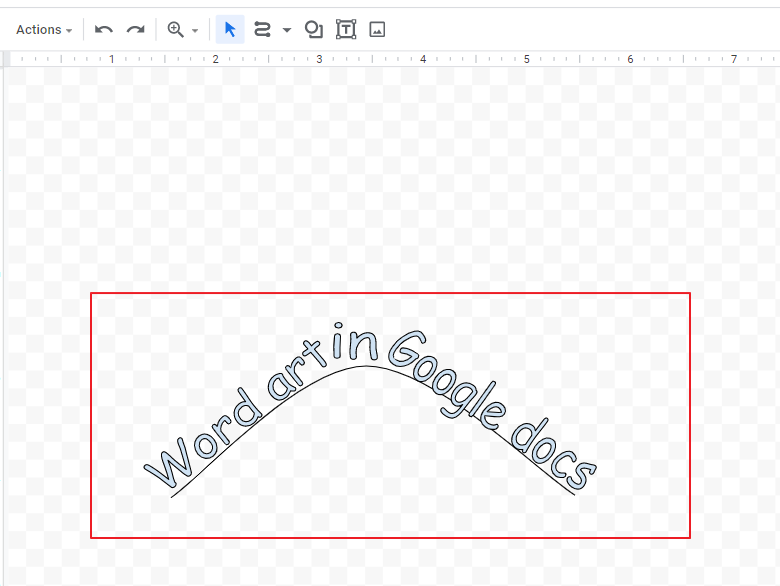
How to Do Curved Word Art in Google Docs
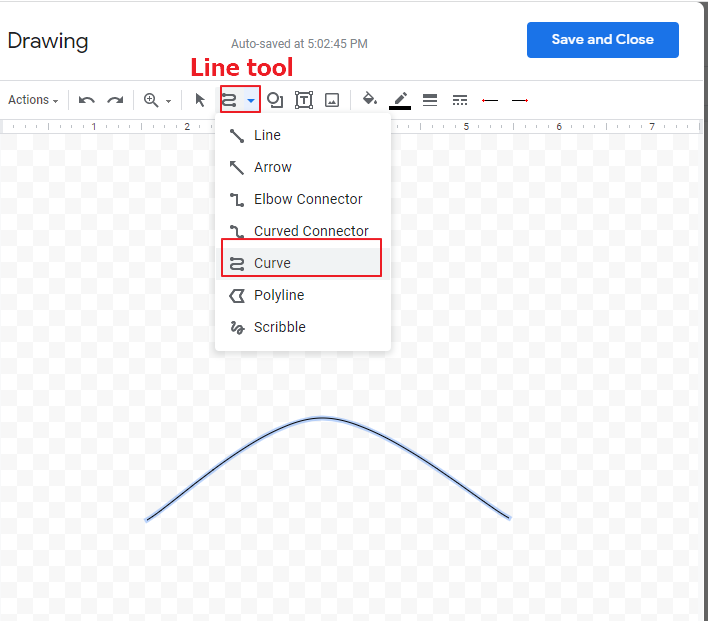
Step 1:
You can also curve the word art using the curve line tool. This is a roundabout way of curving the word art. Open the Drawing tool in Google docs and select the curve line from the Line drop-down. Draw a curve in the drawing panel.
Step 2:
Go to Actions -> Word art. Enter the text in the word art textbox. Adjust the circular anchor point of the word art textbox to each side of the curve. Add as many text boxes as you need to create the word art.
Step 3:
Format the word art to any font and color. Select the curve line and click Line color icon. Select Transparent to change the border color of the curve to transparent.
Step 4:
Click Save and Close. The word art is added to the doc screen.
Alike curved word art, choose any shape from the shapes icon. Insert word art into the selected structure and adjust the angle to get the formation. Even though this is an indirect way of adding effects to the text, this is more feasible than adding an image from an online tool.
Notes
- Use Shift+Enter for multiple lines in the word art text box
- Resize the text box before adding the word art to the Doc screen
- You cannot adjust the font size of the text in the word art
Frequently Asked Questons
Can I Use Word Art in My Newspaper Design on Google Docs?
Yes, you can use Word Art in your newspaper design on Google Docs. With the powerful tools available on google docs for creating newspapers, you can easily add attractive and eye-catching Word Art elements to enhance the visual appeal of your newspaper layout. Get creative with fonts, colors, and styles to make your newspaper stand out.
Conclusion
The sentiment of a design emulates a friendly atmosphere. The language and the visual appeal attract more attention. It is easy to insert and use Word art in Google Docs. This article helps in crafting creative text with visual appeal.


