
To Use Scheduling Assistant in Outlook
- Access Calendar.
- Start New Meeting.
- Title Your Meeting.
- Add Required Attendees.
- Add Optional Attendees (if applicable).
- Access the Scheduling Assistant.
- Check Attendee Availability.
- Use the AutoPick Feature (for larger meetings).
- Include Meeting.
- Rooms (if applicable).
- Set Meeting Date and Time.
- Enter Meeting Details.
- Send Meeting Invitation
Hi, and welcome back to our series of Outlook tutorials. Today we are going to learn how to use scheduling assistant in outlook. Microsoft Outlook is an easy-to-use email client used to send and receive emails by accessing Microsoft Exchange Server email.
Scheduling assistant is a very useful and helpful tool of outlook that can help and assist you in scheduling meetings, events, or appointments. It assists you to find a compatible time for all meeting attendees and prevents scheduling clashes. If you use a Microsoft office 365 or Microsoft Exchange account with Outlook, you can get its benefits by learning and utilizing it as per your requirements.
Here is how to use scheduling assistant in outlook in the correct way. So, let’s get started!
Importance of Using Scheduling Assistant in Outlook?
Learning how to use Outlook’s Scheduling Assistant can be profitable for many reasons, Scheduling Assistant makes it easier for you to manage your time by assisting you in choosing conflict-free times for meetings, events, or appointments. To facilitate and improve collaboration, use the Scheduling Assistant to schedule meetings with others and confirm their availability.
By avoiding the back-and-forth communication required to schedule a meeting, you can save time and boost your productivity by using the Scheduling Assistant. By using Outlook’s Scheduling Assistant to make sure meetings are scheduled at the proper times, you can make a more professional impression on others at work. The Scheduling Assistant is simple and convenient to use because it can be accessed from your Outlook calendar.
How to Use Scheduling Assistant in Outlook?
Scheduling Assistant in outlook is a tool that can help and assist you in scheduling meetings and appointments. It indicates where are clashes and propose times when all the team are free also you can customize the scheduling assistant as per your needs to meet your requirements and to make sure the meeting is as perfect and efficient as possible, you can confirm the places, time duration, and other meetings and appointment details. You can prioritize important meetings, events, appointments, or tasks using a schedule, since you can’t make more time in the day, a schedule enables you to make the most of the time you do have to be more productive.
We have very easy and understandable guidance to learn how to use scheduling assistant in outlook. So, let’s get started and learn each step in detail.
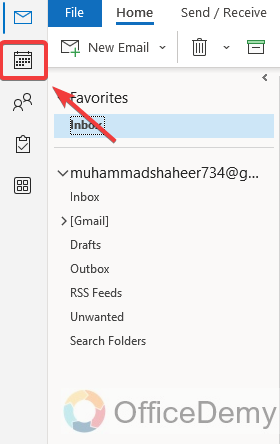
Step 1
Open Outlook App, and click on the calendar shown in the bar of your screen
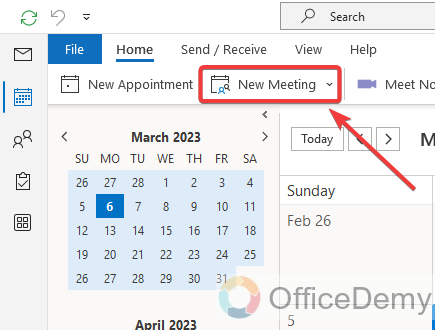
Step 2
Select New Meeting under the Home tab
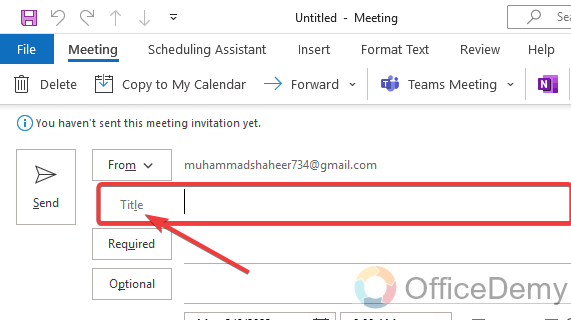
Step 3
Add the Title or Subject of your meeting (Shown to everyone going to be in this meeting)
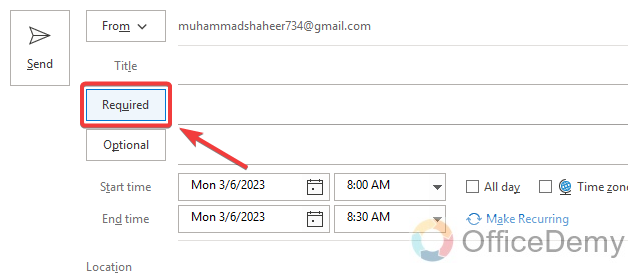
Step 4
Click on the Required (chosen participant must require for the meeting) button
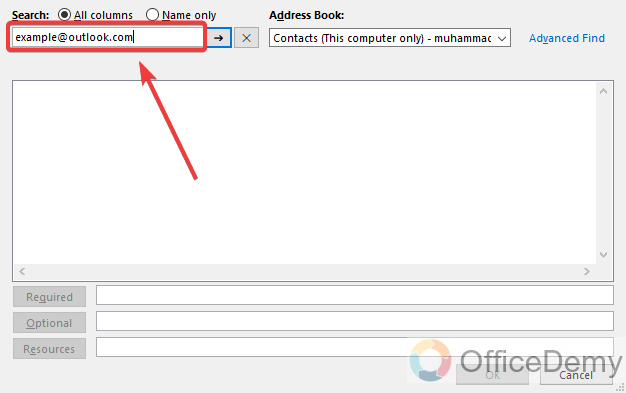
Step 5
Add Required meeting attendees
Step 6
Click on the Optional (means that the chosen participant has the choice but is not required to attend) button
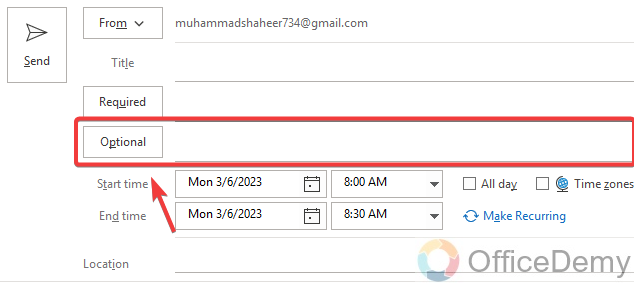
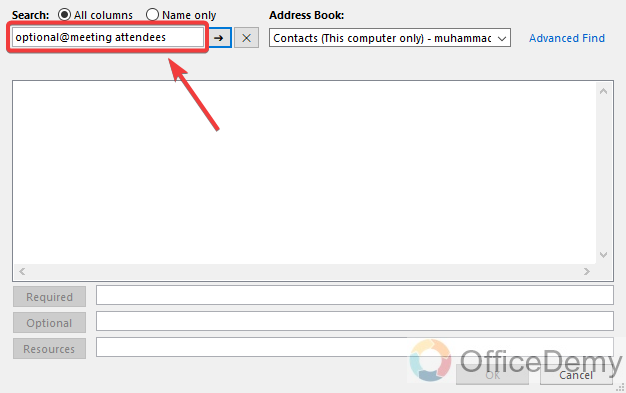
Step 7
Add Optional meeting attendees
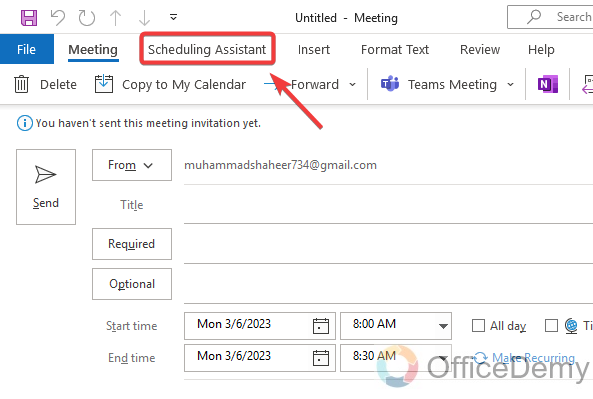
Step 8
Click on the Scheduling assistant
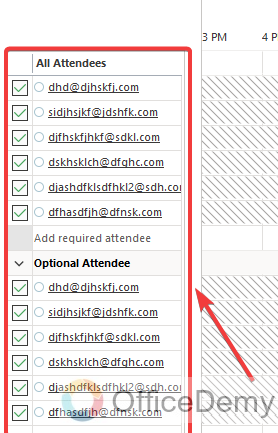
Step 9
Check all required and optional meeting attendees here
Step 10
Click on the AutoPick
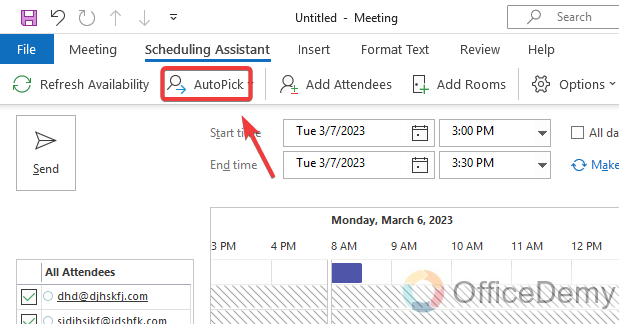
(The AutoPick is a scheduling assistant tool that finds and chooses the very next available time for the people who attend your meeting. If you’re planning a meeting with a large number of attendees, this feature will be very beneficial. With the assistance of this feature, you can locate the free period for your list of attendees)
Step 11
Click Add Rooms
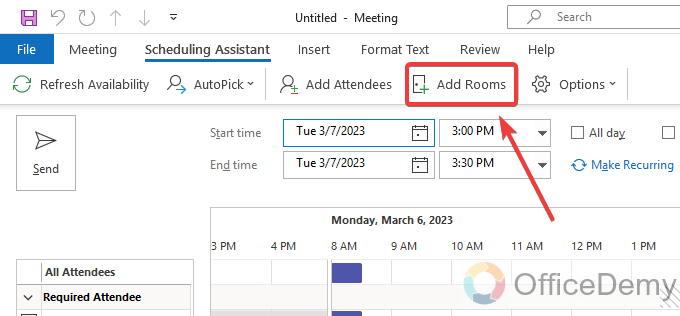
(It is an additional choice [for when we are all back in the office]. You can add a meeting room to the schedule and its availability will be factored into the suggested meeting times
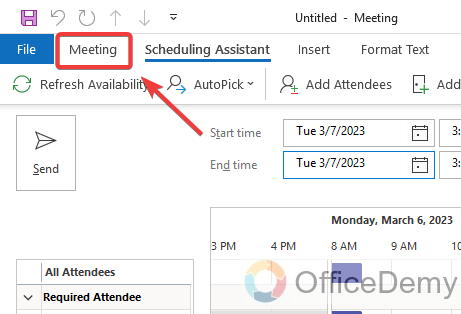
Step 12
Once you have determined the time of the meeting, go back to the Meeting tab
Step 13
Add meeting Start Date
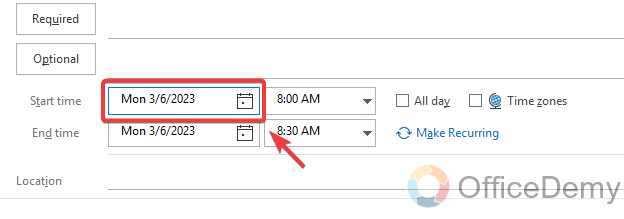
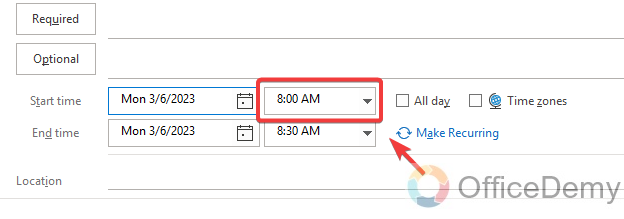
Step 14
Add meeting Start Time
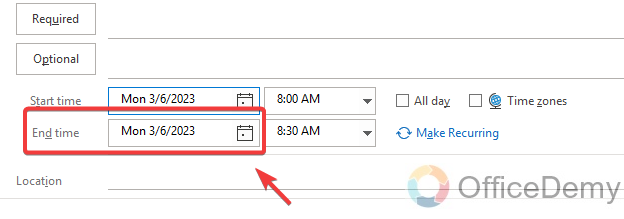
Step 15
Add meeting End Date
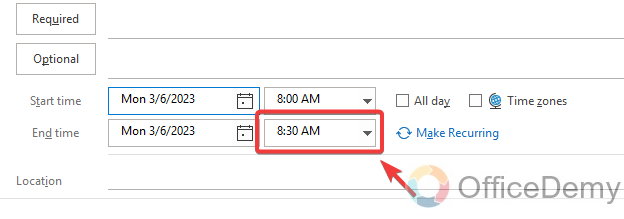
Step 16
Add meeting End Time
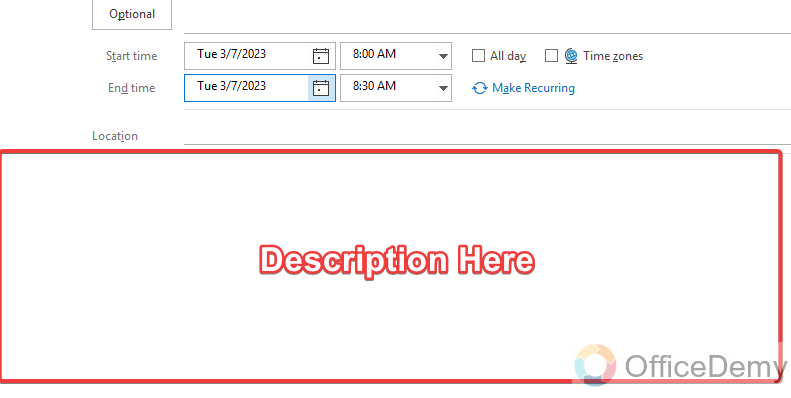
Step 17
Write your meeting descriptions here
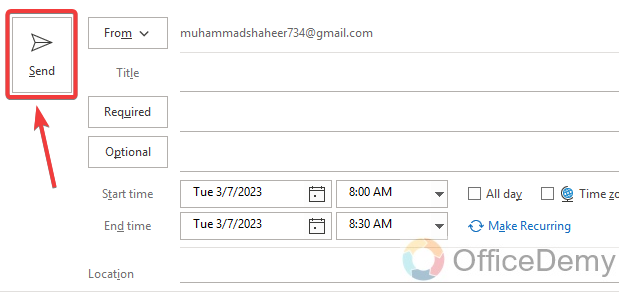
Step 18
Click on the Send button
Tip: You can now quickly see your attendee’s availability and pick a time that works for everyone. When you create an event, meeting, or appointment from your calendar and include your coworkers or team in the People field, the date picker in outlook (Auto Picker) will display an availability indicator for each attendee.
Frequently Asked Questions
How do I know which attendees are available for the meeting?
The scheduling assistant visualizes the attendee’s availability by showing the calendar with their schedules and highlighting the time when everyone is available.
The meeting date and time can be changed after I have sent the meeting request through the scheduling assistant?
Yes, after you have sent the meeting request in outlook you can change the date and time of the meeting, event, or appointment just open your meeting, event, or appointment request change the date, time, or whatever you want to change in the meeting request, and simply click Send Update.
How can I see responses to a meeting request?
If you want to review the responses to a meeting request open your outlook calendar view and find the meeting, event, or appointment The meeting, event, or appointment can be marked as, “Accepted”, “Tentative”, and “declined” as per the attendees’ responses.
Can I Track Who Accepted a Meeting Using the Scheduling Assistant in Outlook?
Yes, the Scheduling Assistant in Outlook allows you to track who accepted meetings in outlook. It offers an efficient way to schedule and manage appointments with multiple participants. By using this feature, you can easily monitor the attendance of those invited to a meeting and keep track of the responses you receive.
Does the Scheduling Assistant in outlook suitable for people who are in multiple time zones?
Yes, The Scheduling Assistant in Outlook does for multiple time zones, in fact, takes the attendees’ local time zones into account when displaying their availability.
Can others check my outlook calendar details in Scheduling Assistant?
When using Scheduling Assistant in a remote forest, users will see varying degrees of free/busy information depending on the default permissions on the Calendar folder in Microsoft Outlook. Additional free/busy and folder permissions are not displayed in detail for users in Scheduling Assistant.
What is the main role of Scheduling assistants?
Enables time management and effective distribution of information to the appropriate attendees.
Can I hide the meeting details of the Scheduling Assistant?
Yes, you can hide the meeting details of the scheduling assistant.
Can I view different time zones in outlook Scheduling Assistant?
Yes, you can view different time zones in outlook Scheduling Assistant.
Can I restrict a meeting forward in outlook Scheduling Assistant?
Yes, you can restrict a meeting, event, or appointment forward in outlook Scheduling Assistant.
What are the various Outlook calendar permission levels?
Below are the various outlook calendar permission levels
- Owner: Make all items and files, read, modify, and delete them.
- None: You lack authorization.
- Contributor: Only create files and items.
- Reviewer: Only read the documents and items.
- Non-Editing Author: Can read the full biography.
What does the meaning of the word tentative in Outlook scheduling?
Although you have something scheduled on your calendar, you can still set up another meeting, event, or appointment.
Conclusion
So, today we learn how to use scheduling assistant in outlook. We hope you liked the above guide and learned how to use scheduling assistant in outlook. You saw how easily we can use the above methods to schedule meetings through scheduling assistant in outlook. These steps are very easy and very useful to save your precious time. I hope this article was worthwhile for you to read and learned something new from this article. I will be back with another useful tip for outlook very soon. Keep learning with Office Demy. Thank you!


